I know there are dozens of guides floating around about how to remove grout from tile, but most of them skip the real details: the why, the how, and the what-not-to-do parts.
So if you’ve just finished a tiling job and you’re staring at that cloudy haze, or maybe you’re restoring older tile that just doesn’t look clean no matter what you do, this is the exact guide you need. Let’s walk through everything together, from understanding your grout and tile type, to picking the right remover, to applying each method properly so you don’t damage your tile’s finish.
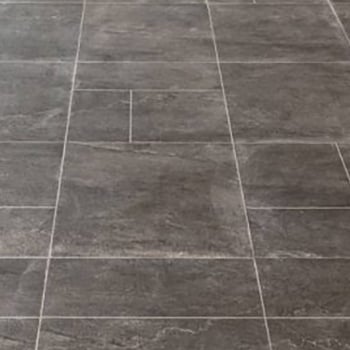
Figure 1: Grout Haze
Removing Grout From Tile Surface Properly
When we talk about removing grout from tile, what we’re really addressing is that stubborn film, often called grout haze, left behind after installation. It looks like a dull, cloudy residue, and it can completely ruin the look of a clean tile job. The goal here isn’t just to scrub it off, but to lift it correctly so you don’t damage your tile in the process.
Here’s something most people don’t realize: removing grout haze isn’t about brute force; it’s about chemistry and timing. You need the right type of cleaner, the right dwell time, and proper rinsing. When you follow that sequence, you’ll get that crisp, polished tile surface that looks brand new again.
Understanding Cleaner Types and Their pH Levels
Now, before grabbing any cleaner, you need to understand what’s actually in those bottles. Every grout remover falls into one of a few families:
- Alkaline,
- Acid,
- Abrasive, or
- Disinfectant.
Each works differently and targets specific types of residues.
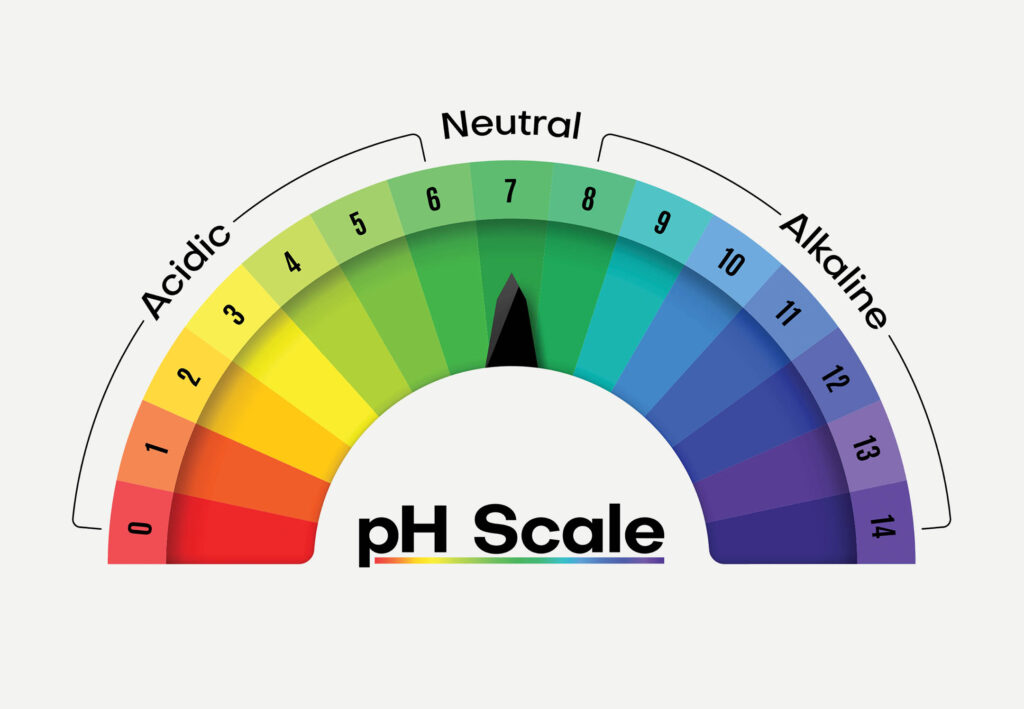
Figure 2: pH Level
1. Alkaline Cleaners
These are great for breaking down oils, polymers, and latex residues. They’re usually on the higher end of the pH scale. These are your go-to for fresh haze, the kind that hasn’t fully cured yet.
2. Acidic Cleaners
On the other hand, acidic cleaners sit on the low end of the pH scale. They’re perfect for dissolving mineral-based cement residues. Phosphoric acid cleaners are the most popular in this category because they’re effective yet relatively safe when used correctly. However, acids can damage natural stones and metal trims, so they’re best for porcelain or ceramic tiles that can handle the acidity.
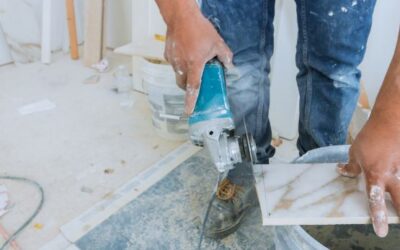
3. Abrasive Methods
There are mechanical rather than chemical things, like doodle pads or drill brushes. They’re helpful for textured tiles or when haze has bonded firmly to the surface. But you have to be cautious: aggressive scrubbing can dull glossy finishes.
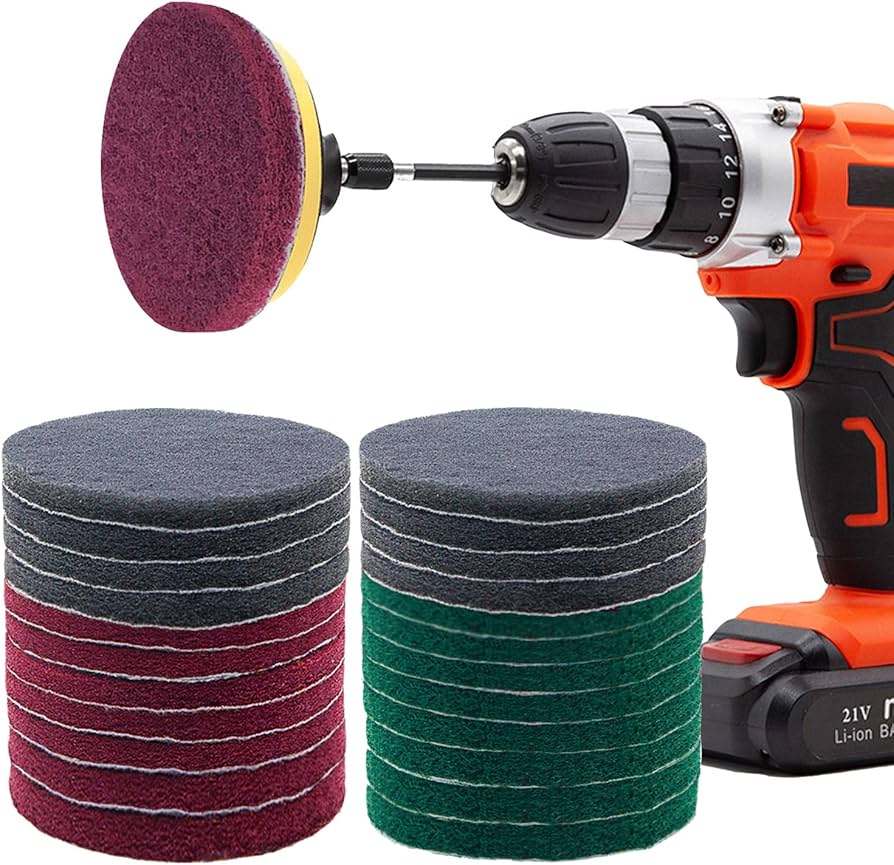
Figure 3: Drill Brush
4. Disinfectant Cleaners
Disinfectant cleaners like bleach or quaternary ammonium compounds don’t actually remove grout haze. They’re for sanitizing, not cleaning residues. So skip those for now.
When you choose a cleaner, think of it this way:
- Cement-based haze: acidic cleaner (phosphoric acid)
- Polymer or latex haze: alkaline cleaner
- Textured surface: add gentle abrasion
Note: Never mix different types of cleaners, and rinse thoroughly before switching.
| Cleaner Type | Typical pH | What It Targets | Use-Cases When You Remove Grout From Tile | Cautions |
| Alkaline | ~9–12 | Oils, polymers, some latex additives, light haze | Fresh haze, latex-modified residues, general soil | Rinse well to prevent filming; test on sensitive finishes |
| Acid (e.g., phosphoric) | ~1–3 | Mineral-based cement residues | Cement grout haze, thinset smears | Never on natural stone (marble, travertine, limestone) or acid-sensitive glazes |
| Abrasive (mechanical, pads/brushes) | Neutral | Physical removal | Thick haze, textured tiles, slip-resistant profiles | Can scratch if pad/brush is too aggressive |
| Disinfectant (quats/bleach) | Varies | Microbes, stains | Not for haze removal | Don’t confuse sanitation with soil removal |
Choosing the Right Cleaner for Porcelain vs. Ceramic
Next, let’s talk about the tile itself. Not all tiles react the same way to cleaners, and that’s where people make the biggest mistakes.
Porcelain tile is dense, durable, and fired at a higher temperature, which means it’s more resistant to chemicals and moisture. It’s usually safe to use acid-based cleaners on porcelain when removing cement haze, as long as you don’t overdo it.
Ceramic tile, especially glazed ceramic, has a protective top layer: the glaze. While it’s generally acid-tolerant, some decorative glazes or glossy finishes can be sensitive to strong acids or aggressive scrubbing. Always do a small patch test in an inconspicuous area first.
And if you’re working with natural stone tiles like marble, limestone, or travertine, never use acid-based cleaners. They’ll etch the surface instantly. For stone, you’ll need a pH-neutral or alkaline solution only.
Confirm the Finish Isn’t the Tile’s Natural Look
Here’s a subtle but critical point that even seasoned installers sometimes overlook: what if the “haze” you’re trying to remove isn’t haze at all? Some tiles are intentionally manufactured with a soft, matte, or sugar-textured finish that can look like residue under certain lighting.
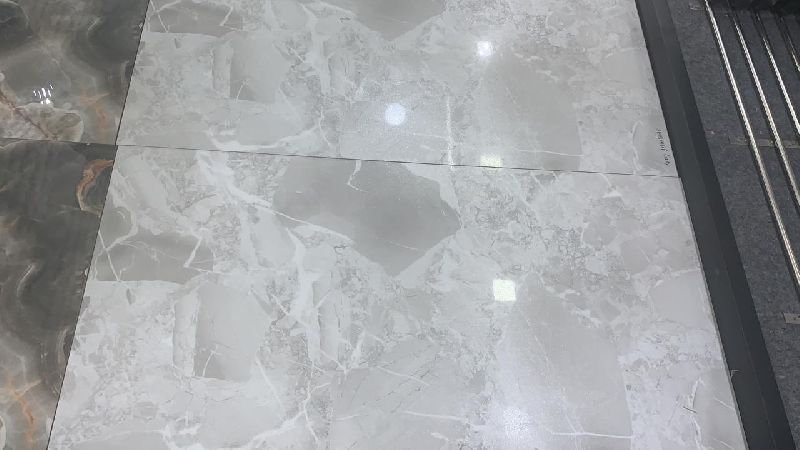
Figure 4: Textured Tile Finish
The easiest way to check is to compare your tiled area to a spare tile from the same box. If the spare has that same matte look, that’s just the tile’s natural finish, not haze. Another simple test: wipe a section of the tile with isopropyl alcohol and a white cloth. If nothing transfers and the appearance doesn’t change, it’s likely the natural finish. Don’t try to polish it off, or you’ll ruin that factory texture.
Grout Type: Cement vs. Non-Cement
The type of grout used determines what kind of remover will actually work.
Cement grout, which includes sanded and unsanded varieties, is mineral-based. It can be dissolved using acidic cleaners like phosphoric acid. However, many modern cement grouts also contain latex or polymer additives to increase flexibility and durability, meaning you may need to use an alkaline cleaner first to break down those additives before switching to an acid rinse.
Non-cement grouts include epoxy, urethane, and single-component formulations. These don’t respond to acid at all. In fact, acids will just sit on the surface and do nothing. For these, you need a specialized haze remover formulated for non-cement grout, such as Aqua Mix Non-Cement Grout Haze Remover. These cleaners contain mild solvents or detergents that break down resin-based residues safely.
If you’re unsure what type of grout you have, check the product packaging or your installer’s invoice. Matching the remover to the grout chemistry is the difference between success and wasted effort.
Considering Dried Grout Time
Timing matters more than most people realize. Grout haze less than 24 hours old is still soft enough to be lifted with mild alkaline cleaners and gentle agitation. Once it’s past the two-day mark, the residue has hardened and chemically bonded to the tile surface, which means you’ll need something stronger, usually a phosphoric acid cleaner or a specialty haze remover.
If your grout was installed within the last day, skip the acid for now. Too early, and it can weaken your grout joints. Patience pays off here.
Choosing the Proper Grout Remover
Now that you understand the chemistry, let’s match some real-world products to each situation.
1. Tsunami Tile and Grout Remover
This is an alkaline cleaner designed for removing light haze, oils, and latex films. It’s ideal for fresh installations, especially when the haze is less than a day old. It works great as a pre-clean step before moving to stronger cleaners.
2. Aqua Mix Cement Grout Haze Remover
This is a concentrated acidic cleaner specifically designed for removing cured haze and residue from cementitious (cement-based) grouts and thinset, and it also doubles as a remover for mortar smears, efflorescence, light rust, lime, and hard water deposits. It’s meant for acid-resistant surfaces only; things like granite, slate, travertine (when labeled acid-resistant), ceramic and porcelain tile, quarry tile, Saltillo, terra-cotta, cement pavers, masonry, and other acid-resistant stone/tile surfaces. Because it is acidic, you do not use it on soft, acid-sensitive stones (marble, some limestones, onyx, some polished travertine) or on metal trims. This is the one you grab when the grout is standard Portland-cement-based and the tile or stone can safely handle acid cleaning.
3. Aqua Mix Non-Cement Grout Haze Remover
This is formulated for non-cementitious grouts; it’s a non-acidic, alkaline cleaner that removes haze from single-component, premixed, urethane, and light epoxy grouts after they’ve cured. Because it’s non-acidic, it’s much safer on a wider range of materials and is approved for natural stone (granite, limestone, slate, travertine), ceramic tile, porcelain tile, quarry tile, and Saltillo/terra-cotta surfaces. This is the right choice when you’ve used a urethane or single-component grout, or a light epoxy, especially over more delicate stones that you don’t want to expose to acid.
4. Aqua Mix Phosphoric Acid Substitute
This is your go-to when you know you’re dealing with cement-based grout that’s already hardened. It dissolves mineral haze beautifully on porcelain or acid-tolerant ceramic tile. Just remember: no acids on natural stone, ever.

Figure 5: How to Remove Grout from Tile
How to Remove Grout from Tile the Right Way
Method 1: Dawn + Water + Scrubby Brushes
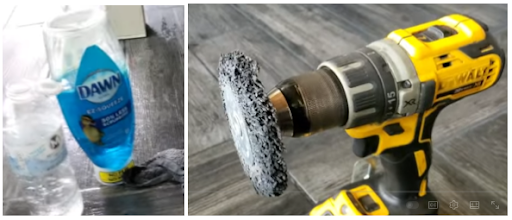
Figure 6: Remove Grout from Tile Using Dawn and Scrubby Brushes
Good for:
- Fresh grout haze (<24 hours)
- Latex/polymer film on porcelain and glazed ceramic
- First pass before escalating to specialty or acid on cement haze
You’ll need:
- Warm water + a small amount of Dawn (or similar mild alkaline dish detergent)
- Drill-mounted scrub brushes (nylon) in soft/medium
- Buckets (clean/dirty), microfiber mops, wet vac (optional)
Steps:
- Prep & Protect: Sweep/vacuum dry debris. Mask baseboards and metal trims.
- Mix: A few drops of Dawn per gallon of warm water (you don’t need a bubble bath).
- Apply: Pre-wet the tile with your solution; keep it damp, not flooded.
- Agitate: Use drill brushes to scrub in overlapping passes. Work small sections (25–50 sq ft).
- Lift & Remove: Mop up slurry promptly or wet-vac. Don’t let the slurry dry.
- Rinse: Two clean-water rinses, flipping your mop head between rinses.
- Inspect & Dry: If haze persists, you’re facing cementitious or resinous residue, escalate to Method 2 or 3.
Pro Tip: If grout joints are brand-new, avoid aggressive scrubbing directly over them. Work diagonally to reduce pull-out risk.
Method 2: Aqua Mix Cement or Non-Cement Grout Haze Remover
Good for:
- Cement haze
- Non-cement haze (epoxy/urethane/single-component)
You’ll need:
- Aqua Mix Cement or Non-Cement Grout Haze Remover
- Pump sprayer, microfiber mop, doodle pad, Buckets (clean/dirty)
Steps:
- Prep & Protect: Sweep/vacuum dry debris. Mask baseboards and metal trims.
- Apply: Spray evenly across a manageable section.
- Dwell: Let it sit for a few minutes per label. Keep it wet.
- Agitate: Use a doodle pad to break the film.
- Mop Up: Remove the slurry thoroughly.
- Rinse With Water: Rinse at least twice; change water often.
- Repeat if Needed: Stubborn epoxy haze may need a second pass or slightly longer dwell (within label guidance).
Pro Tip: On textured porcelain, combine Method 3 with a soft drill brush pass to reach micro-texture valleys.
Method 3: Aqua Mix Phosphoric Acid (Acid Medium Duty)
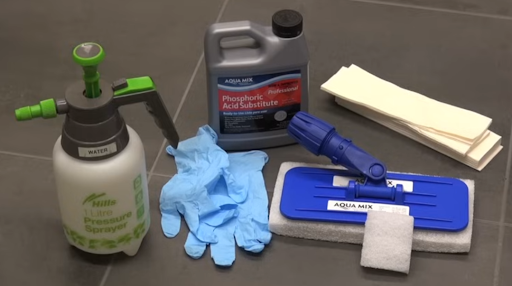
Figure 7: Remove Grout from Tile Using Phosphoric Acid
Good for:
- Cement grout haze on porcelain or acid-tolerant ceramic
- Cured haze (>48 hours) that laughed at Method 1
Avoid on:
- Natural stone, concrete tiles, terrazzo, or acid-sensitive glazes
You’ll need:
- Aqua Mix Phosphoric Acid Cleaner (follow label for dilution)
- Pump sprayer, buckets, microfiber mop, doodle pad
Steps:
- Prep & Protect: Sweep/vacuum dry debris. Mask baseboards and metal trims.
- Pre-Wet: Lightly mist the surface with clean water. Pre-wetting reduces the acid’s bite and helps even dwell.
- Apply Acid: Spray the diluted phosphoric solution evenly.
- Dwell: 2 minutes is a solid starting point. Do not let it dry.
- Agitate: Work the area with a doodle pad in tight, overlapping circles.
- Lift & Mop: Pull the slurry off the floor immediately, wet-vac if possible.
- Rinse Thoroughly: Rinse at least twice with clean water.
- Neutralize (Optional but Smart): Follow with a light alkaline rinse to neutralize any residual acidity.
- Final Rinse & Dry: Inspect under good light.
Pro Tip: Work in small zones. If you need more bite, extend dwell slightly or repeat, don’t jump straight to a hotter mix without testing.
Troubleshooting: When “Remove Grout From Tile” Gets Tricky
- Haze returns after drying: This problem happens when you don’t fully remove the slurry. Repeat the method and improve your extraction + rinse.
- Streaky finish on glossy ceramic: You see a streaky finish when you use an abrasive pad that is too aggressive. Switch to white/tan pads and finish with a microfiber buff.
- White film after acid: These are residual salts from an incomplete rinse. Rinse thoroughly and neutralize with a mild alkaline solution, then rinse again.
- Still cloudy on matte porcelain: That may be the factory finish. Compare with a spare tile to confirm before escalating.
Safety and Surface Protection Checklist (Don’t Skip)
- PPE: Use gloves, eye protection; for acids, add a respirator if ventilation is limited.
- Ventilation: Open windows/doors; use fans to move air across and out.
- Test Area: Always do a 2 ft × 2 ft test in an inconspicuous spot.
- Protect Adjacent Materials: Mask stainless, aluminum trims, and painted baseboards. Acids can bite metals and wipe splashes immediately.
- Grout Joints: If the grout is less than 7 days old, minimize acid exposure. Rinse joints fast and avoid pooling.
- Never Mix Chemicals: Rinse between products; mixing can create dangerous reactions or gummy residues.
Final Thoughts
Removing grout from tile doesn’t have to be intimidating; it just requires understanding the material, the chemistry, and the proper process. Always start mild and escalate as needed. Protect your surfaces, rinse well, and take your time. When done right, your tiles will look crisp, bright, and factory-fresh again, the way they were meant to be seen.
So, next time you’re wondering how to remove grout from tile without ruining your finish, just remember this: chemistry, timing, and patience. That’s the professional secret.
If you have hired a contractor to do the tiling for you, make sure to inspect the job after installation to avoid the cost and hassle of cleaning it yourself or hiring another contractor. At Matrix Construction, we always make sure the tiles look clean, with no haze or marks, after each tiling job. So, if you need help with your kitchen and bathroom renovation, don’t hesitate to contact us for a FREE Consultation.


0 Comments