If you are looking for an easy way to waterproof your bathroom walls and eliminate moisture problems, Schluter Kerdi Membrane may be the solution you have been looking for.
Water damage is a severe problem for most homeowners. It can cause mold, mildew, and structural rot, costing you thousands to repair and even more to replace structural elements like floor joists or ceiling supports. In most homes, the bathroom tends to be the room most prone to water leaks. With proper waterproofing techniques and materials, however, you can effectively prevent leaks from causing damage, ensuring your bathroom is waterproof for years to come.
In our previous articles, we explained how to waterproof your bathroom walls and floor using Schluter Ditra Underlayment, Kerdi Board, and Kerdi Tray. In this article, we will explain how to use Schluter Kerdi Membrane to waterproof bathroom walls.
Let’s get this show on the road.
What is a Schluter Kerdi Membrane?
Schluter Kerdi Membrane is a waterproof and vapor-retardant pliable membrane made of polyethylene bonded between two sheets of polyester fleece. You can use this membrane to waterproof bathroom walls and even floors in areas that get wet. It prevents water from entering your shower’s internal structure and prepares a great substrate for tile installation.
Tools and Materials
- Kerdi Membrane
- Unmodified/Schluter mortar
- 1/8” Schluter notched trowel (Kerdi trowel)
- Six-inch Putty knife
- Utility knife
- Kerdi-Seal-MV (Mixing Valve Seals) and Kerdi-Seal-PS (Pipe Seals)
- Kerdi-Fix sealant
- Kerdi-Band waterproofing strips
- 3/16-inch V notched trowel or 8-inch square notched trowel
- Sponge
Step 1: Prepare the Substrate.
When you use the Kerdi Membrane over a mortar bed, drywall, gypsum board, or any other substrate, preparing the substrate is the first thing you should do to make sure that the Kerdi Membrane adheres well to the substrate.
First, wipe the substrate using a wet sponge. This will keep the mortar from drying too fast, which gives you more time to attach the membrane and by using a wet sponge you will remove any dust from the wall.
Step 2: Install the Kerdi Membrane.
Immediately after step one, start installing the Kerdi membrane.
- Mix the mortar thoroughly. It is very important to use the correct water ratio as per the instructions on the mortar bag. Be careful to use the ratios for Kerdi.
- Apply the mortar to the wall using your trowel. Apply it until all the substrate is covered by mortar making sure to spread it all over the wall using your trowel. (See Figure 1)
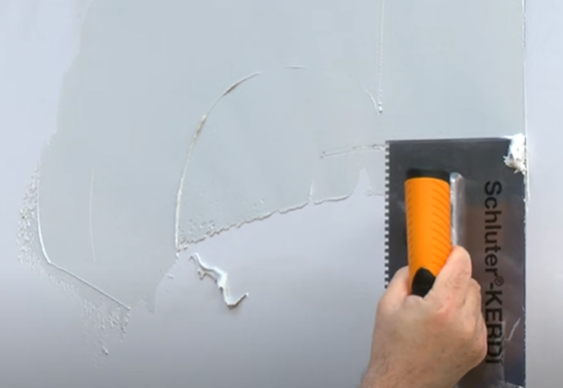
Figure 1
A word of caution, the mortar tends not to spread completely and evenly if you use the notched side of the trowel during this step.
After thoroughly covering the wall with mortar, move the trowel’s notched side straight on the mortar and comb with additional mortar. Do this for the entire area where the mortar was applied. Removing additional mortar helps to create straight and even mortar lines and avoid unevenness. (See Figure 2)

Figure 2
- Now, it is time to apply the Kerdi Membrane. Remember to cover the walls with the Kerdi Membrane at least up to the showerhead.
- If you are using a wide-roll Kerdi Membrane, apply it from left to right or vice versa. There will be fewer joints, in this case, making installation easy.
If the Membrane is not a wide roll, apply it from the bottom to the top, making sure to overlap the layers of Membrane two inches. (See Figure 3)

Figure 3
In either case, to ensure the Membrane sticks properly without bubbles or wrinkles, embed the Membrane using the flat side of the trowel or a putty knife. (See Figure 4)

Figure 4
- To prevent buildup of mortar and create an entirely flat surface, squeeze out as much mortar as you can from the edges. (See Figure 5)
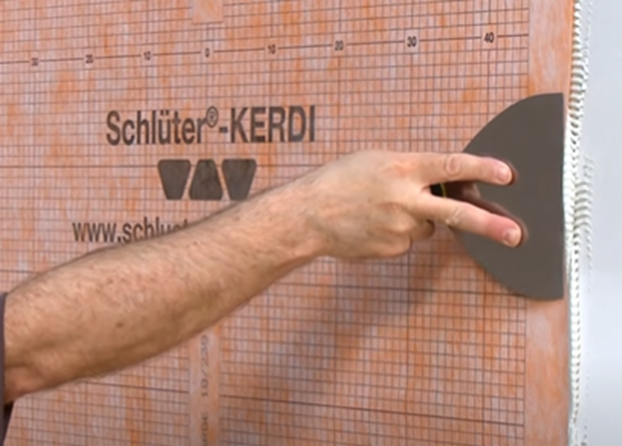
Figure 5
- Regularly pull the Membrane back and look at the mortar to see if you have proper mortar coverage. The mortar should entirely and evenly cover the substrate. If you notice any bald spots in the mortar, it indicates you do not have proper coverage and you should apply additional mortar. (See Figure 6)
- When you are sure the mortar coverage is good, adhere the Kerdi Membrane to the wall again.
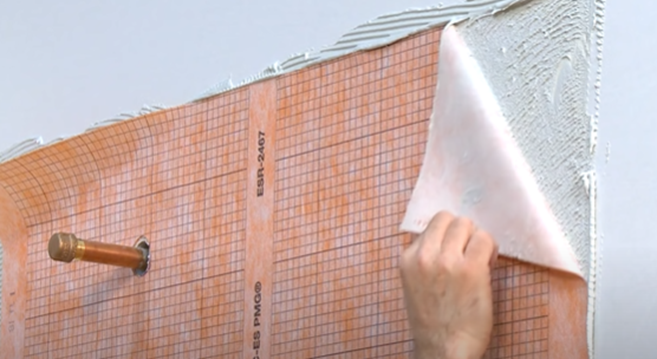
Figure 6
- Continue applying the Kerdi Membrane to cover all the walls of the shower.
Use a putty knife to get the Membrane tightly into the corners, making sure not to damage it. It is important to do this correctly since air and mortar can easily get trapped in the corners. (See Figure 7)
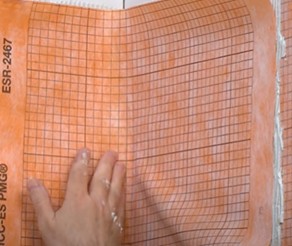

Figure 7
To avoid air getting trapped under the Kerdi, you can cut the Kerdi into the corners in these areas.
Remember, if you cut the Membrane into the corners, you should apply Kerdi Band over the joints.
Step 3: Waterproof Joints and Edges.
You must make sure that all the joints and edges are correctly sealed during this step. Using Kerdi Band and Kerdi Seal makes it simple to accomplish this.
- You should install the Kerdi Band over all the areas where you have joints in the Membrane, including corner joints, edges, and butt joints. If you have butt joints, instead of overlapping the Membrane, make sure to install the Kerdi over these joints. In butt joints, the Membrane is placed edge to edge. (See Figure 8)
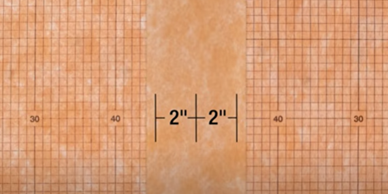
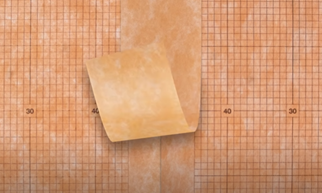
Figure 8
Using the flat side of the trowel, apply mortar to the places where the band is to be installed then comb additional mortar using the notched side of the trowel and embed the Kerdi Band into the mortar. (See Figure 9)

Figure 9
- Repeat the same process explained above to install Kerdi Seals at the pipe protrusion and mixing valve: apply mortar, comb additional mortar, and place the seals. (See Figure 10)
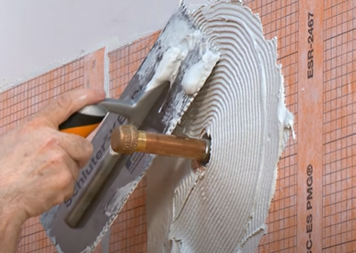

Figure 10
Keep in mind that you can also use Kerdi Fix instead of Kerdi Seal for waterproofing around pipe protrusions and mixing valves. (See Figure 11)

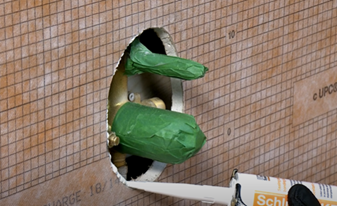
Figure 11
The Bottom Line
Now you have learned how to waterproof bathroom walls in a simple way. The Schluter Membrane is a revolutionary alternative to traditional methods of waterproofing bathroom walls, such as cement board. By following these few simple steps, you can be sure that your bathroom walls and showers are protected from unwanted moisture.
If you are looking to renovate and waterproof the bathroom of your Philadelphia area home, contact us and one of our Certified Schluter Systems Experts will be happy to discuss your project and answer any questions. Matrix Company Solutions Corp, the right professional for your job!


0 Comments
Trackbacks/Pingbacks