Ever tried installing drywall? You bought the supplies and decided to install the drywall yourself. You are no stranger to home projects, so this will not be that tough, right? Wrong!
Installing drywall can be a complicated process. There are a lot of steps that you must do right. The money you will spend at home improvement stores buying drywall alone is enough to make you nervous, but if you mess up the installation, the cost could skyrocket.
This guide looks at the steps involved in drywall installation. We have listed the tools you need to install drywall and will explain step-by-step how to install it. So let’s fire away.
Tools and Materials
First, here’s a list of tools and materials you should prepare.
- T-square
- Utility knife
- Drywall saw
- Tape measure
- Level
- Drill or screwdriver
- Drywall jack
- Step ladder
- Rasp
- Screws (25 screw/1 piece of 4×8 sheet)
- Drywall panels
- Liquid Adhesive (LIQUID NAILS® Drywall Adhesive, (DWP-30))
Step 1: Prepare the Substrate.
The first thing you should do before installing drywall is prepare the substrate (the ceiling joists and wall studs). To prepare, make sure there are no screws or nails sticking out of your studs. Also look for any mechanical elements that may be in the way, such as pipes, heating vents, or electrical boxes. Any protrusion can poke through the drywall and give you an uneven surface. Therefore, pull out all protruding nails and screws. If there are mechanical elements that can not be moved, in the way, you will have to install the drywall around those areas.
Next, you should check the ceiling and make sure it is completely level. To do this, go around the room with a level and check each area where the drywall will be installed. Otherwise, you will end up with an uneven surface after installing the drywall. If your ceiling is not level, there are ways to correct it. You can install strappings to the joists and attach the drywall to the strappings. The complete method is explained in this article:
https://homeguides.sfgate.com/fix-uneven-joists-before-drywall-28348.html
After you are sure the substrate is level and flat, you can start the drywall installation.
Step 2: Plan the Drywall Installation on Paper.
Want to know a secret? To have the perfect drywall installation, you should first plan the job on paper.
To begin, measure your walls and ceiling surfaces and write them down on a piece of paper. Based on your measurements, determine if you are going to install your panels horizontally or vertically (see Figure 1). Remember that your goal is to have the least number of joints possible.

Figure 1
To make a to-scale drawing, follow this example:
First measure the wall, let’s say it’s 8 ft x 16 ft.
Measure a drywall panel, let’s say it’s 4 ft by 8 ft.
Draw the perimeter of your room to scale, 0.08 ft (0.96 inch) x 0.16 ft (1.92 inch).
Draw a drywall panel to scale, 0.04 ft (0.48 inch) x 0.08 ft (0.96 inch).
Fit your drywall panels into your room’s perimeter.
Try both vertically and horizontally to see which option has the fewest number of seams (see Figure 2).

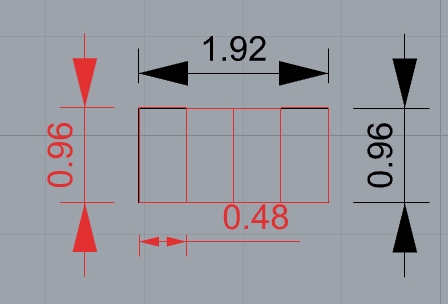
Figure 2
Usually, installing the panels horizontally provides you with fewer joints (see Figure 3).


Figure 3
When designing the layout, ensuring that the seams for the ceiling and walls do not line up is critical. The drywall will be more stable if the seams are staggered (see Figure 4).

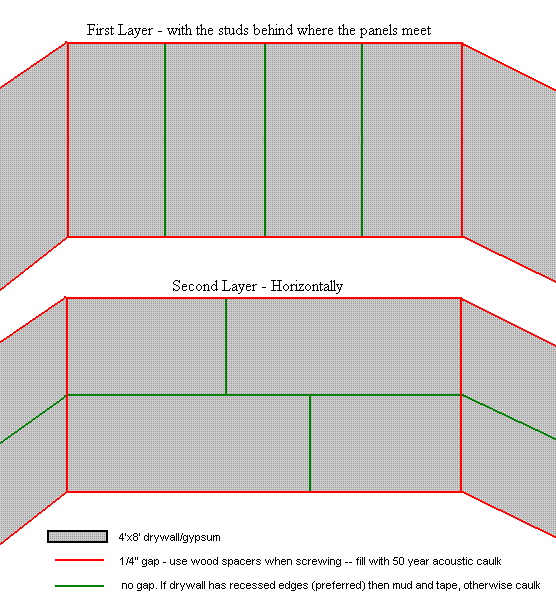
Figure 4
After writing your measurements down and deciding on the panel’s alignment, draw a layout on the paper as is shown in Figure 2.
Now you know what your panel’s layout will look like after installing them, making installing drywall easier.
Three important things to keep in mind:
- The goal is to have the least number of seams possible and by installing the panels horizontally you will typically have fewer seams.
- The seams for the ceiling and walls should not line up. The drywall will be more stable if the seams are staggered. (see Figure 4)
- There must be a ½ inch gap between the bottom panel and the floor.
Step 3: Cut the Drywall Panels to Size.
The next step is to cut the drywall panels to size in a way so that you have nice, clean edges. Cut one piece of drywall at a time, install that piece then move onto the next piece. By doing one piece at a time, you can make modifications along the way to ensure each piece fits properly in place. Now we will show you how to accomplish this.
- Lay the panel horizontally with the light color side up. Typical drywall, also known as white board, has a brown side and a white side (see Figure 5).
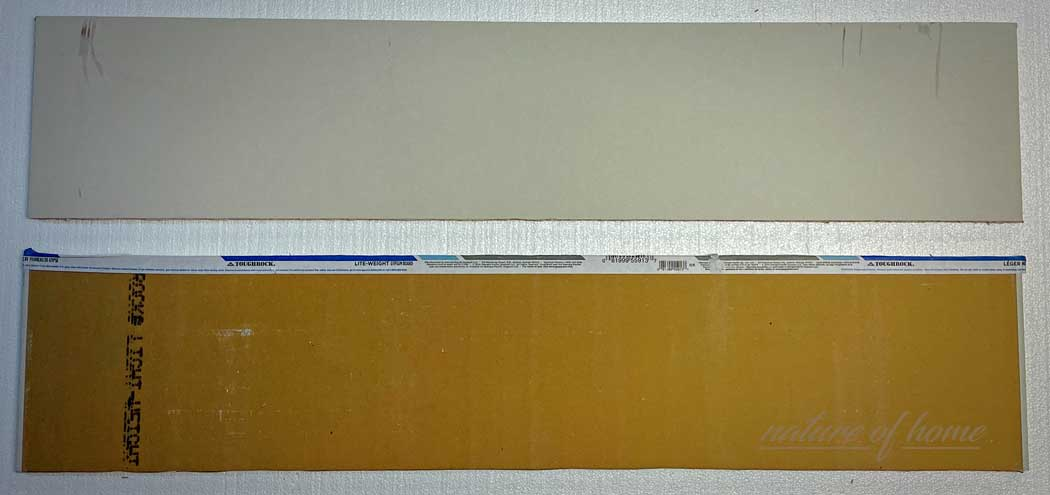
Figure 5
- Measure and mark where you need to cut. Next, using a t-square and a sharp utility knife, cut the panel along the mark deep enough to cut through the face paper and part of the core (see Figure 6).
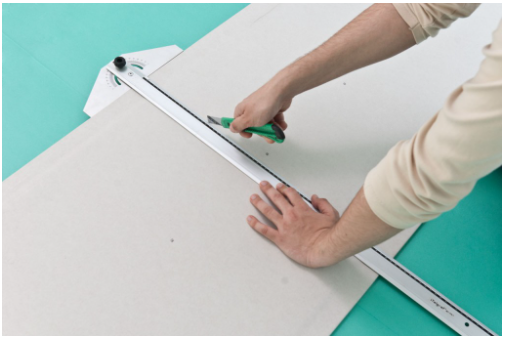
Figure 6
- After cutting the panel, you should break the core completely. To do this, while holding the panel edges snap the board with a quick, firm movement away from yourself.
- Run the utility knife through the back paper to finish cutting the panel.
- In order to get a nice smooth finish, take a rasp and run it over the cut edge.
Be warned: Cuts that are not square and unsmooth edges are not acceptable.
Step 4: Attach the Drywall.
Once the piece of drywall is cut, install it in its predetermined place before cutting the next piece. Remember to measure and mark the areas on the panel where the lights, vents, outlets, and any other openings are. These areas will be cut out after the panels are installed. Installing the ceiling drywall should be done prior to the walls.
Start by following the instructions below:
- Apply adhesive to the ceiling joists (Only apply the adhesive to the joists where you will install your next drywall panel). Also keep in mind that if you must remove the drywall in order to get to mechanical elements in the ceiling the best methods include: using adhesive remover or a reciprocating saw.
- Place the first piece of the ceiling drywall in its pre-designed layout, it is best to start in a corner and complete one row at a time.
- Install the ceiling panels perpendicular to the joists.
A challenge when installing ceiling drywall is lifting the panels up and holding them in place (they are heavy). You can use a drywall jack or ask a friend to assist you (see Figure 7).
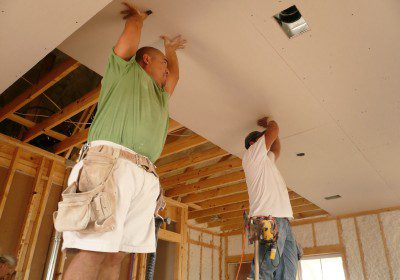

Figure 7
- Fasten the panels to all ceiling joists and perimeter framing using drywall screws (see Figure 8). Along the perimeter, place screws 7 inches apart and ⅜ (0.375) of an inch away from each panel’s edges and every 12 inches or so along the internal joist.
Remember that the screw heads should be driven slightly below the surface of the panel but not deep enough to break the panel.

Figure 8
- Continue along the wall and attach the next piece of drywall to the ceiling using the same method. Then start the next row and repeat this process until you cover the whole ceiling.
- When you finish the ceiling, start to install the wall’s drywall. Start in the corner and work your way across one row at a time. Apply adhesive to the studs in the area where your next panel will be installed (see Figure 9).
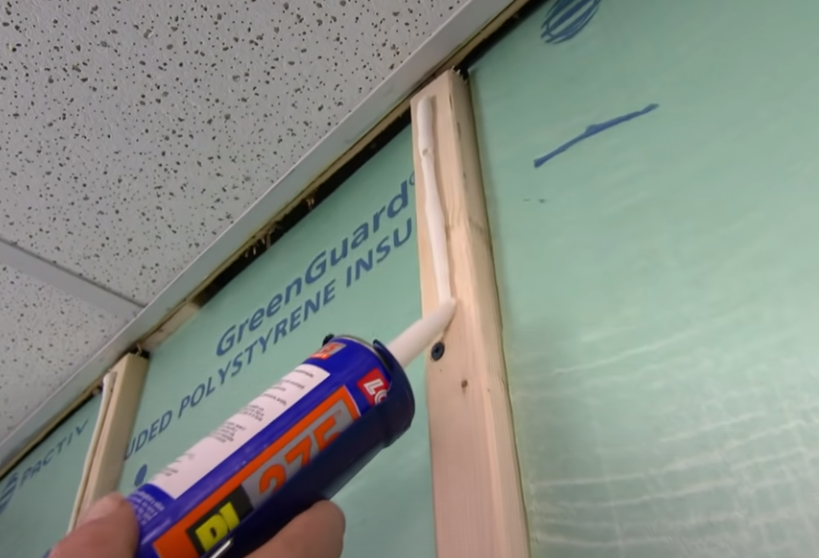
Figure 9
- Install the walls’ top panels first and make sure the top edge is tight against the ceiling panel. (complete the entire top row before moving down the wall)
- Fasten the panels to the wall studs using screws, 16 inches apart.
- When installing the top panels, avoid having joints above or below the corners of windows, doors, or other openings (see Figure 10). Doing so will reduce the chance of cracks forming in your finished walls.
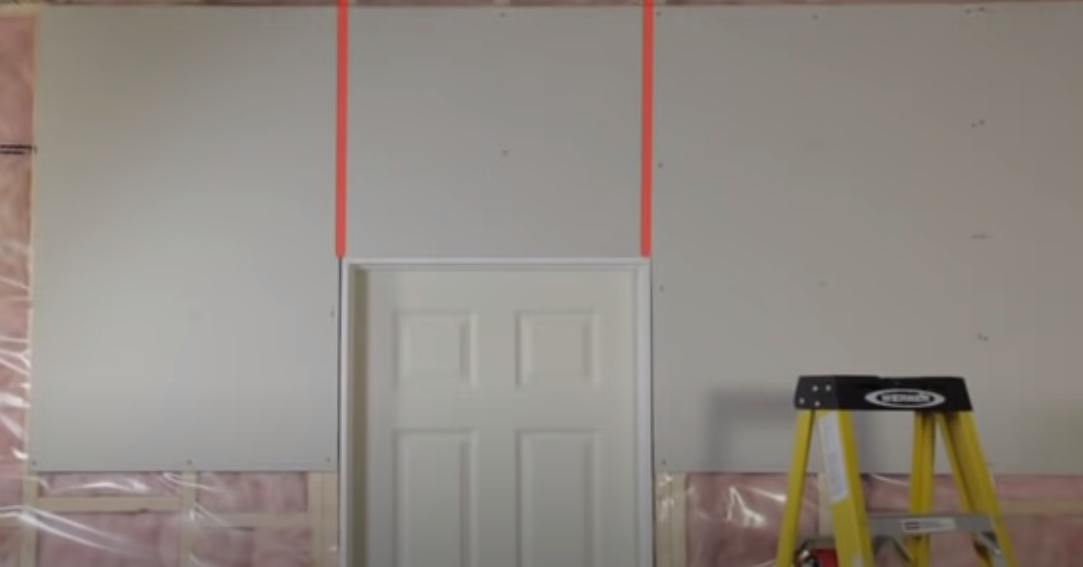

Figure 10
- Once the walls’ upper panels are installed, move down the wall installing one row at a time. (a typical wall will only require 2 rows, but if you have higher ceilings you may have additional rows)
- Remember, make sure you cut the bottom panels accurately to leave a half-inch gap between the panel and the floor.
Be warned: Any gap between panels more than ⅛ inch is unacceptable because the amount of compound it would take to fill the gap could shrink leaving a visible seam in the wall.
Step 5: Create the Cutouts.
When you are done installing all the drywall, it is time to create cutouts for outlets, vents, lights, electrical boxes, and any other necessary holes. You just need to cut out the holes that you drew before on the panels using a drywall saw (see Figure 11).
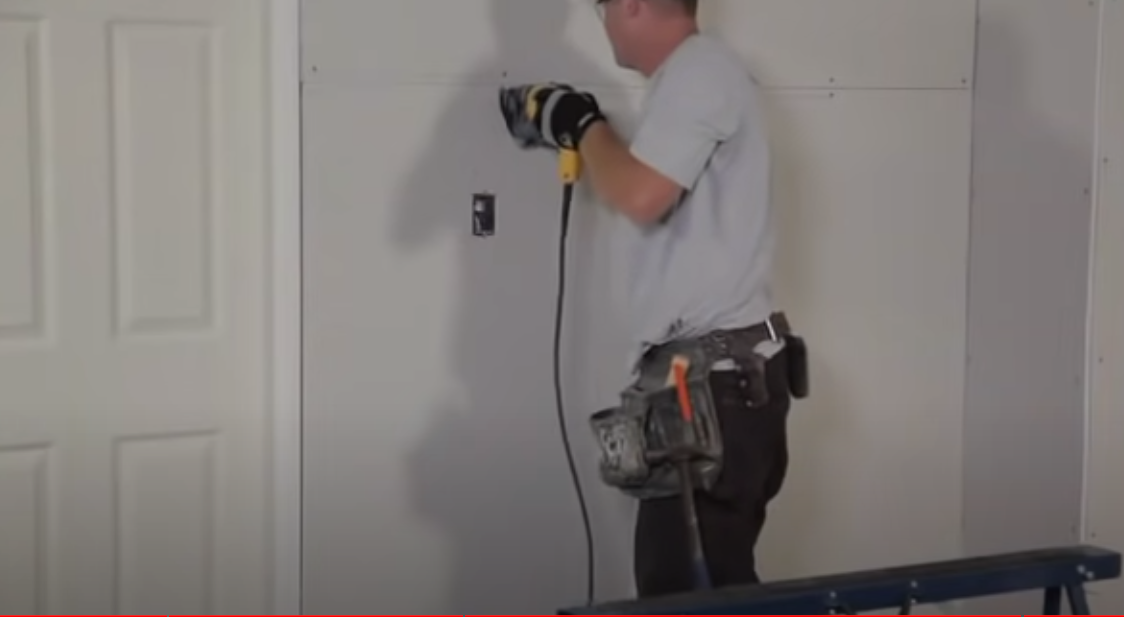
Figure 11
Now that the drywall installation is complete, the next step is to tape and spackle the seams. This process joins the pieces of drywall into a single solid wall and makes a physical connection between each drywall sheet. In the next article, we are going to explain how to tape and spackle.
The Bottom Line
Installing drywall can be challenging. This guide should make it a little easier to understand the steps for installing drywall and the materials needed. We hope this article is a great resource for those interested in doing their own drywall installation or any newbies considering starting in the trade.
As previously mentioned, installing drywall panels can be a do-it-yourself job, but it will take some skill. Even though the process is easy, there are some drawbacks. For instance, you may not get a professional look or there could be squished and broken panels. Also, having no experience in this field could cost you quite a bit more money than expected. Therefore, hiring someone with expertise in drywall installation will help avoid any issues.
Matrix Company Solutions Corp. is a certified 203(k) contractor in the Philadelphia area that provides professional home renovation services. If you want to be sure that you get the drywall results you are looking for, leave this job to the experts at Matrix Company Solutions Corp. Give us a call for a FREE Consultation.


0 Comments
Trackbacks/Pingbacks