There are several reasons why you may need to install a new door in your home. In some cases, you may have a broken door, or perhaps you are renovating your home and want to upgrade your door. In any case, a prehung exterior door is a great option that we highly recommend.
A prehung exterior door is an exterior door that has been placed in its frame prior to installation. This allows for easier installation, easier alignment, and reduced chances of any complications. If you are thinking about replacing your home’s exterior door, installing a prehung door will make the job much easier.
The installation can be tricky, but there is no reason for you to worry because this article will guide you through the process step by step. Let’s dive right in.
Tools and Materials
It is best to prepare all the necessary tools and materials before getting started. A bit of preparation can go a long way!
Here is the list:
- Level
- Drill
- Shims
- Screw
- Hammer
- Pry bar
- Utility knife
- Reciprocating saw
- Tape measure
- Caulk
- Mesh wire
- Nails
Step 1: Remove the Old Door
The first thing you should do is remove the old door if you have not already done so. How you do this job depends on whether you want to keep and reuse the old door. If you are not going to reuse the old door, you can break the door and jambs and throw them away. Otherwise, follow the instructions below to ensure that you remove the door and the frame without damage:
- Remove the outside and inside casing (trim) around the door using a pry bar (see Figure 1).
- Figure 1
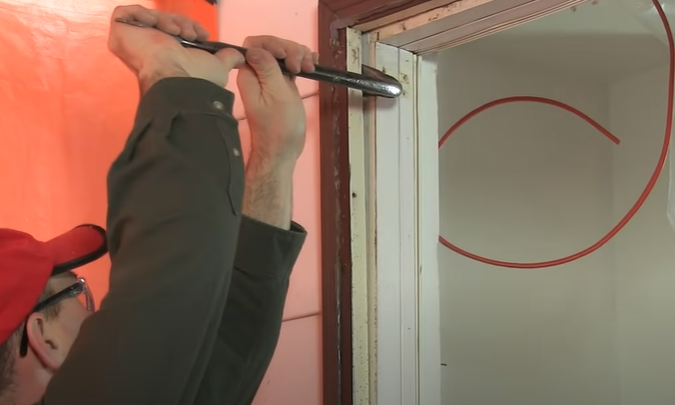
For the outside trim, remember to score around the trim to cut the caulking and remove it (see Figure 2).
- Figure 2

- Remove the hinge pins.
- Open up the door, pull it off, and move it out of the way.
- Use a reciprocating saw to cut all the way around the door, between the frame and drywall, in order to cut the nails and screws that were used to attach the door frame to the drywall. (see Figure 3).
A word of caution: Be careful not to cut the doorbell hard wiring, which is usually located between the door jamb and the drywall.
- Remove the frame carefully, making sure not to break it..
- After removing the insulation around the frame, you are done.
Step 2: Make Sure the Door Opening and Sill Area are Level and Square.
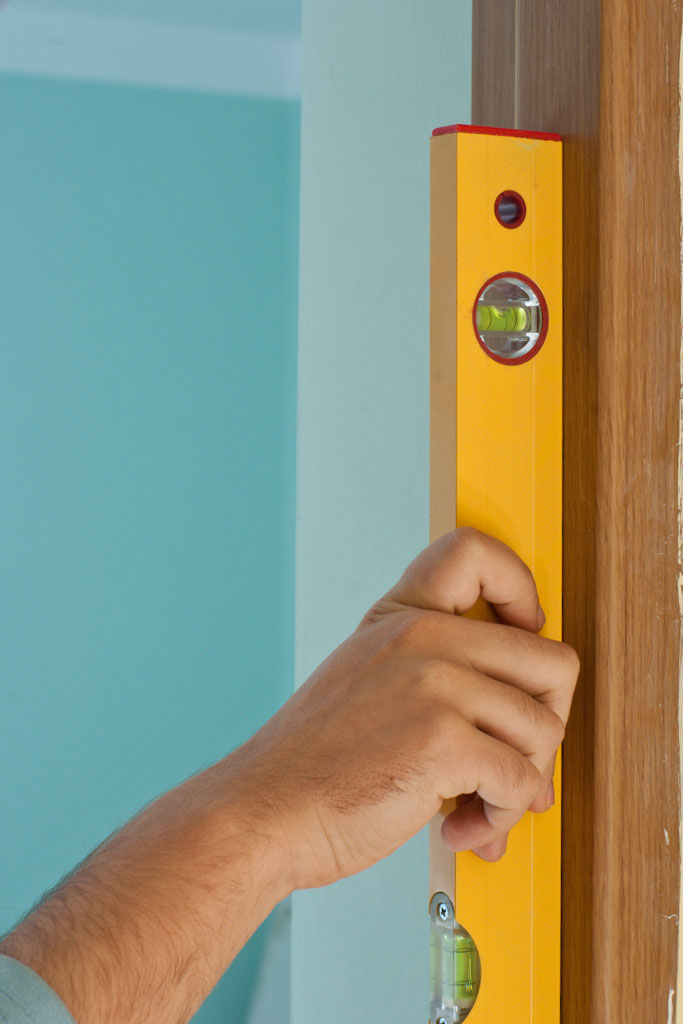
The next step is to check if the door opening is level. Using a level, check the sill area (the floor within the door opening) and the door jambs (the perimeter of the door opening). If any area is not level, you can use shims of various sizes to level the area.
- Figure 4
Next, you should check if the top plate is level; keeping in mind this is the least of your concerns if it is not level. Actually, the sides and sill area being level are far more important than the top plate.
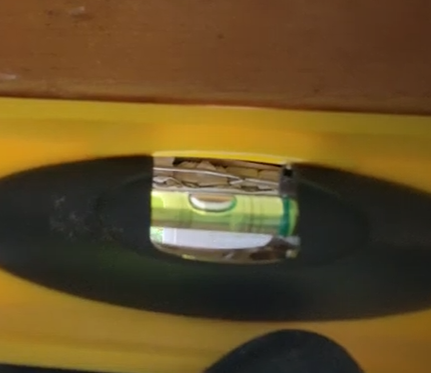
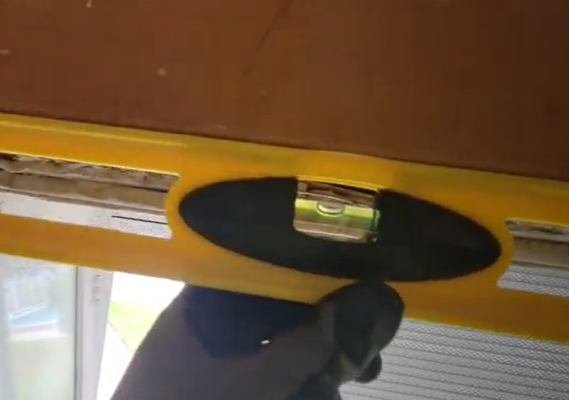
In figure 5, you can see that the level’s bubble is toward the left lines a little. By measuring from the ground to the top plate, you can find the difference between the two sides. In this case, the difference is ⅛ inch.
- Figure 5
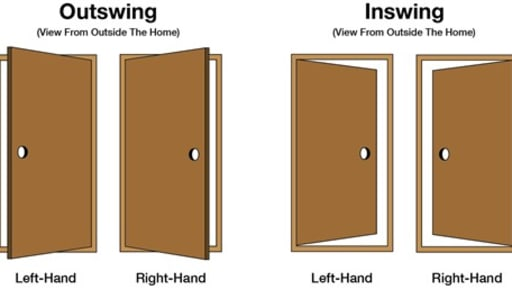
Step 3: Figure Out the Hinge Side.
Prior to installing a prehung door, you must find out which side is the hinge side. If the door is a left swing door, you are facing it from outside, and it swings toward you; the hinge side would be the right side, the left side would be the lock stile, and vice versa (see Figure 6).
- Figure 6
You can put the prehung door in place for a second and use the above method to figure out the hinge side or check the hinge side before removing the old door.
Step 4: Measure the Opening and the Door Width
The opening may be equal to or bigger than the new door size. Measure the opening; if it is bigger than the prehung door, you can use shims to reduce the opening’s width. The shims can be installed on the hinge side, lock stile, or both.
Technically it is always better to keep the hinge side on the strong side, so with this logic, we suggest putting the shims on the lock stile. Little gaps may form between the frame and the jamb when putting shims on the lock stile side. These gaps should be covered with mesh and stucco, and painted to have a nice look.
Step 5: Install the Prehung Door
When installing a prehung door, set the door in place and use hinge screws, such as 2 ½ inch all purpose steel screws, to secure the prehung door. You need to drill through the edge of the door and screw it to the hinge jamb. To do this, follow the instructions below:
- If the opening width is wider than the door size, attach shims between the rough opening and the framing on the lock stile side using nails.
- Put the prehung door in place.
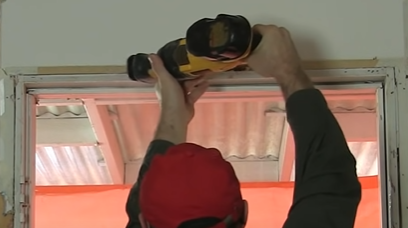
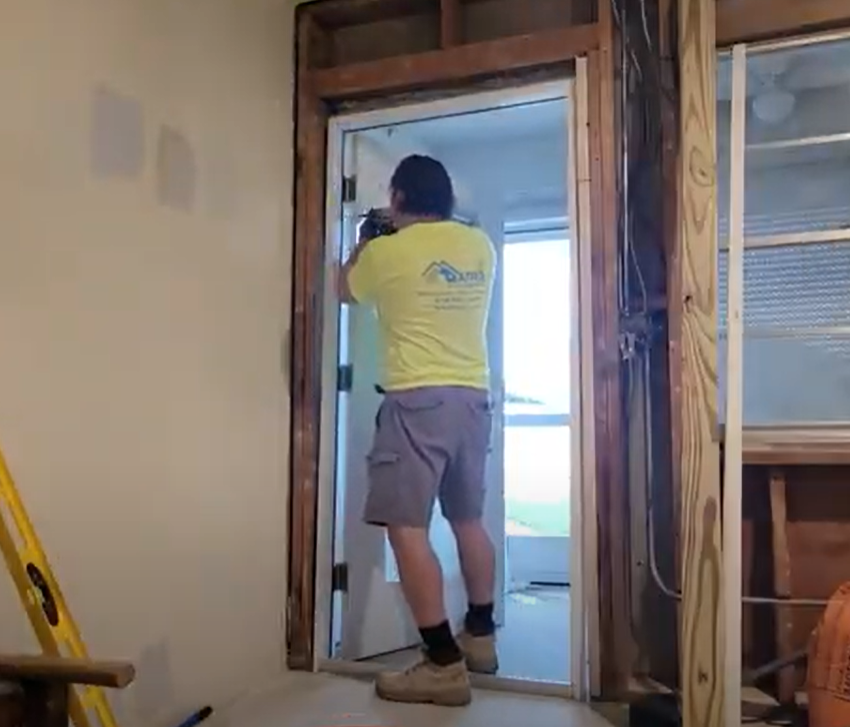
- Screw the hinge side to the framing where the hinges will be (see Figure 7).
- Figure 7
- Add some shims around the interior frame to get the door straight, if required.
- Check if the door is level (see Figure 8).
- Figure 8

- Screw the lock side to the door jamb where the strike plate will be.
- Use nails every 16 inches all around the door frame to make it more secure.
- The final step is to install the doorknob.
Step 6: Check if the Door is Set Properly
Once the door is set, check if the door shuts properly. It is important when shutting the door that the only thing that hits is the strike plate. Next, check all the way around the door to see if any light is passing through. If either the door does not shut properly, or light is seen passing through, it means the door is not entirely level and square or does not fit into the frame. In this case, you can put additional shims between the door frame and the opening to solve the problem.
Step 7: Fill in the Top Plate
No need to worry if the top plate of the door does not meet the top of the opening. If there is a gap between the door frame and the stud above, you can fill in this area. When filling in this area, be mindful as to how it will look when finished. (decide what looks better, filling in flush with the stud above or flush with the door frame) Always check both the interior and exterior for the best look. Next fill in any gaps, cover with mesh wire, apply mortar then caulking, and finally paint.
Final Tips
Now you are near the end, and mostly everything is done.
In Figure 9, you can see we put one ½ -inch and one 1-inch stud next to the lock stile and two 1 ½ inch studs on top of the door. By adding these shims it allows the prehung door to be installed properly inside the door jamb.
- Figure 9

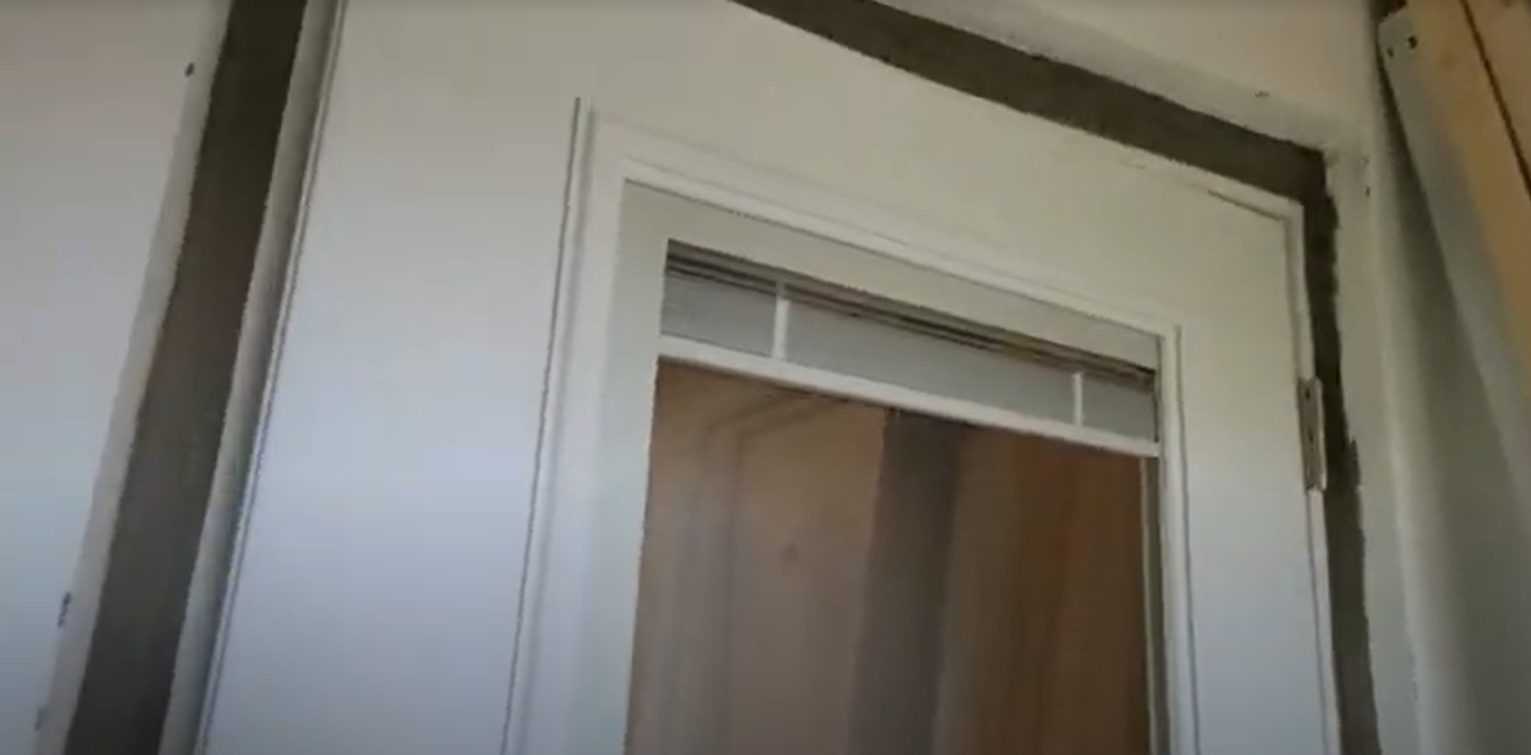
Figure 10 shows the prehung door installation completed. All the gaps are closed, and the mortar has been applied around the door. The only step left is to paint the area surrounding the new door.
- Figure 10
In this article, we explained how to use wood shims to fill the space between the framing and the door jamb. However, foam can be used to fill this space. Foam fills the space and provides insulation.
The Bottom Line
To sum up, whether you are replacing an old door or adding another door to your home, a prehung exterior door is a great option. As long as you choose the right door for the style of your home and follow the installation instructions carefully, you should have no trouble installing a prehung door.
If you need help with your home renovation in the Philadelphia area, Matrix Company Solutions Corp. is the way to go. We have done hundreds of home renovation projects. We recommend leaving your renovation job to our experts. Contact us for more information.
If this article was helpful, please leave a comment or share. Your feedback is extremely valuable to us and would be greatly appreciated.


0 Comments