If you are looking for an easy way to waterproof a bathroom surround and shower pan to eliminate moisture problems, the Schluter Kerdi Board Kit may be the solution you have been looking for.
Water damage is a serious problem for most homeowners. It can cause mold, mildew, and structural rot, costing you thousands to repair and even more to replace structural elements like floor joists or ceiling supports. In most homes, the bathroom tends to be the room most prone to water leaks. With proper waterproofing techniques and materials, however, you can effectively prevent leaks from causing damage, ensuring your bathroom is waterproof for years to come.
Our previous article explains how to waterproof the bathroom floor using Schluter Ditra Underlayment. In this article, we present a method to waterproof a bathtub surround and shower pan using the Kerdi Board Kit.
What is a Schluter Board Kit?
The Schluter Kerdi Board Kit includes all the necessary materials to waterproof a bathtub surround and shower pan. These boards are installed directly on the wood studs and provide the underlayment required for the tile installation as well as waterproofing. Also, you can install the tile directly on these boards, eliminating the need to use cement boards. Although more expensive, these boards are substantially more waterproof, lighter, and easier to install than cement boards.
Tools and Materials
• Schluter Kerdi Board Kit includes:
o 8 pieces ½ inch Kerdi-Board
o Kerdi-Board ZT washers and ZS screws
o Kerdi-Band waterproofing strips
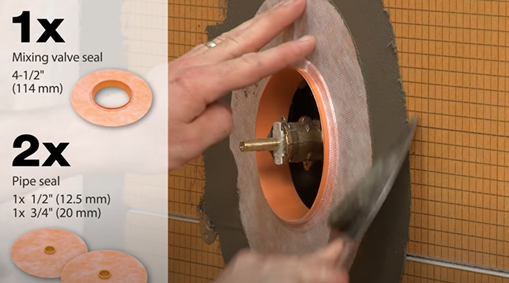
o Kerdi-Seal-MV (Mixing Valve Seals) and Kerdi-Seal-PS (Pipes Seals)
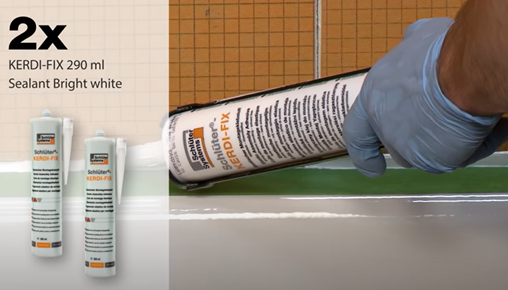
o Two cartridges of Kerdi-Fix sealant


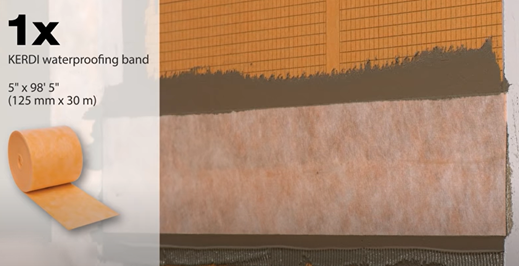
Figure 1
• Unmodified/Schluter mortar
• 1/8” Schluter notched trowel (Kerdi trowel)
• Small notched trowel
• Utility knife
• Screwdriver
• Tape measure
• Painter’s tape
• Schluter profiles
Install Schluter Kerdi Board on Shower Tub Surround
Step 1: Install the Kerdi Board.
After finishing the shower stall framing and installing the bathtub, you can install the Kerdi Boards right away.
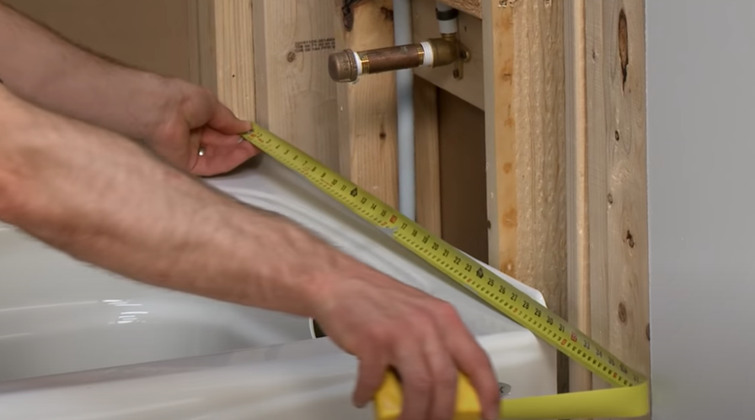
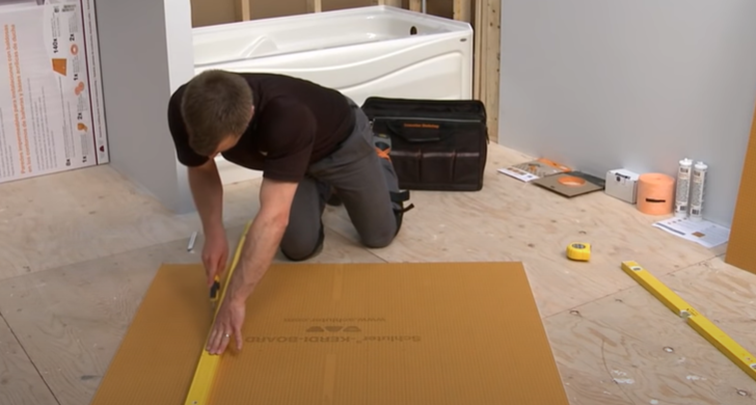
- Measure the area to be covered to determine the Kerdi Board layout before cutting the board (See Figure 2). You should know the boards’ layout, either horizontally or vertically. The type of tub can determine your layout. For example, a vertical layout is more practical for a shorter tub.
Figure 2
Remember that you must position the vertical edges of each panel over the center of the studs (See Figure 3).The maximum allowable stud spacing for ½inch thick Kerdi-Board is 16 inches to the center. Therefore, consider installing additional studs or solid backing if required.
Figure 3
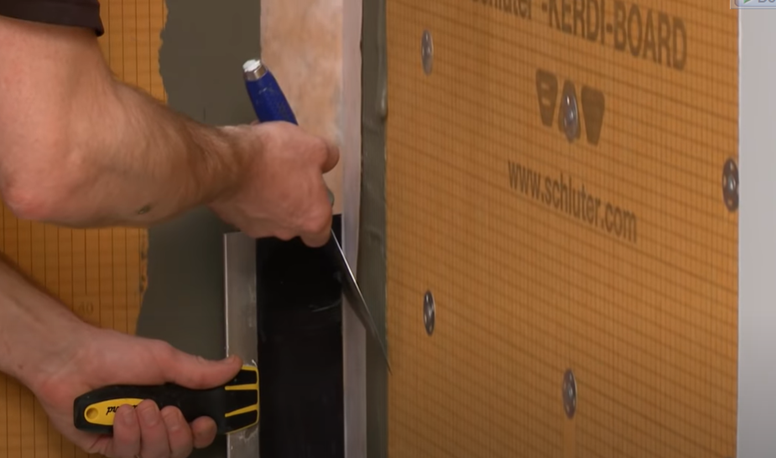
- Cut the Kerdi Boards to the measured sizes using a utility knife. Also, measure and cut openings for the pipe protrusions and mixing valve (See Figure 4).
Figure 4

- Place the Kerdi Boards according to the specified layout.
For installing the boards around the tub flange, you have two choices:
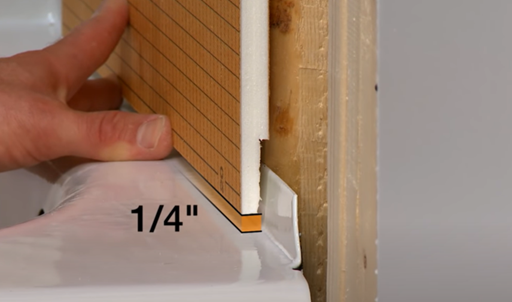
- When the flange is thin, you can cut a notch in the board and place the board on the flange to cover it. In this case, remember to leave a 1/4 inch gap between the board and the tub (See Figure 5).
Figure 5
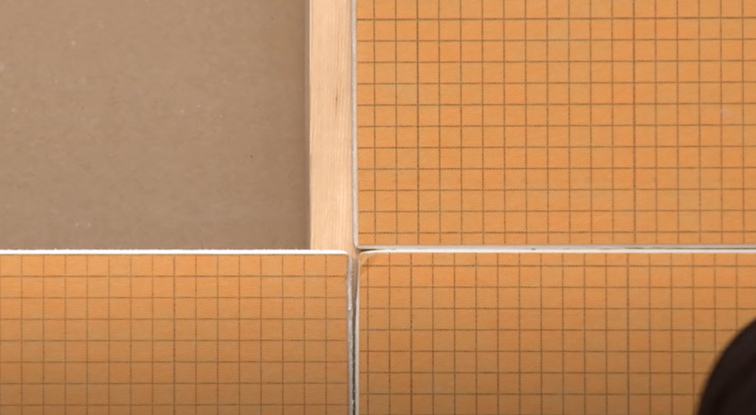
2. Place the board above the tub flush with the top of the flange (See Figure 6).
Figure 6

4 Fasten the boards to the wood studs using the included washers and screws (See Figure 7). Keep in mind that the maximum allowable fastener spacing is 12 inches to the center.
Figure 7

Step 2: Waterproof Joints and Edges.
You must make sure that all the joints and edges are sealed and water cannot pass through them.
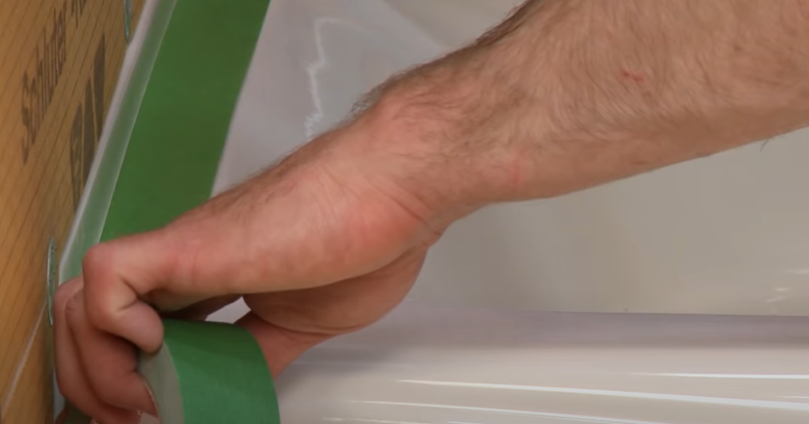
- First, lay painter’s tape around the tub’s ledge to protect it from getting dirty or damaged. You should place the tape close to the lip of the tub but not underneath the Kerdi-Board (See Figure 8).
Figure 8
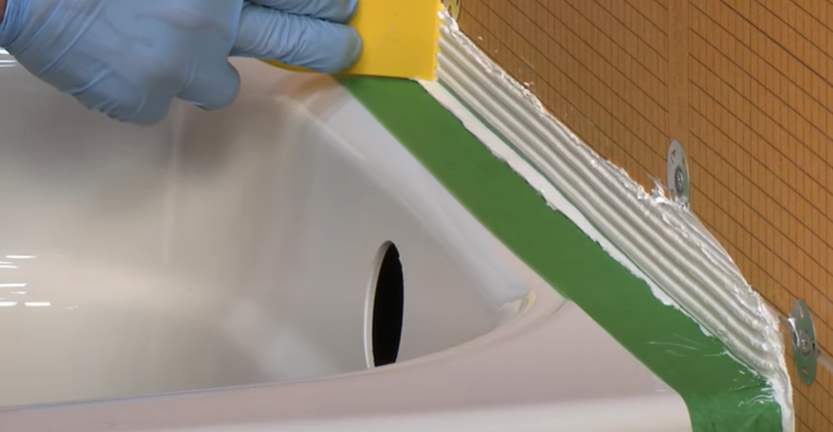
- If you installed the Kerdi Board above the tub flange, use Kerdi Fix to seal around the bathtub and completely cover the tub flange. Then, spread the Kerdi Fix using a small notched trowel. Next, apply a minimum of 5 inches of Schluter thinset mortar or unmodified mortar to the Kerdi-Board above the tub flange. After that, apply mortar using the flat side of the trowel and then comb the additional mortar over the area where the Kerdi-Band will be installed (See Figure 9).
Figure 9
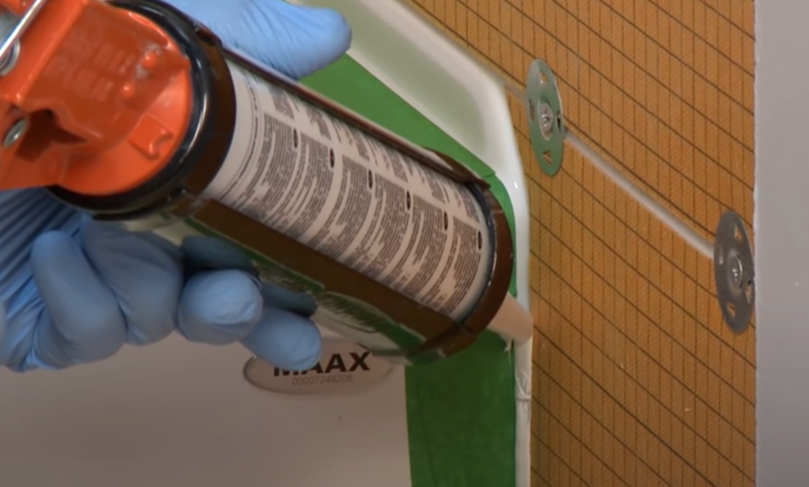

If the tub flange is thin and you installed the Kerdi Board on the flange, fill the 1/4 inch gap between the Kerdi Board and the tub with Kerdi-Fix. Then apply 5 inches of mortar above the flange (See Figure 10).
Figure 10

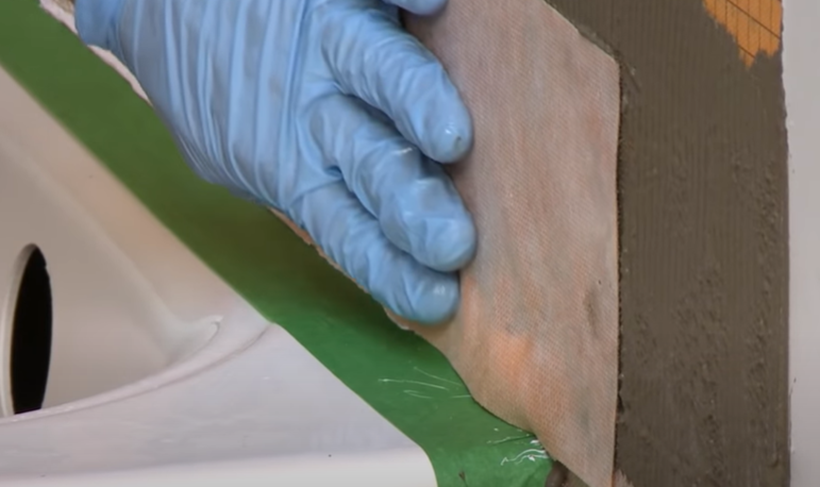
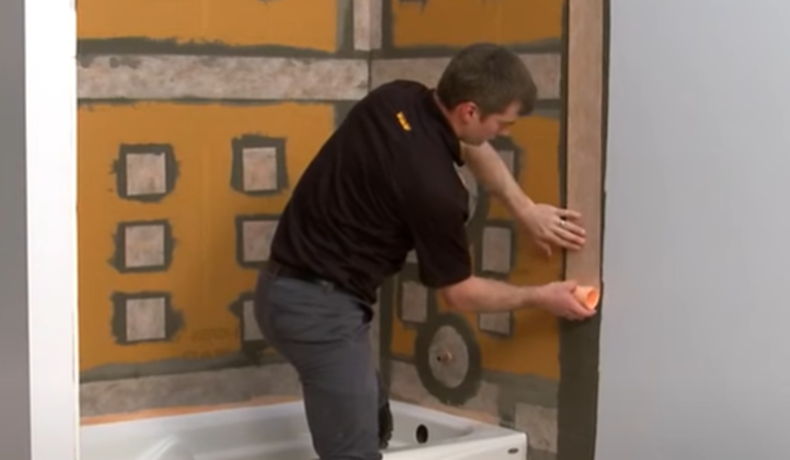
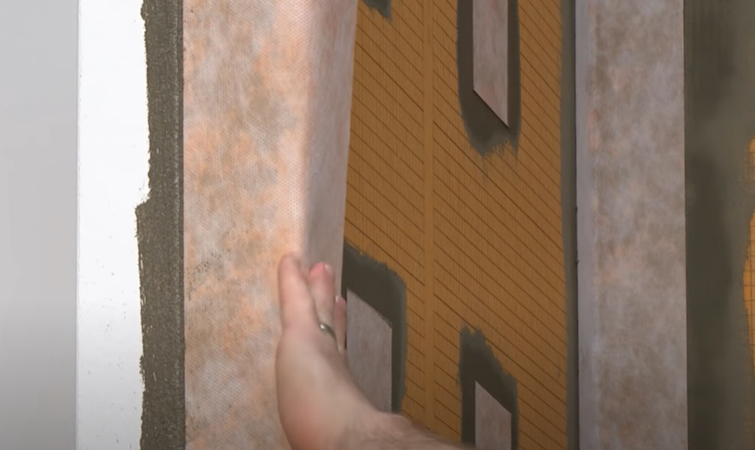
- Apply Kerdi-Band and embed the membrane into the mortar and Kerdi-Fix to ensure complete coverage (See Figure 11). Make sure you have 2 inches overlap at all the seams.
Figure 11
- Follow the above process all the way around the bathtub.
- Immediately after the waterproofing around the tub deck is complete, carefully remove the painter’s tape.
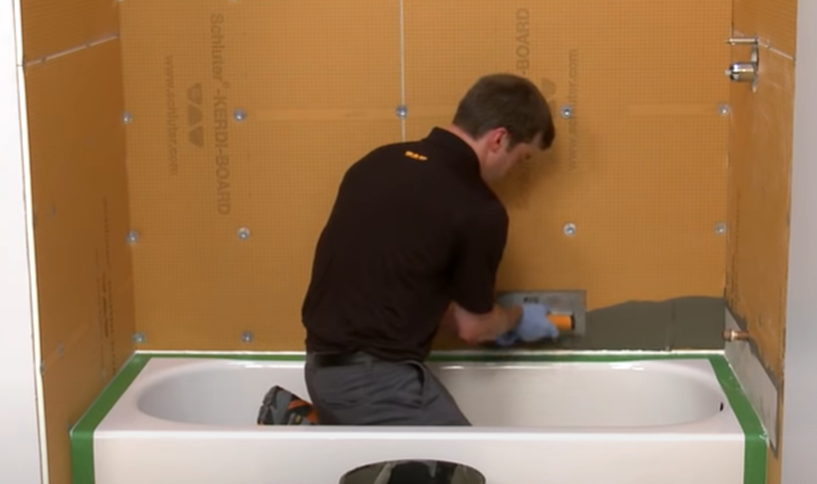
- Then seal All Kerdi-Board joints, corners, and fastener penetrations by applying unmodified mortar and then Kerdi-Band over it (See Figure 12).
Figure 12
- Use unmodified mortar and Kerdi-Seal-PS to seal any protrusions through the Kerdi-Board at the tub spout and showerhead. Use Kerdi-Seal-MV to seal around the mixing valve (See Figure 13).
Figure 13

Step 3: Install a Schluter Profile on Edges.
In the previous steps, you prepared a waterproofing underlayment for tiling the bathroom walls. In the last step, we want to make sure that we will have a proper transition between the tiled area and the other walls.
The Kerdi Board may be finished as a corner or a flat transition to adjoining walls, depending on the bathroom’s design. When you have a flat transition, Kerdi-Band, in conjunction with mortar, is appropriate to maintain the waterproofing’s integrity while also providing a transition at this joint (See Figure 14).
Figure 14
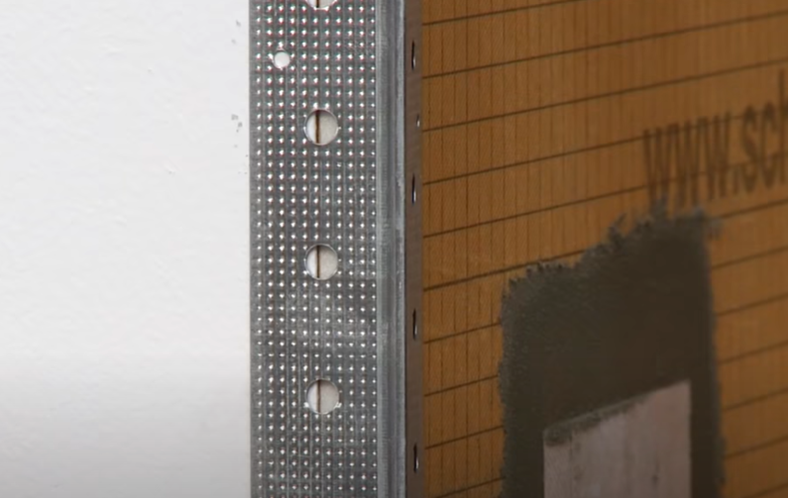
For the corners, using a corner bid is the best choice. At a corner, install Kerdi-Band and finish the corner with a Schluter profile to protect the edges of your tile and provide a clean finish (See Figure 15).
Figure 15
Install Schluter Kerdi Board on the Shower Pan Surround
In the first part of the article, you learned how to prepare a waterproof underlayment for tile installation on a tub wall surround.
For the shower pan surround, the process of installing and waterproofing the Kerdi Board is the same as we explained before. Find the proper layout, install the boards using washers and screws, and do not forget the maximum spacing for the framing studs and fasteners. For waterproofing, follow the same steps and seal the gap around the shower pan, all the seams, fastener penetrations, and pipe protrusions. Also, remember to provide transitions at corners and wherever a Kerdi Board meets another wall. You can waterproof a bathtub surround and shower pan if you carefully follow the above instructions.
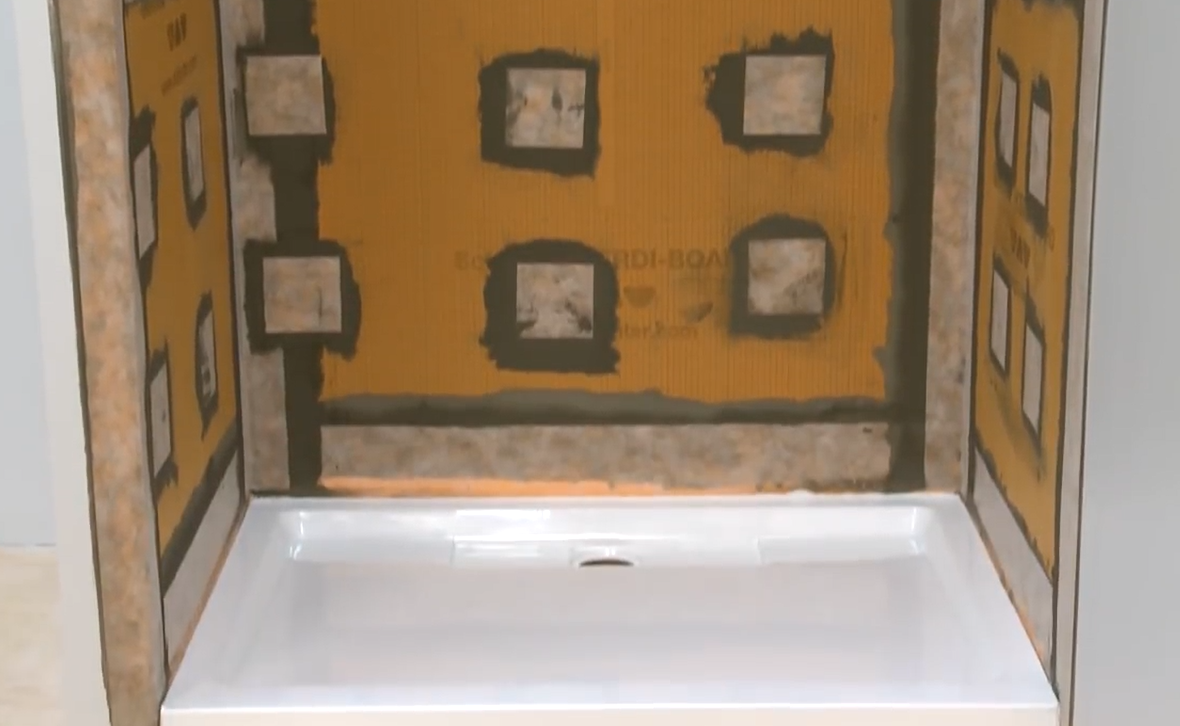
Now the Kerdi-Board-Kit installation in the shower is complete and ready for tile installation (See Figure 16).
Figure 16
A final tip. Consider using Schluter profiles such as Dilex-As or Dilex-BWA profiles on the edges for separating the tiled area from the tub or shower pan. These profiles provide a clean and maintenance-free finishing touch to bathtub and shower surrounds.
The Bottom Line
In a nutshell, learning how to waterproof a bathtub surround and shower pan can help you avoid water damage problems in the bathroom. Following the steps in this article ensures that your bathroom walls are well protected and gives you peace of mind when bathing or showering.
Consider hiring experts to do your home renovation job for easy, quick, high quality results. If you live in the Philadelphia area, Matrix Company Solutions Corp. can help you renovate your bathroom and your entire home.
We would be thrilled to help you with your home renovation project. Thank you for visiting our website, and feel free to share this article with your friends and family. Do not hesitate to contact us for more information on your home renovation project.


Great post! I learned something new and interesting, which I also happen to cover on my blog. It would be great to get some feedback from those who share the same interest about Thai-Massage, here is my website UY3 Thank you!
Thanks Alysa!
Thanks Bernard!