Tiling has been around for centuries, but even today, it is still a brilliant way to enhance the look of your bathroom. A beautifully tiled bathroom will last for years and give you a splash of style and peace of mind when it comes to hygiene. Tiled bathrooms are one of the most practical and cost-effective ways to update the look of any home!
Whether doing this as a DIY project or leaving it to a contractor, tiling a bathroom comes with some need-to-know important tips. To tackle the job, you need more than just some time on your hands and strong arms — you need some knowledge!
Here is a step-by-step guide that uses a simple and useful bathroom tiling method explained in two parts. In each step, we first introduce the tools and materials needed for the job and then explain how the job should be done. This article is Part 1, here we will explain how to prepare the shower walls and floor for tiling.
Step 1: Frame Shower Stall.
Tools and Materials:
2 × 4 Regular studs
Drill
Screws
The first step is to build the shower stall in the bathroom area. To begin framing the shower stall, you must build the shower wall framing. For installing wall framing, you need 2 × 4 regular studs for the bottom and top plate and 2 × 4 regular studs for wall studs and blocking.

Figure 1
- Mark the location for the shower walls on both the floor and the ceiling.
- Cut the bottom and top plate studs to the required length.
- Secure the bottom plate to the floor and the top plate to the ceiling joists (not the drywall) using screws.
- Measure the distance between the bottom and top plates to determine the wall stud length.
- Mark the locations of the wall studs along the top and bottom plates. The spacing between the center of the studs should be 16 inches. (see figure 2)
You might need to move the wall studs if they get in the way of where the mixing valve and plumbing lines are supposed to go. The below picture shows an example of a wall stud placement design. As you can see, on the wall where we are going to install faucets, the distances between the studs are different from the other wall.
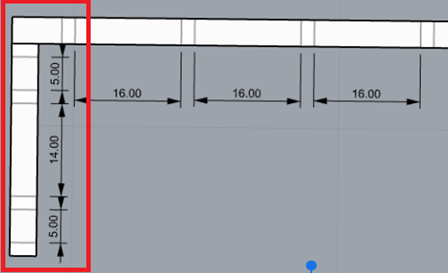

Figure 2
- Cut the required number of studs to the measured length and place them on the marked areas. Secure them to the top and bottom plates using screws.
- Cut two pieces of stud for the shower head and shower valve blocking the length between the two studs where you are going to install them. The standard distance for the shower valve and the shower head should be 38 to 45 and 72 to 78 inches above the ground, respectively.
- Install 2 × 6 boards to the bay. You will need these boards for securing the waterproofing PVC liner. (see figure 3)

Figure 3
Step 2: Build Shower Curb.
Tools and Materials:
2 × 4 Pressure-treated studs
2 × 4 Regular studs
Drill
Screws
The next step is to build the shower curb. The shower curb borders the shower pan and the bathroom floor. A shower curb keeps the water in the shower area. A shower curb can either be built or purchased. This article explains how you can build a shower curb using wood.
Choosing the number and size of the studs depends on your preferred shower curb height. We recommend using three pieces of 2 × 4 studs. One pressure treated for the bottom piece and two regular studs on top of that.
- Draw a straight line on the floor that shows where the curb will be installed.
- Cut the studs to the required length of the curb.
- Place the pressure-treated stud on the floor making sure it is placed exactly according to the line you drew before.
- To install the pressure-treated stud, screw the stud to the bottom plate of the wall framing to hold it in place. (see figure 4)
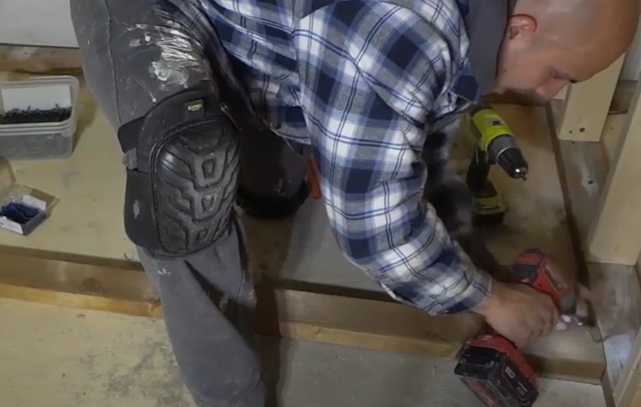
Figure 4
- Make three holes along the stud and screw the stud to the floor using these holes.
- Install the other two studs. Place one of the studs on top of the secured stud and secure it to the underneath stud using at least four screws. (see figure 5)
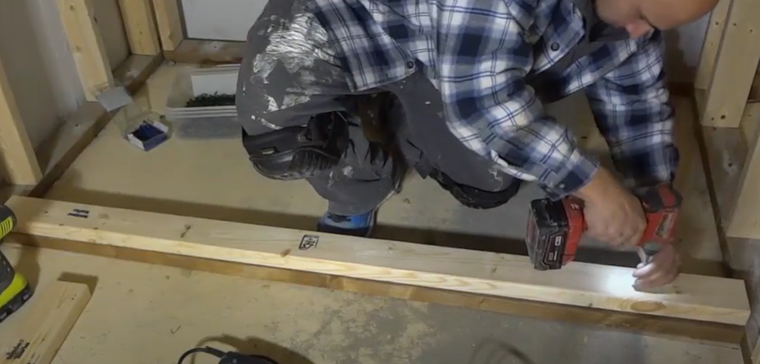
Figure 5
9. Finally, do the same for the third stud, making sure all studs are secured.
Step 3: Build Shower Wet Bed.
Tools and Materials:
Dry Compact Mortar Mix
PVC shower liner
Pipe adhesive
Trowel
Level
Screwdriver
Nail gun
Drill
Bucket
Screws
After building the shower stall, you must prepare the floor and walls for tiling. First, you should prepare the shower and wet bed.
- Before working on the wet bed, secure the shower drain with a two-inch drain pipe using adhesive. Then, set the screws into the subfloor. (see figure 6)

Figure 6
- Use a mortar mix to create the first slope, which runs 1 inch from the edges and slopes down to ⅜ of an inch, flush with the drain. (see figure 7)
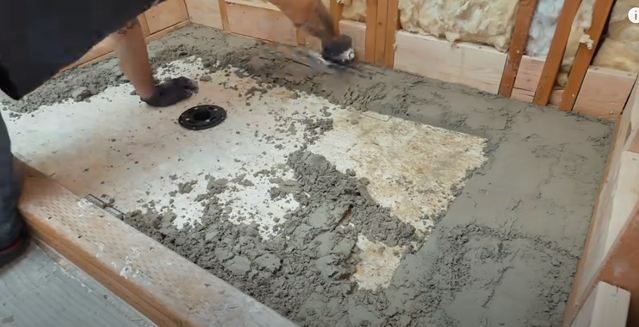
Figure 7
- Lay down a PVC shower liner and fold the edges. Secure the liner to the 2 × 6 boards to prevent water leaking in case this level floods. (see figure 8)
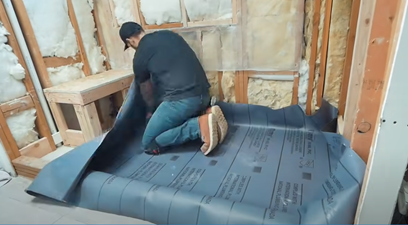
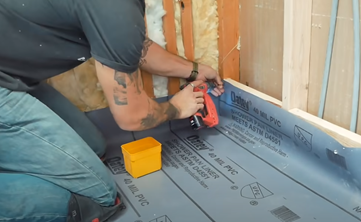
Figure 8
- Before entirely securing the PVC liner, fold the liner over, remove the top of the two-piece drain, lay a bead of silicone around the ring to create a gasket, and fold the water liner carefully over it. (see figure 9)
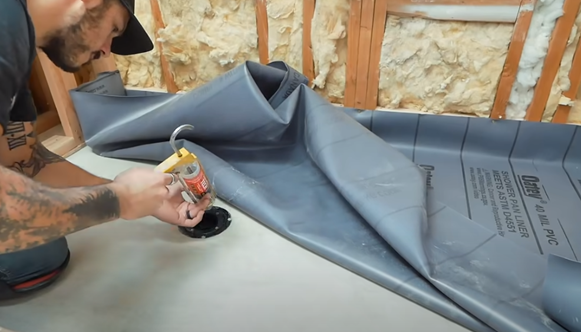
Figure 9
- Use the top piece of the two-piece drain to find the hole, make a small x on the hole using a knife and place the top piece of the drain, making sure the slits of the PVC liner fold down into the drain , then secure the top of the drain to the bottom using bolts. (see figure 10)
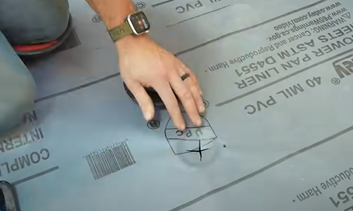
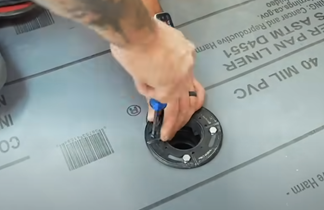
Figure 10
- Soon after, put some small pea size gravel or pebbles around the drain for adequate drainage. (see figure 11)

Figure 11
- The final step is to work on the second and final slope, which should run from one inch down to half an inch covering the rocks. (see figure 12)
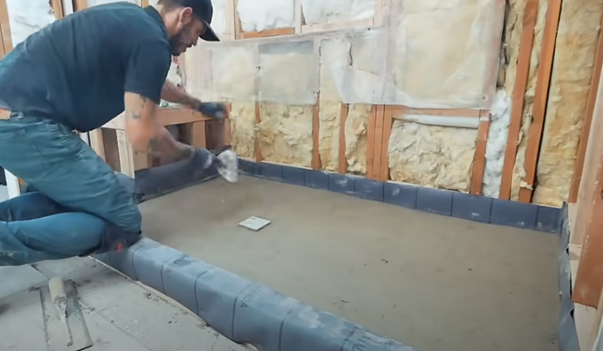
Figure 12
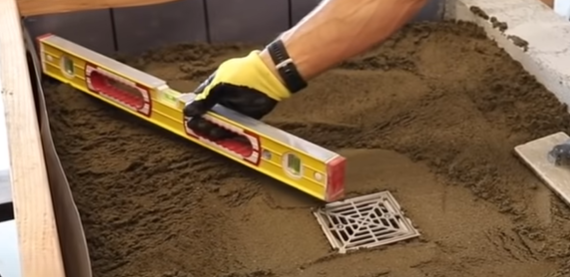
For the best results and to ensure all the water will run into the drain, it is important to use a dry compact mortar mix while checking the slope using a level. Use a special compound, which is similar to dry pack mortar, made by mixing 2 ½ parts sand plus 1 part cement plus a small amount of water. To maintain the ¼ inch per foot slope when the length of the corner to the drain is 2 feet, the slope should be ½ an inch. (see figure 13)
(Figure 13)
In cases where the length is 2 feet, use a two-foot level, put a tile in the corner, and put one side of the level on it. Hold the level straight and when the bubble inside the level is in the middle, measure from the other side of the level to the surface of the substrate. It should be ½ inch. (see figure 14)
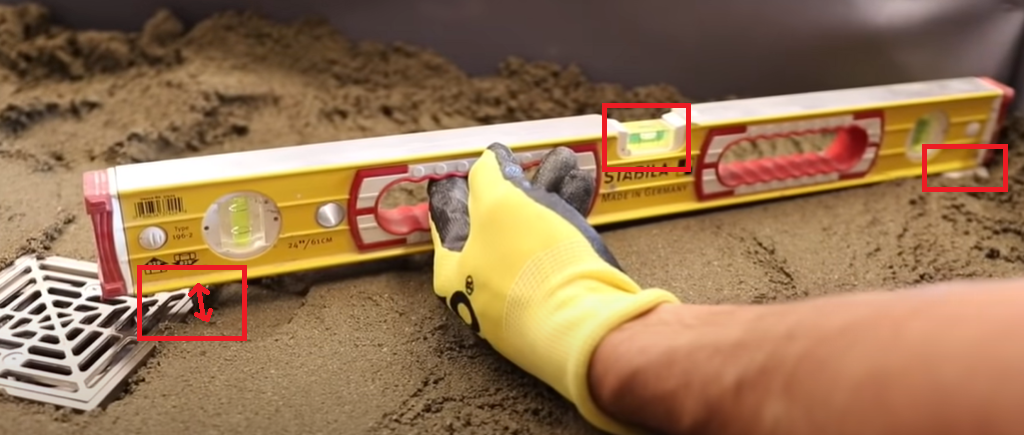
Figure 14
If it is higher than ½ an inch, use less mortar mix. If this measurement is less than ½ inch put more mortar mix in the corner. (see figure 15)

Figure 15
Step 4: Install Cement Boards on the Curb and Shower Walls.
Tools and Materials:
Wallboard adhesive
1 5/8 inch Cement board screws
1 1/4 inch Cement board screws for floor cement board
Fiberglass mesh
Mortar
Screwdriver or drill
Caulk gun
Level
After preparing the wet bed, you should prepare the walls and curb by installing cement boards for tiling. You should wait for the wet bed to dry completely (three days would be good) before starting to install the cement boards.
We prefer to use cement boards because there are small holes all over the cement boards that absorb the first coat of the waterproofing substance. Applying the second coat completely covers the board, making it a better waterproofing material as compared to other materials such as green board. Waterproofing is embedded into the cement board.
Cement boards typically come in 3 × 5 feet and two thicknesses (1/4 and 1/2 inch). You need to install 1/2-inch sheets.
- Install the cement boards around and on the shower curb. Cut the cement board to the required measurement for the curb, install the boards to the curbsides, and then on top using screws. (see figure 16)

Figure 16
- For the walls, you can either start from the ceiling and work down or from the floor and work up. Here we explain working from the ceiling down. For the bottom, remember to leave a little gap between the cement boards and the wet bed for the mortar when installing the tiles.
- Start installing the cement boards on the center wall in a shower stall with three walls. Cut the cement board to the length of the shower’s center wall and mark the areas where the studs are on the cement board. This is a good reference for where your studs are located.
- Take the wallboard adhesive and apply it to each stud on the wall. (see figure 17)
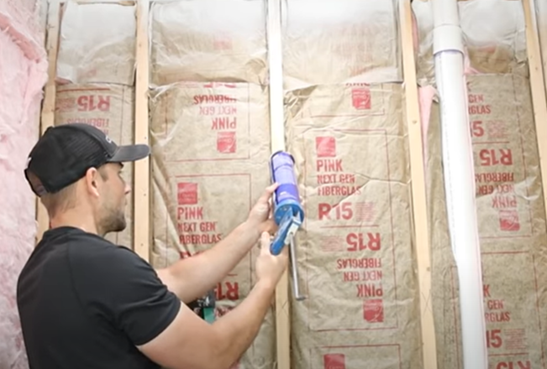
Figure 17
- Install the cement board by screwing it to the studs. It is recommended to use 30 screws per sheet for walls. (see figure 18)
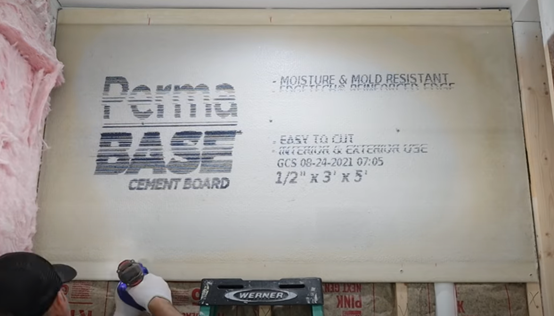
Figure 18
- Install the cement board to the bottom part of the center wall and then the other two walls, as described above.
- After installing the cement boards, tape all the joints using mesh tape. You should do this first in the corners and then for the horizontal joints. (see figure 19)
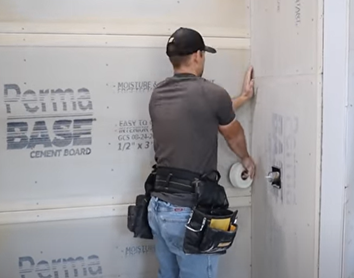

Figure 19
- Mud over the joints, screws, shower valve, and the shower head with a layer of thinset. (see figure 20)
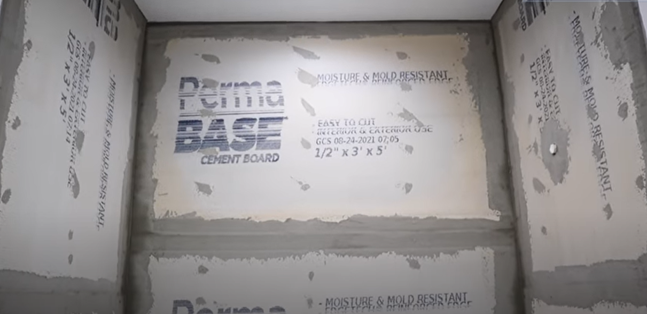
Figure 20
Step 5: Install Cement Boards on the Floor.
Tools and Materials:
Scraper
Hammer
Rag
Bucket
Drill mixing paddle
Utility knife
1 1/4 inch cement board screws
Fiberglass mesh tape
Thinset mortar
Circular saw blade
Notched trowel
After installing the wall cement boards, install the floor cement board to prepare the floor for bathroom tiling. We recommend using 1/4 inch sheets for the floor and 60 screws per sheet for the installation.
- The most important part of the floor tiling job is ensuring the subfloor is level. Therefore, clean off the surface completely. If there is any mortar on the subfloor from previous jobs, scrape it using a scraper until you have a smooth surface. To ensure maximum adhesion between the surface and the mortar, you can use a slightly damp rag to wash the floor.
- Cut the cement board to the appropriate size. Mark and cut all the openings on the floor so the board fits perfectly
.
- Install the cement boards by applying a layer of thinset under them and screwing them down. (see figure 21)
.


Figure 21
- Apply fiberglass mesh tape to the seams of the cement board to tie them together and make them more stable. (see figure 22)
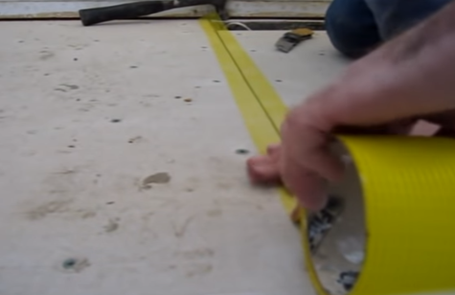
Figure 22
- Apply a layer of thinset mortar to the seams and let the thinset mortar cure overnight. (see figure 23)
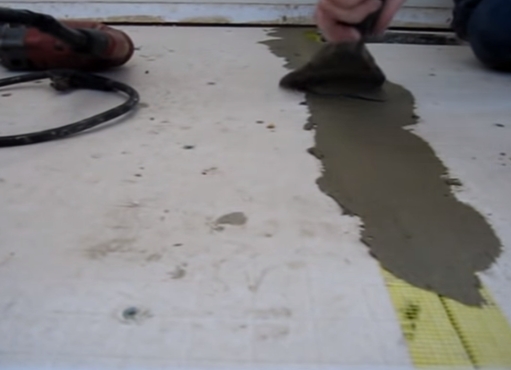
Figure 23
Everything is Ready for the Tile Installation…
In this article, we explained how to prepare the walls and floor of a shower for bathroom tiling. This process is not difficult but you must pay careful attention to detail when completing each step. Ignoring minor details can cause problems during or after the tile installation Once you have completed all the steps, you can start the bathroom tiling job. See Part 2, for our next step-by-step guide.


0 Comments