The first line of defense against the elements is a building’s facade. Exposure to weather can cause wear and tear, leading to cracks, leaks, and structural instability. If these problems are not fixed, they can get worse and become a danger to the building and its occupants. This is especially important for Philadelphia row houses, as their exterior walls tend to be heavy and poorly connected to the main structure system. Any weakness or damage in these walls, such as facade bulges or lintel damage, can affect the entire building. Therefore, it is crucial to have professionals with experience in this area handle the facade renovation in such buildings.
In this article, we will share our experience with a facade renovation project for a three-story Philadelphia row house. Our goal was to create a functional and beautiful facade. Join us as we walk through the steps we took to achieve this goal!
Structural Facade Renovation
The Structural Condition of Exterior Walls in Philadelphia Row Houses
Philadelphia row houses have a unique structural system of their exterior walls. These houses are constructed by linking wooden joists between the side walls, also called party walls. The front and back of a row house are connected only at the edges of these side walls, not directly to the sturdy wooden joists. So, the connection between these walls and the building’s structure is weak. In these homes, the exterior walls were constructed using heavy, hard-fired bricks, which can only support their weight.

Figure 1

Figure 2
Therefore, facade renovation, especially for Philadelphia row houses, is not just about patching visible damage. Assessing the condition of a facade, identifying potential risks, and finding suitable solutions to address them is a complex and challenging process. During our project, we discovered significant structural damage, such as facade bulges and cracks around openings. (see Figure 3)
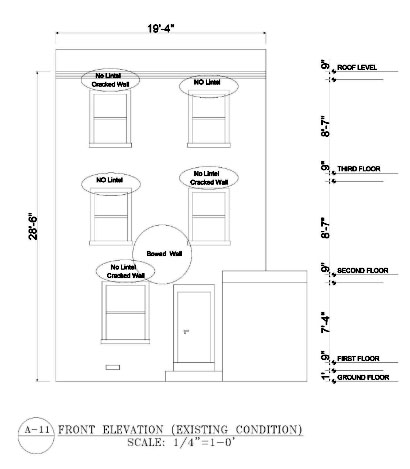
Figure 3
Repairing Facade Bulges with Star Bolts
During a facade renovation, the first critical step is addressing areas where the facade bulges or sags, often called a facade bulge or belly (see Figure 4).

Figure 4
To address this, our experienced team employed star bolts. Star bolts reinforce the exterior walls by connecting them to the floor and ceiling joists. This reinforcement helps maintain the overall stability of the house and preserve the structural integrity of the building.
For our project, we connected one star bolt to the first-floor ceiling joists and three star bolts to the second-floor ceiling joists (see Figure 5).
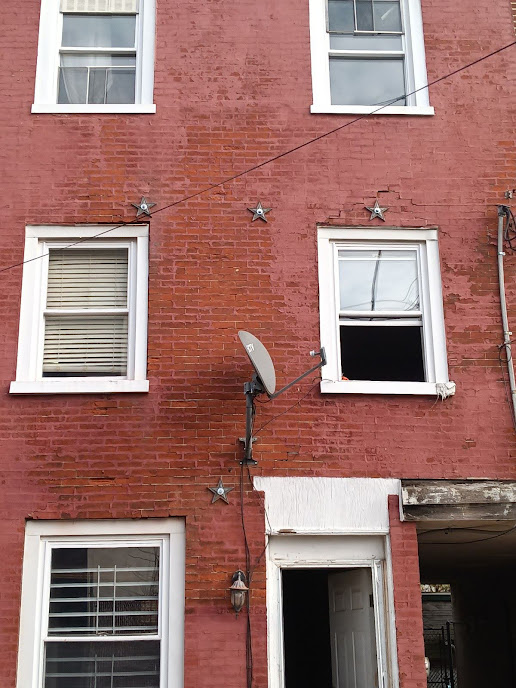
Figure 5
It is crucial to securely connect the star bolts to the building’s structure. For this project, we used star bolts with a 10-inch diameter star plate attached to a ¾-inch threaded rod. We anchored the bolts to the floor beams at a depth of 4 to 8 joists using washers and nuts. In some cases, it may be necessary to remove the flooring or ceiling to install the bolts. To reinforce the structure further, we have added solid bridging (blocking), which is indicated by the green arrows in Figures 6 and 7.

Figure 6

Figure 7
Installing Exterior Lintels
In our project, there were major cracks at the corners of the window and door openings.
These cracks compromised the structural integrity of the building. We opted to remove the bricks and insert lintels, to redistribute the load above these openings, preventing further cracking and potential structural failure.
A lintel is a structural support frame placed over door and window openings. Lintels transfer the weight above them to nearby walls. Exterior lintels are commonly made of concrete or metal. Concrete lintels are subject to failure so we do not use them in our projects.
When doing facade renovations, we carefully inspect existing exterior lintels for any damage and replace them if necessary. When assessing our project, it was clear that there were no existing lintels which led to the cracks around the windows.
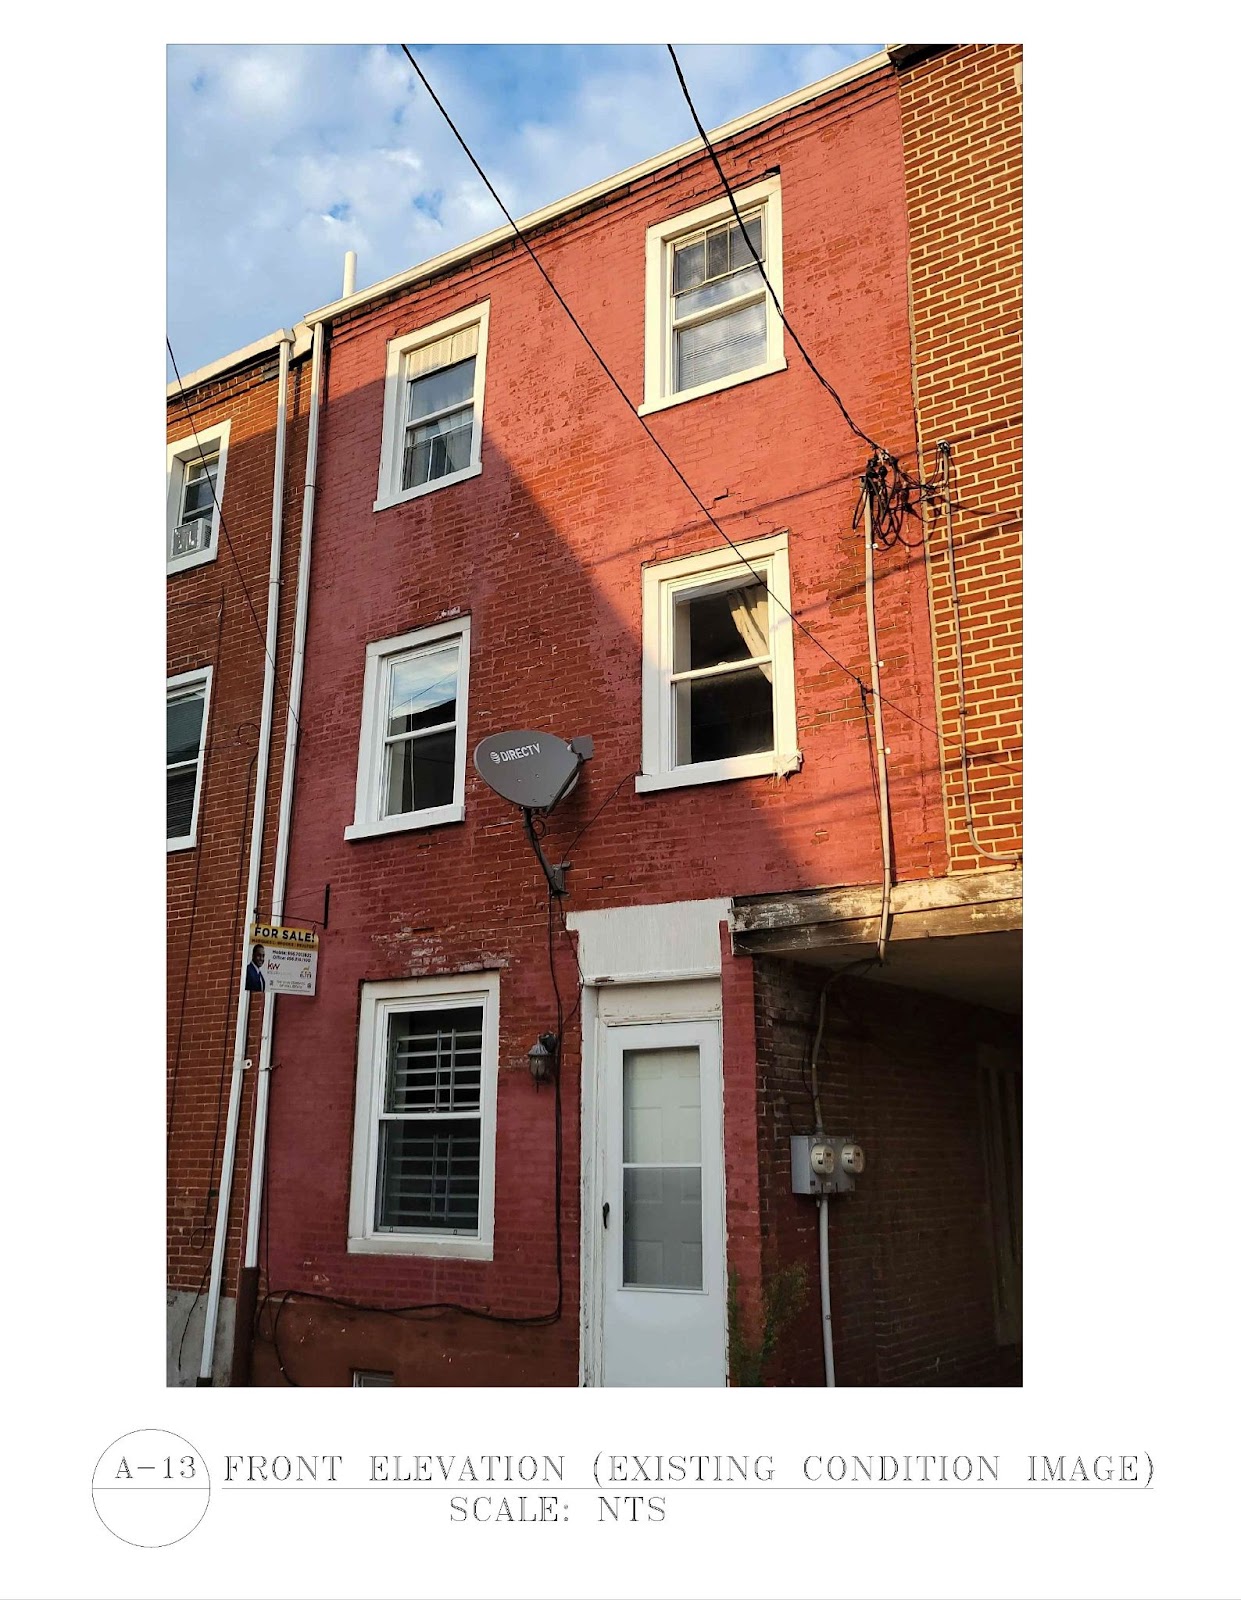
Figure 8
For a typical lintel installation, the L-shaped component’s horizontal part, or flag, is positioned at the center of the wall (see Figure 9). However, for this project, we have taken a different approach in line with the design choices. We have oriented the flag of the L-shaped lintel with the facade, as illustrated in Figure 10.
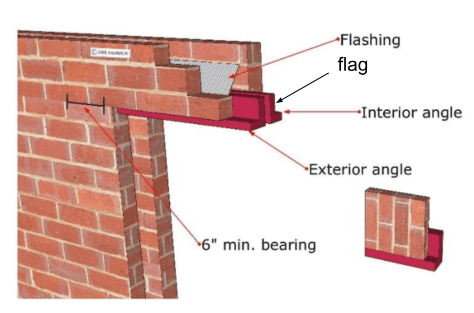
Figure 9
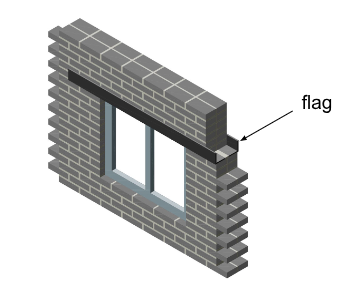
Figure 10
In Figure 11, you can see the process of installing the exterior lintel above the door opening.
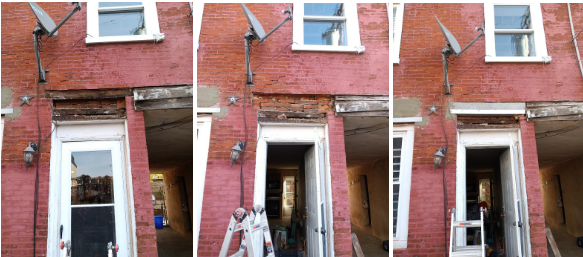
Figure 11: Exterior lintel installation
Architectural Facade Renovation
Undertaking a large-scale renovation project, such as a facade renovation, often involves navigating a complex web of challenges that can be unseen at the project’s outset. One of the primary issues is removing various items attached to the facade. These can range from antennas and gutters to lamps and urban electrical wires (see Figure 12). Each item requires careful removal to prevent damage to the building or the item itself. This process can be time-consuming and requires careful planning and coordination.
For instance, urban electrical wires often require correspondence with the electrical company to ensure safe removal. Timing this removal to align with the renovation schedule can be challenging. Even seemingly small items, like a lamp installed on the facade, can cause substantial logistical actions. Therefore, it is crucial to consider these potential challenges when planning a facade renovation and to work closely with experienced professionals who can navigate these complexities effectively.
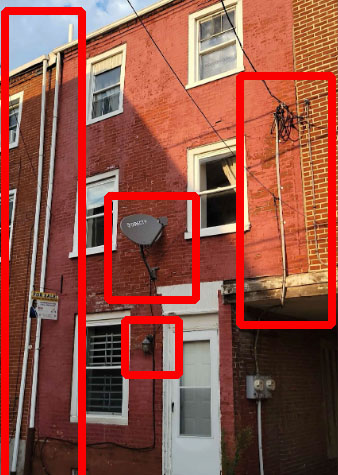
Figure 12
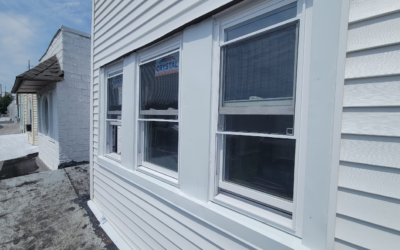
After addressing facade bulges and installing exterior lintels, we ensured the building had good structural integrity. Next, we installed the siding. Our goal was to create a functional and beautiful facade. To achieve this, we opted for a combination of materials, using Hardie® Shingle Siding for the first floor and Hardie™ Architectural Panel for the second and third floors. Additionally, we employed Hardie® Trim Boards to frame the openings and edges. For installing the Fiber Cement Siding (Hardie Panel siding), we followed a floor-by-floor approach. Let’s break it down:
First Floor
We started with meticulous groundwork. We positioned wooden strips strategically to create a sturdy base. These strips were firmly connected to the brick walls using bolts.
We carefully installed Hardie Shingle fiber cement on top of these wooden strips. The shingles were installed from the bottom up, securing them with bolts. This installation caused the facade to extend a few inches forward, requiring us to remove the downspout and replace it (see Figure 13).
After the siding was in place, we moved on to installing HardieTrim fiber cement around openings, corners, and edges.
Figure 13
As we made the transition from flashing to panels on the second floor, we added a Z-shaped flashing over the last row of shingles (see Figure 14). This is essential for proper water drainage and helps prevent water from getting behind the shingles.

Figure 14
Second Floor
Similar to the first floor, we began the second phase of our project by installing the necessary foundational wood strips. However, this time, we had an additional step to deal with. We had to manage the electric cables to ensure that everything looked seamless. The building had electrical cables attached, so we had to temporarily remove them in coordination with the electric company.
Next, we installed the Hardie Architectural Panel on top of the wooden strips and Hardie Trims to achieve the desired look.
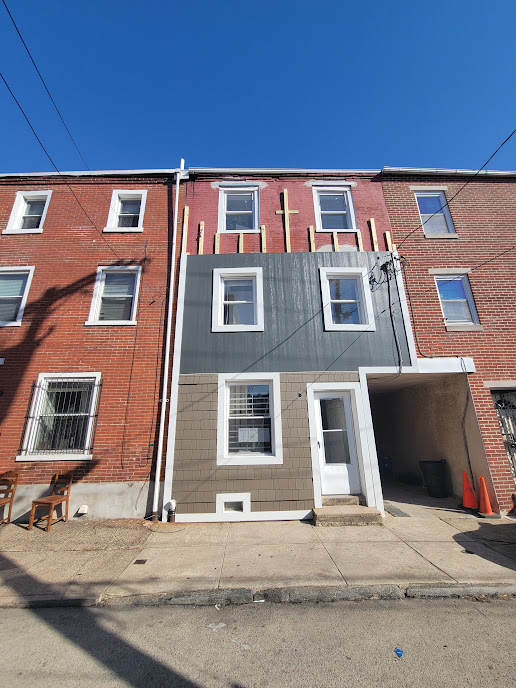
Figure 15
Third Floor
Just like the previous phases, we started by placing the foundational wooden strips. Then, we brought in the Hardie Architectural Panel siding and installed it on the wooden strips with bolts. Next, we installed the Hardie Trim. This phase marked the completion of the project, leaving the facade not only functional but also visually impressive.

Figure 16
Conclusion
The appearance and strength of a building are heavily influenced by its facade. Choosing the right siding can make it more resilient to weather and other types of damage. Our facade renovation project aimed to improve not only the physical appearance of the house but also its structural integrity. We fixed bulges in the facade and installed exterior lintels to enhance its durability and safety for those who live within its walls. Instead of using vinyl siding, we opted for Fiber Cement Siding (Hardi Panels), which is a durable, beautiful, and unique material. This project’s value surpasses monetary terms, as it creates a safe and comfortable living environment for years to come.

Figure 17
If you live in the Philadelphia or South Jersey areas and are considering a facade or home renovation project, we are here for you. Contact us for a FREE Consultation and Estimate.


0 Comments