A valuable part of a row house renovation job is to upgrade the siding. Siding renovation will give your home a fresh, charming look and also increase your home’s value. However, when installing new siding in an older row house you could face many challenges.
This article will focus on preparing to reside a Second Floor Bay Front of a two story Philadelphia row house. In our next article, we will focus on the actual siding installation process. This method can be used not only for Philadelphia row houses but similar houses built around the same time in New York City, Baltimore, and Boston.
Follow this article for our step by step preparation guide.
Evaluate the Existing Structure
Evaluating the existing structure is the most important step in the siding renovation project. Follow the steps below before starting the new siding installation.
Remove Old Siding
In any siding renovation project, depending on the situation, you can either remove the old siding or install the new siding over the old. We highly recommend removing the old siding. This allows you to evaluate the existing structure. It is important to know what is under the old siding and whether the structure underneath is strong enough to hold the new siding once installed.
What is Under the Old Siding
Once the old siding is removed you will most likely find asphalt shingles with plankboard behind that. It is the plankboard that requires careful evaluation. The plankboard must be strong enough to hold the new siding in place even in very strong winds. Also the wood that runs around the windows, in the corners, and at the top of the bay front cannot be rotted or compromised since this is where you will secure your J Channels and corner posts. (J channels are used as a decorative finish and will help drain water away from these areas) Figure 1 shows Asphalt siding found when the old siding was removed.
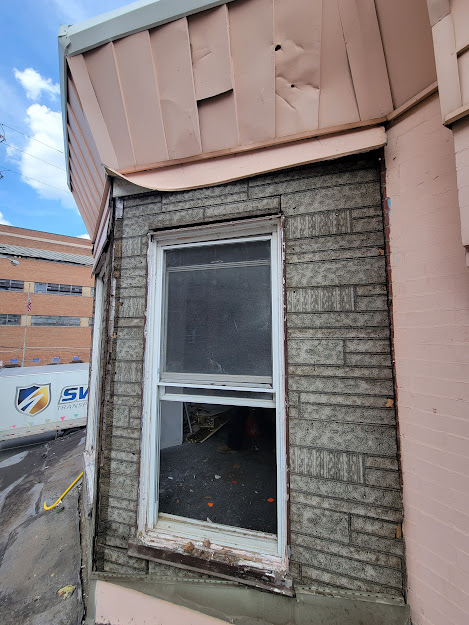
Figure 1
Check the Integrity of the Structure
To check the integrity of the plankboard, take a 3 inch screw and drill it into any wood you want to evaluate. This includes all areas where you will nail or screw in your new siding as well as the wood where the J Channels and corner posts will be placed. Be sure to test multiple areas to ensure all the wood is good and don’t forget the corners. While checking, if the screw catches the wood beneath, the plankboard is strong enough to use, if not the area will need some additional prep work.
Prepare for New Siding
Once you know the integrity of the structure, you can start to prepare for the new siding installation. The two most important parts of a siding renovation job is making sure the area is watertight and that the structure is solid.
Replace Rotted or Damaged Wood
In areas where the screw does not catch or if you find holes caused by rotted wood, you can install new wood boards to strengthen these areas. Keep in mind if you are installing new wood, make sure your screws are long enough to catch the structure behind it so it becomes a solid surface. Also, if installing new wood next to a brick exterior wall, get the new board as close to the brick wall as possible to prevent leaks. Figure 2 shows an area where the wood is missing; this area needs new wood installed before installing the new siding. Also shown is new wood installed close to the brick wall.
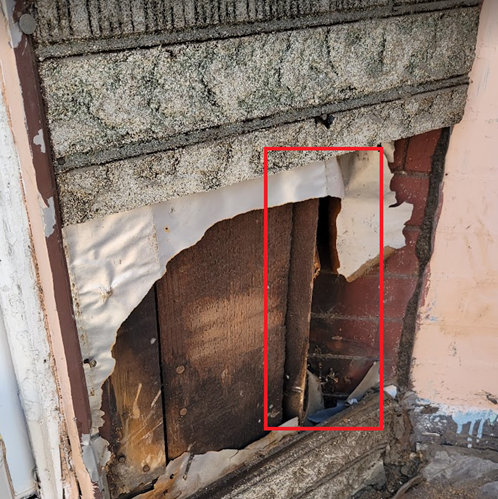
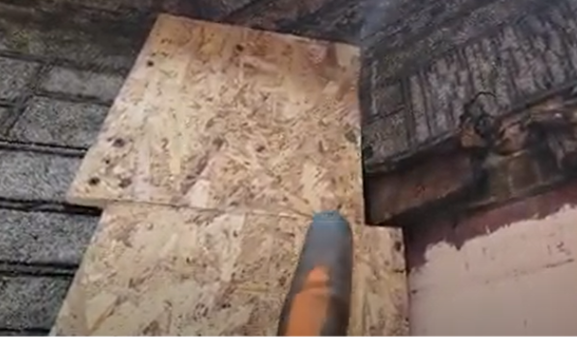
Figure 2
Another area to check for rotted or damaged wood is where the top of the wall to be sided meets the roof, this is the very top of the bay front. Remove the capping from this area and check the integrity of the wood to ensure you will have something to secure your moisture wrap and capping to at the end of the siding renovation project. You may need to put a shingle or piece of plywood there and cover it with muck and fab.
Make All Areas Watertight
While preparing for the siding renovation of your row house second floor bay front, keep in mind that the weakest and most likely place that water will penetrate is where the siding shingle meets the roof below. To keep this area watertight, the roofing material should always go under the siding shingles. Once you clean up the area where the roof meets the wall, secure the existing roof with roofing nails, then add a layer of muck and fab to create a seal. Next, put metal flashing over the muck and fab. Metal flashing comes in a roll: unroll it, bend it to fit the area between the roof and wall, and nail it in place. Add another layer of muck and fab over the installed flashing. This process will stop water from penetrating the structure. Figure 3 shows this process.
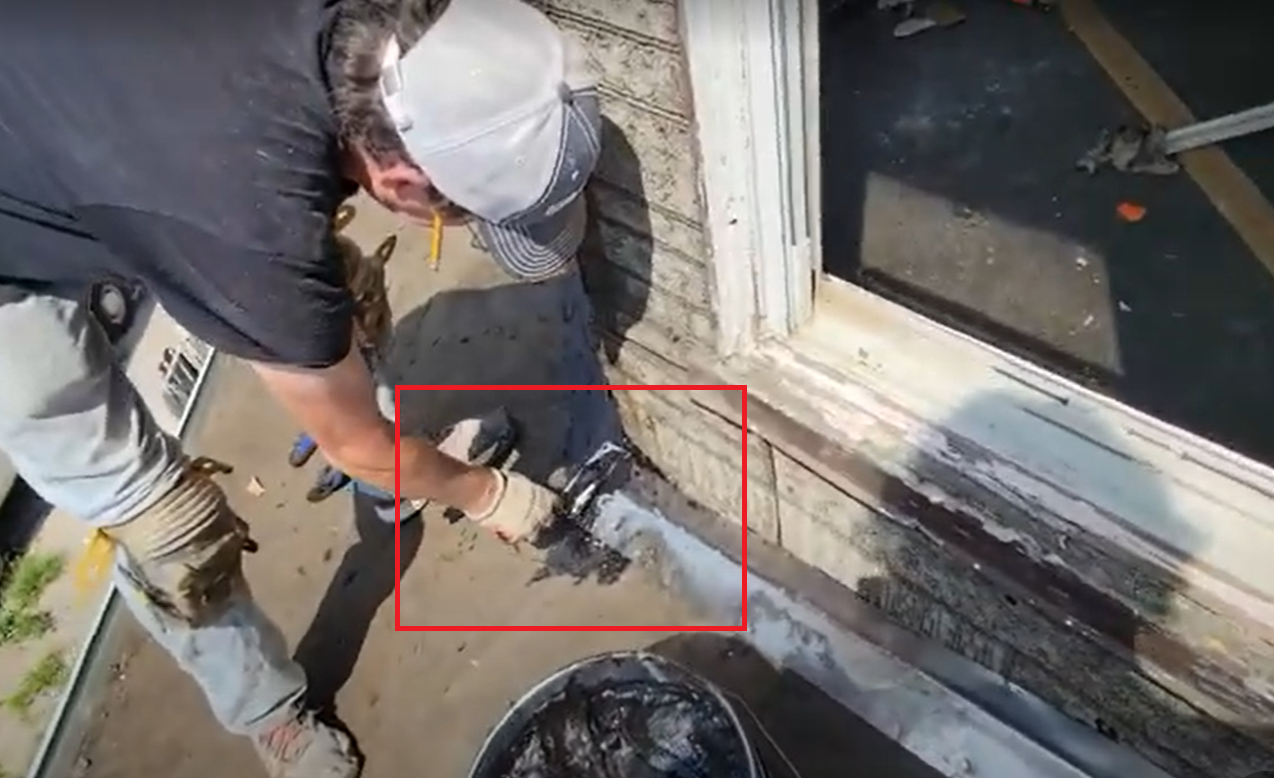

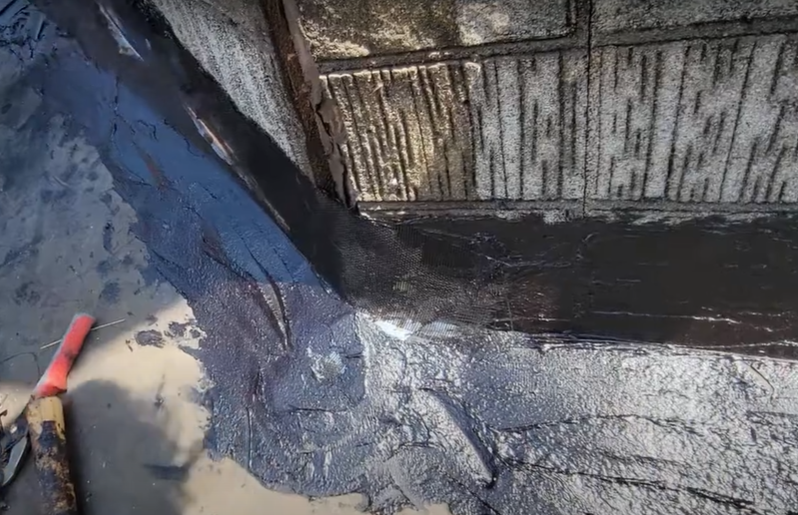
Figure 3
Remember, from earlier, if you are replacing any wood where the bay front meets the brick wall, you should put the new wood as close to the brick as possible. This new wood is where you will install the J Channel at the end of the project, helping to make this area waterproof.
Install a Moisture Barrier
We highly recommend installing a moisture barrier, such as Tyvek, under the new siding. Tyvek, which is a brand of synthetic flash spun high-density polyethylene fibers, helps protect the home against damaging winds and rain. Tyvek will also prevent any water that gets behind the siding from penetrating the house Figure 4 shows the area to be sided covered with a moisture barrier.

Figure 4
A moisture barrier such as Tyvek can be used to cover any gaps in the old paper that was previously used to wrap the structure. Be sure to cover the entire area from the installed metal flashing all the way up and over the top of the area to be sided. Remove the old capping at the top of the wall temporarily and bring the moisture barrier over the edge. Replace the capping at the end of the siding renovation project.
Preparation Complete, The Next Step…
You should now be ready to start installing the new siding. Click here to follow our step by step guide on how to install siding on a row house second story bay front.
Preparing for a siding renovation project in a row house second story bay front is a difficult process that requires experience and expertise. The preparation can have a significant effect on the final result and even determine how long the new siding will last. Siding preparation should be done by professionals, especially in old Philadelphia row houses where unpredictable situations may arise when the old siding is removed.
Matrix Company Solutions Corp. has gathered a team of experts to do siding renovation work in the Philadelphia area. Siding preparation and replacement are just a few of the many renovation and restoration construction services we offer. With over 25 years of experience, we are one of the best renovation construction companies in the Philadelphia area. Contact us today via our FREE Consultation Service Link.


0 Comments
Trackbacks/Pingbacks