Are you planning to install a kitchen backsplash in your home? But you don’t know how? Don’t worry! We can help you.
A kitchen backsplash is a vertical surface installed on the wall between the kitchen countertop, stove, sink, and upper cabinets (see Figure 1). It protects the wall from moisture, grease, and food splatters and adds an aesthetic element to the kitchen. Installing a tile backsplash can be a great way to spruce up the look of your kitchen. But it can be intimidating if you don’t know where to start.
In this article, we will cover the key steps for installing a tile kitchen backsplash. With this step by step guide, you will be able to easily install a beautiful tile backsplash in no time. We will take you through each step of the process, from selecting the right tools and materials to cutting and installing the tile. So get ready for an easy and rewarding DIY project!
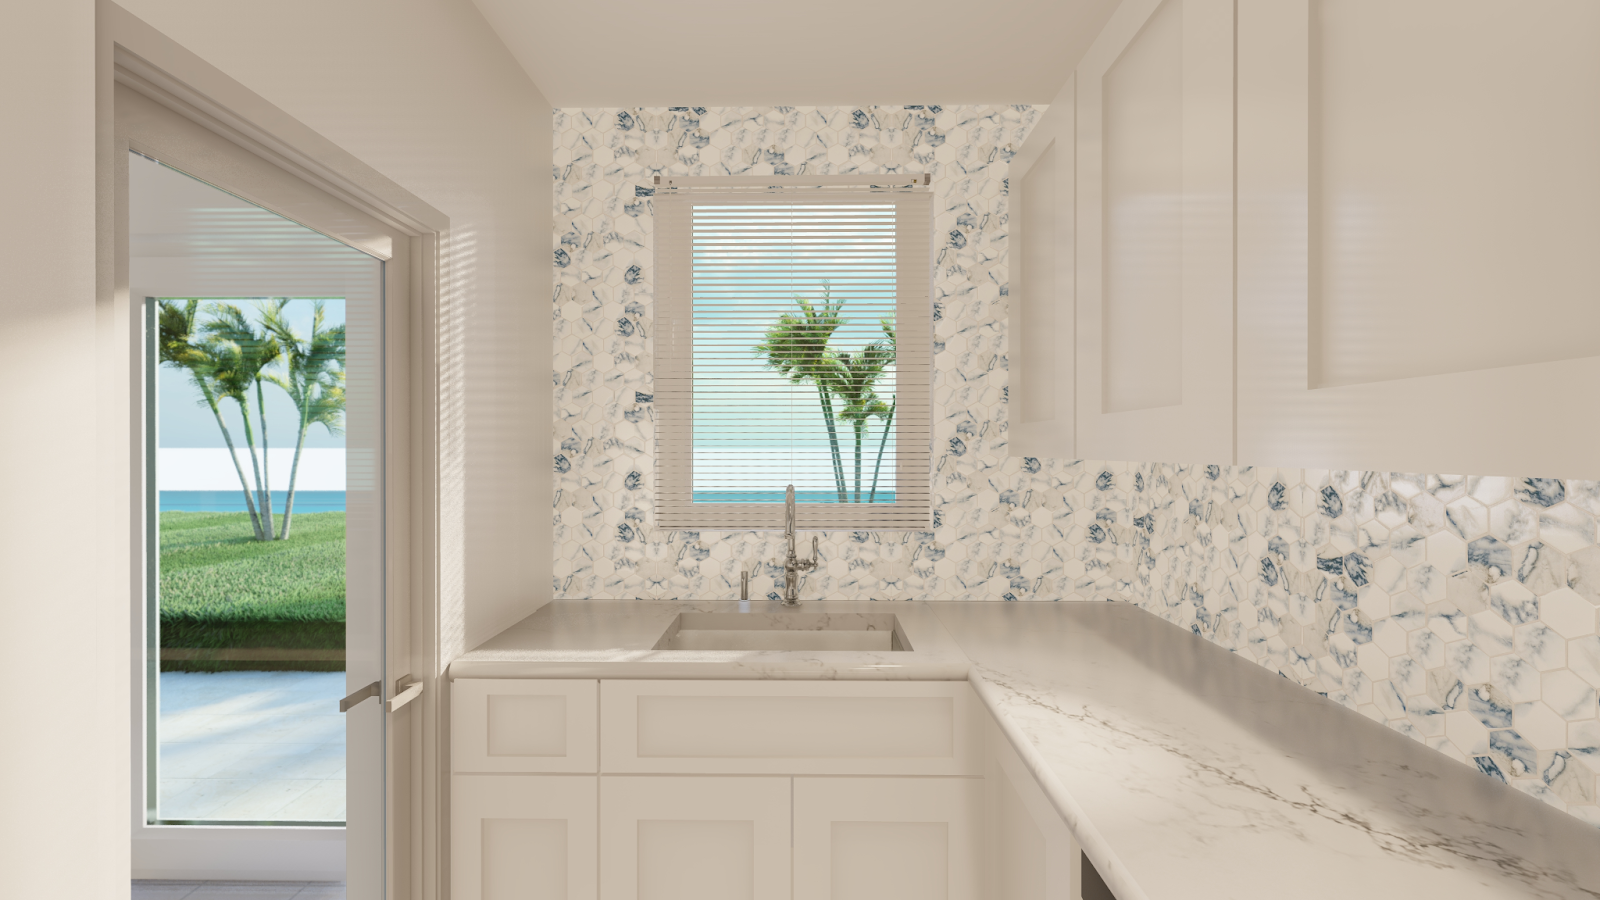
Figure 1
Tools and Materials
Here is a list of tools and materials you will need to get started:
Tape Measure
Level
Grout Float
Notched Trowel
Tile Cutter
Utility Knife
Screwdriver
Drill
Mixing Paddle
Sponge
Cloth
Bucket
Painter’s Tape
Cardboard
Pencil
Screw
Sandpaper
Outlet Extenders (if needed)
Safety Glasses
Gloves
Tile
Tile Spacers
Edge Trim
Grout
Grout Sealer
Caulk or Silicone Sealant
Thinset Mortar
Trisodium Phosphate
Joint Compound
1 x 4 inch Board (for a ledger board, if needed)
Preparation
Installing a tile backsplash is an exciting project that can transform the look of your kitchen. Before you start, however, it is important to take the time to do some preparation. This will ensure that the project goes as smoothly as possible and that you are happy with the end result.
1. Measure the Area and Purchase the Tile
The first thing you need to do is to measure the height and length of the area where the backsplash will be installed to determine the number or square footage of tile you will need to purchase.
You can choose between different types and looks of tile. One of the most widely used options is a mesh-backed tile. A mesh-backed tile is a type of tile that has a mesh material attached to the back of the tile (see Figure 2). It allows you to install small tiles as a single sheet. The mesh backing helps to hold the tiles in place and makes the installation process go quicker and easier than installing each individual tile.
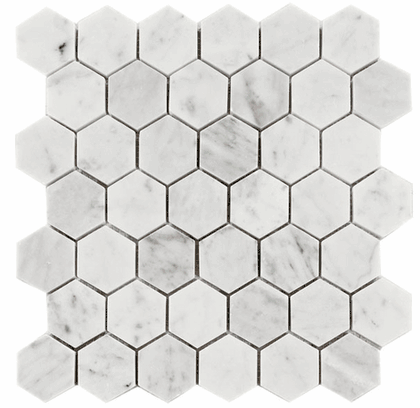
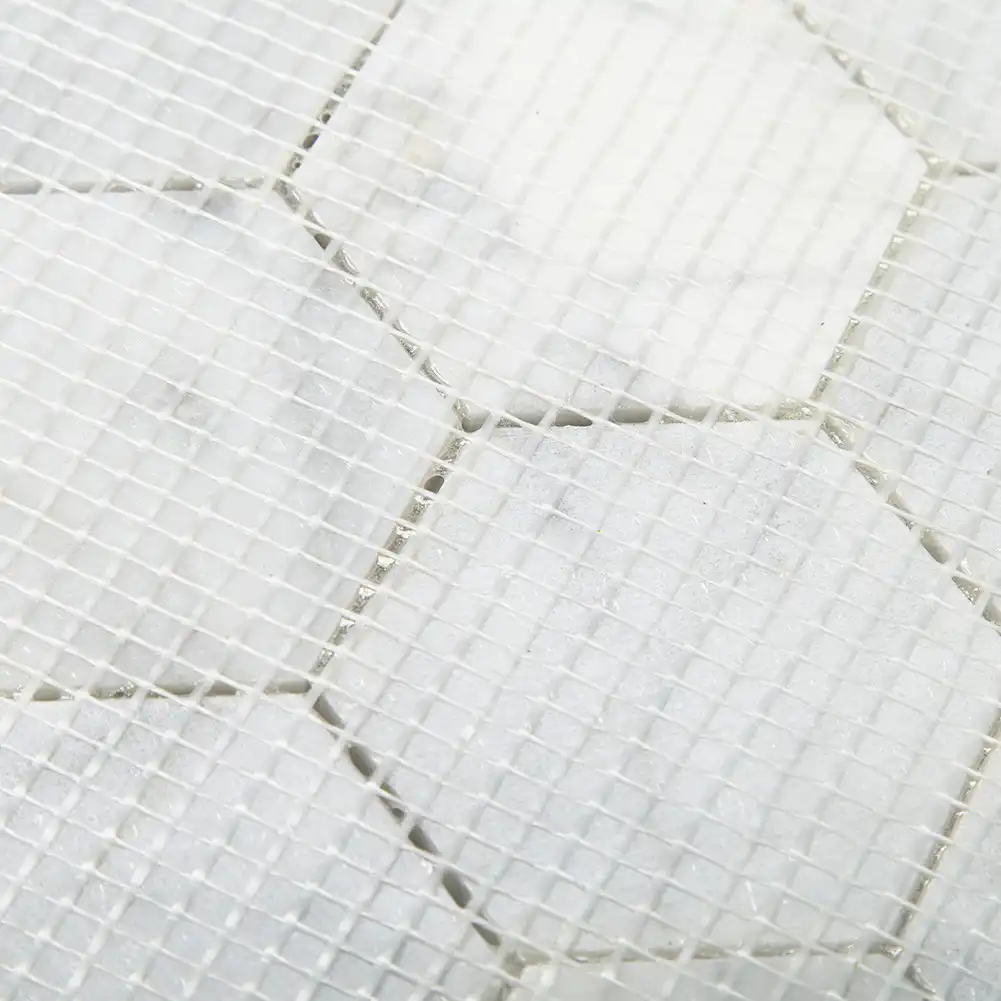
Figure 2
Once you choose your preferred tile, calculate the amount of tile needed and add on an extra 10% for cutting and waste.
2. Remove Outlet and Switch Covers
Turn off the power to the kitchen and remove any switch plate or outlet covers. Cover the outlets with painter’s tape to prevent mortar or grout from getting on or in them and to prevent damage during the tiling process.
3. Clean and Prepare the Walls
The area where the backsplash will be installed should be flat, clean, and smooth. Therefore, fill in any cracks or holes with joint compound, let it dry, and smooth the area with sandpaper. If the surface of the wall is glossy, sand it for better adhesion.
Next, wipe the wall with a damp sponge to make sure the wall is free of grease, dirt, and dust. You can remove tough stains using a mixture of trisodium phosphate and water. It is important to follow the manufacturer’s instructions carefully and to use the solution with caution, as trisodium phosphate can be harsh and irritating to the skin and eyes.
4. Prepare the Area
Move all the freestanding appliances away from the walls and cover the countertops with drop cloths or flattened cardboard to protect it from damage. Secure with painter’s tape to keep the area protected.
5. Determine Your Starting Point
Before determining your starting point, remember that you will need to leave a ⅛ inch gap between the tile and the cabinets or countertop. This gap allows for the expansion and contraction of the tile due to temperature changes and helps prevent cracking or breaking.
Keeping that in mind, draw a straight horizontal line on the wall ⅛ inch above the countertop. This line will be used to determine the placement of the first row of tile.
Next, you should determine where to install your first tile. This is important to ensure the tiles are aligned and evenly spaced. You can either start from the corner or center of the wall or at a focal point (ex: stove, window, or sink).
Starting from the center is generally recommended when tiling a kitchen backsplash. This ensures that the cuts on the edges are equal and symmetrical, making the installation look neater and more balanced. However, if the wall has an irregular shape, starting from the corner may be a better choice. Always lay the tile out first to determine which way will give you the desired look.
6. Install a Ledger Board-if needed
In areas where there is no countertop, you will need to install a ledger board under the reference line to support the tile until the mortar cures (see Figure 3). A straight 1 x 4 inch board is a good choice.
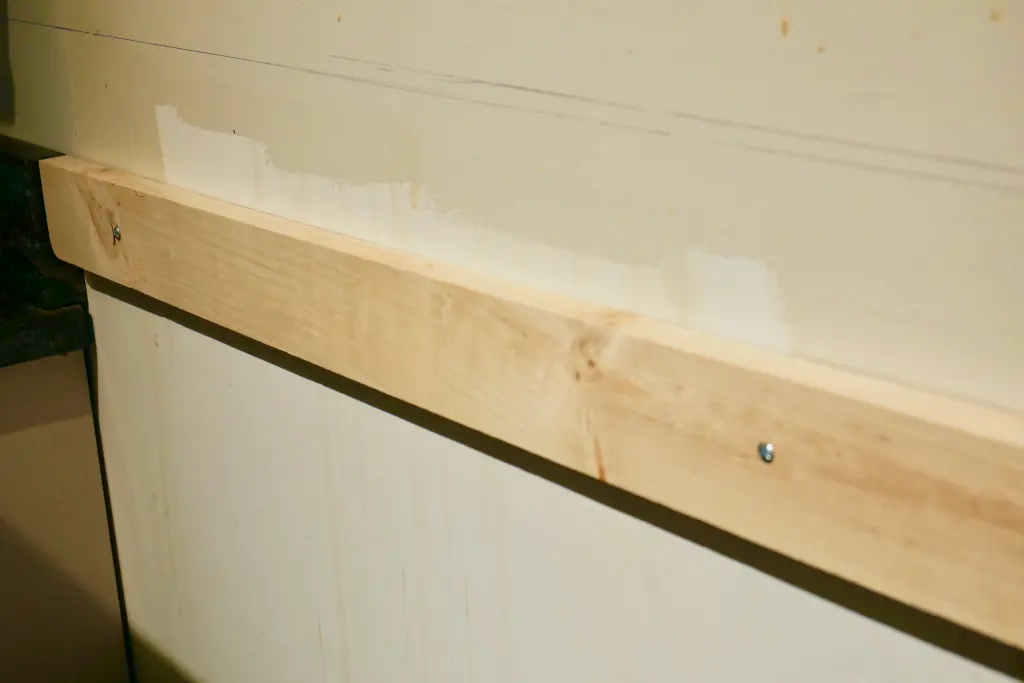
Figure 3
The height at which you install the ledger board will need to be adjusted to match the height of the countertop. This will allow the tile to extend all the way to the countertop height, providing a continuous and seamless backsplash. It is recommended to install the backsplash and ledger board (if necessary) a little lower than the stove height. This will prevent any gap between the bottom of the backsplash and the top of the stove. (see Figure 4)
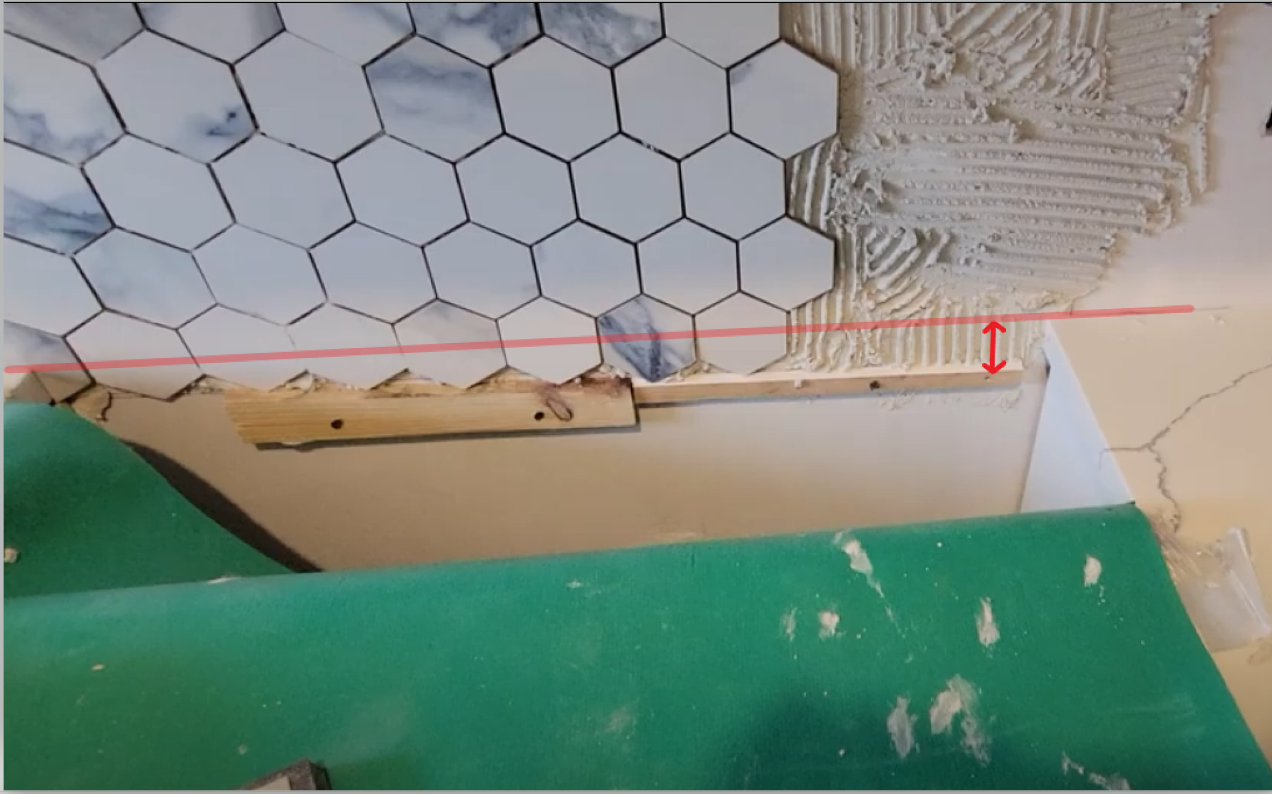
Figure 4
To attach the ledger board, cut it to length and screw it to the wall. It is important to make sure that the screws are driven into a solid part of the wall, such as a wall stud, to provide the necessary support.
When installing the ledger board, make sure that it is level and straight so that the tile will be installed evenly. You may also need to make additional cuts to the ledger board to accommodate any obstacles or curves in the wall.
7. Dry Fit the Tile
It is best to measure and plan the tile layout before starting to ensure a smooth and efficient installation process. Lay the tiles out on the counter to plan the pattern. You can change the starting point and the pattern in this step to achieve your desired look.
Step by Step Installation
Now that you have prepared everything you can start installing the tile. It is important to note that this guide only provides a general overview of tile backsplash installation. Be sure to read the manufacturer’s instructions and seek professional assistance if needed.
1. Apply Thinset Mortar
Follow the manufacturer’s instructions on how to use the mortar. Start by applying a thin layer to the wall from the starting point using a trowel. Start from the bottom and work your way up. Spread the mortar using the notched side of the trowel at a 45-degree angle. Remember to apply mortar to a maximum 3×3 foot area at one time to prevent it from drying out.
2. Lay the Tile
Place the first tile onto the mortar, starting from the bottom at the starting point, and continue laying the tiles outward and upward according to the predetermined pattern. Press the tile firmly into the mortar using a grout float. Remember to put spacers between each sheet of tiles if using mesh-backed tile or between each tile if using individual tile. (see Figure 5).
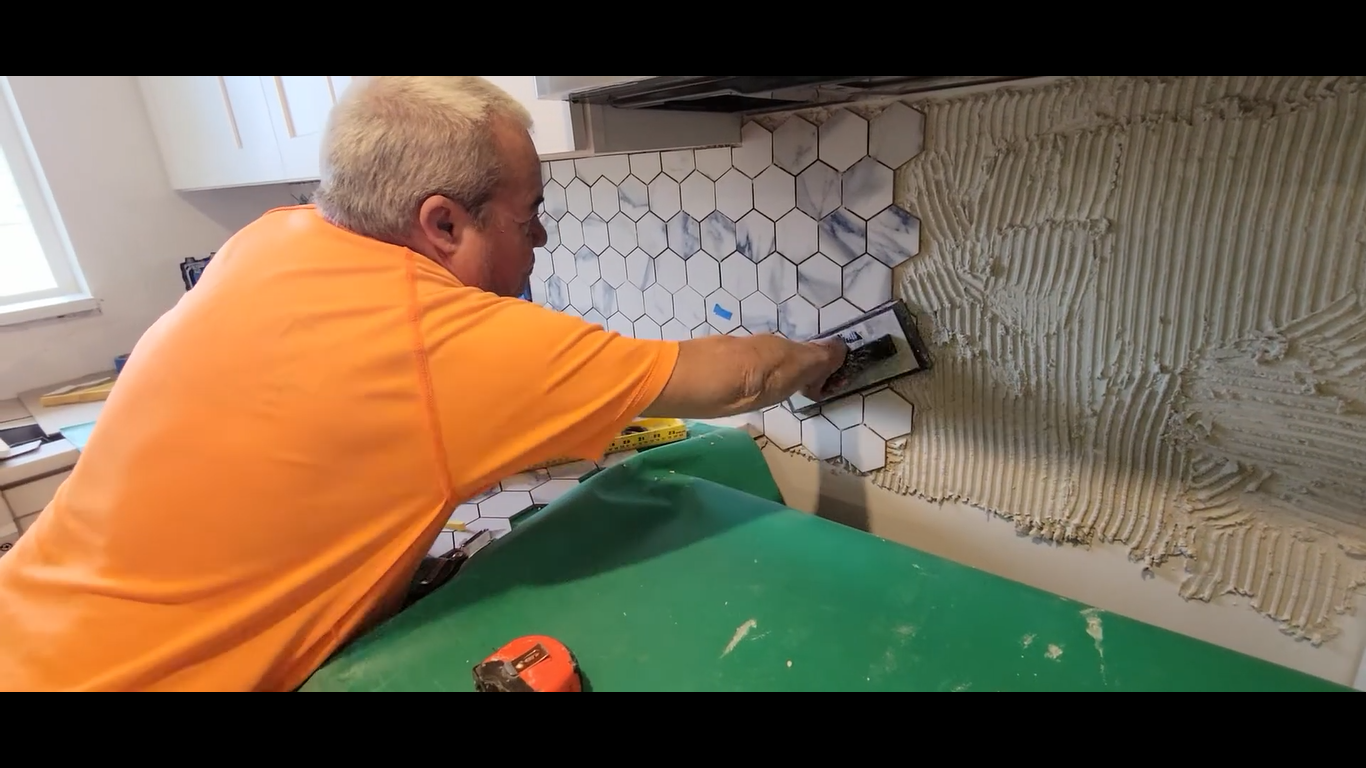
Figure 5
3. Make Cuts Where Required
Cut tiles are inevitable. Cut border tiles as needed to fit around outlets and corners. You should install the border tile using the same mortar and process as the main tile.
For mesh-backed tile, in some cases, cutting the mesh backing with a utility knife works to cut the tile to the proper size. But if cutting the mesh does not give you the appropriate size and shape or you are not using a mesh-backed tile, you must use other cutting tools.
There are different tools for cutting tile, such as a tile cutter, a wet saw, and a tile nipper (see Figure 6). Choosing the proper tool depends on the tile’s size and type of material. In a separate article, we explain the most common tools for cutting tile and how to choose the right one for your project.
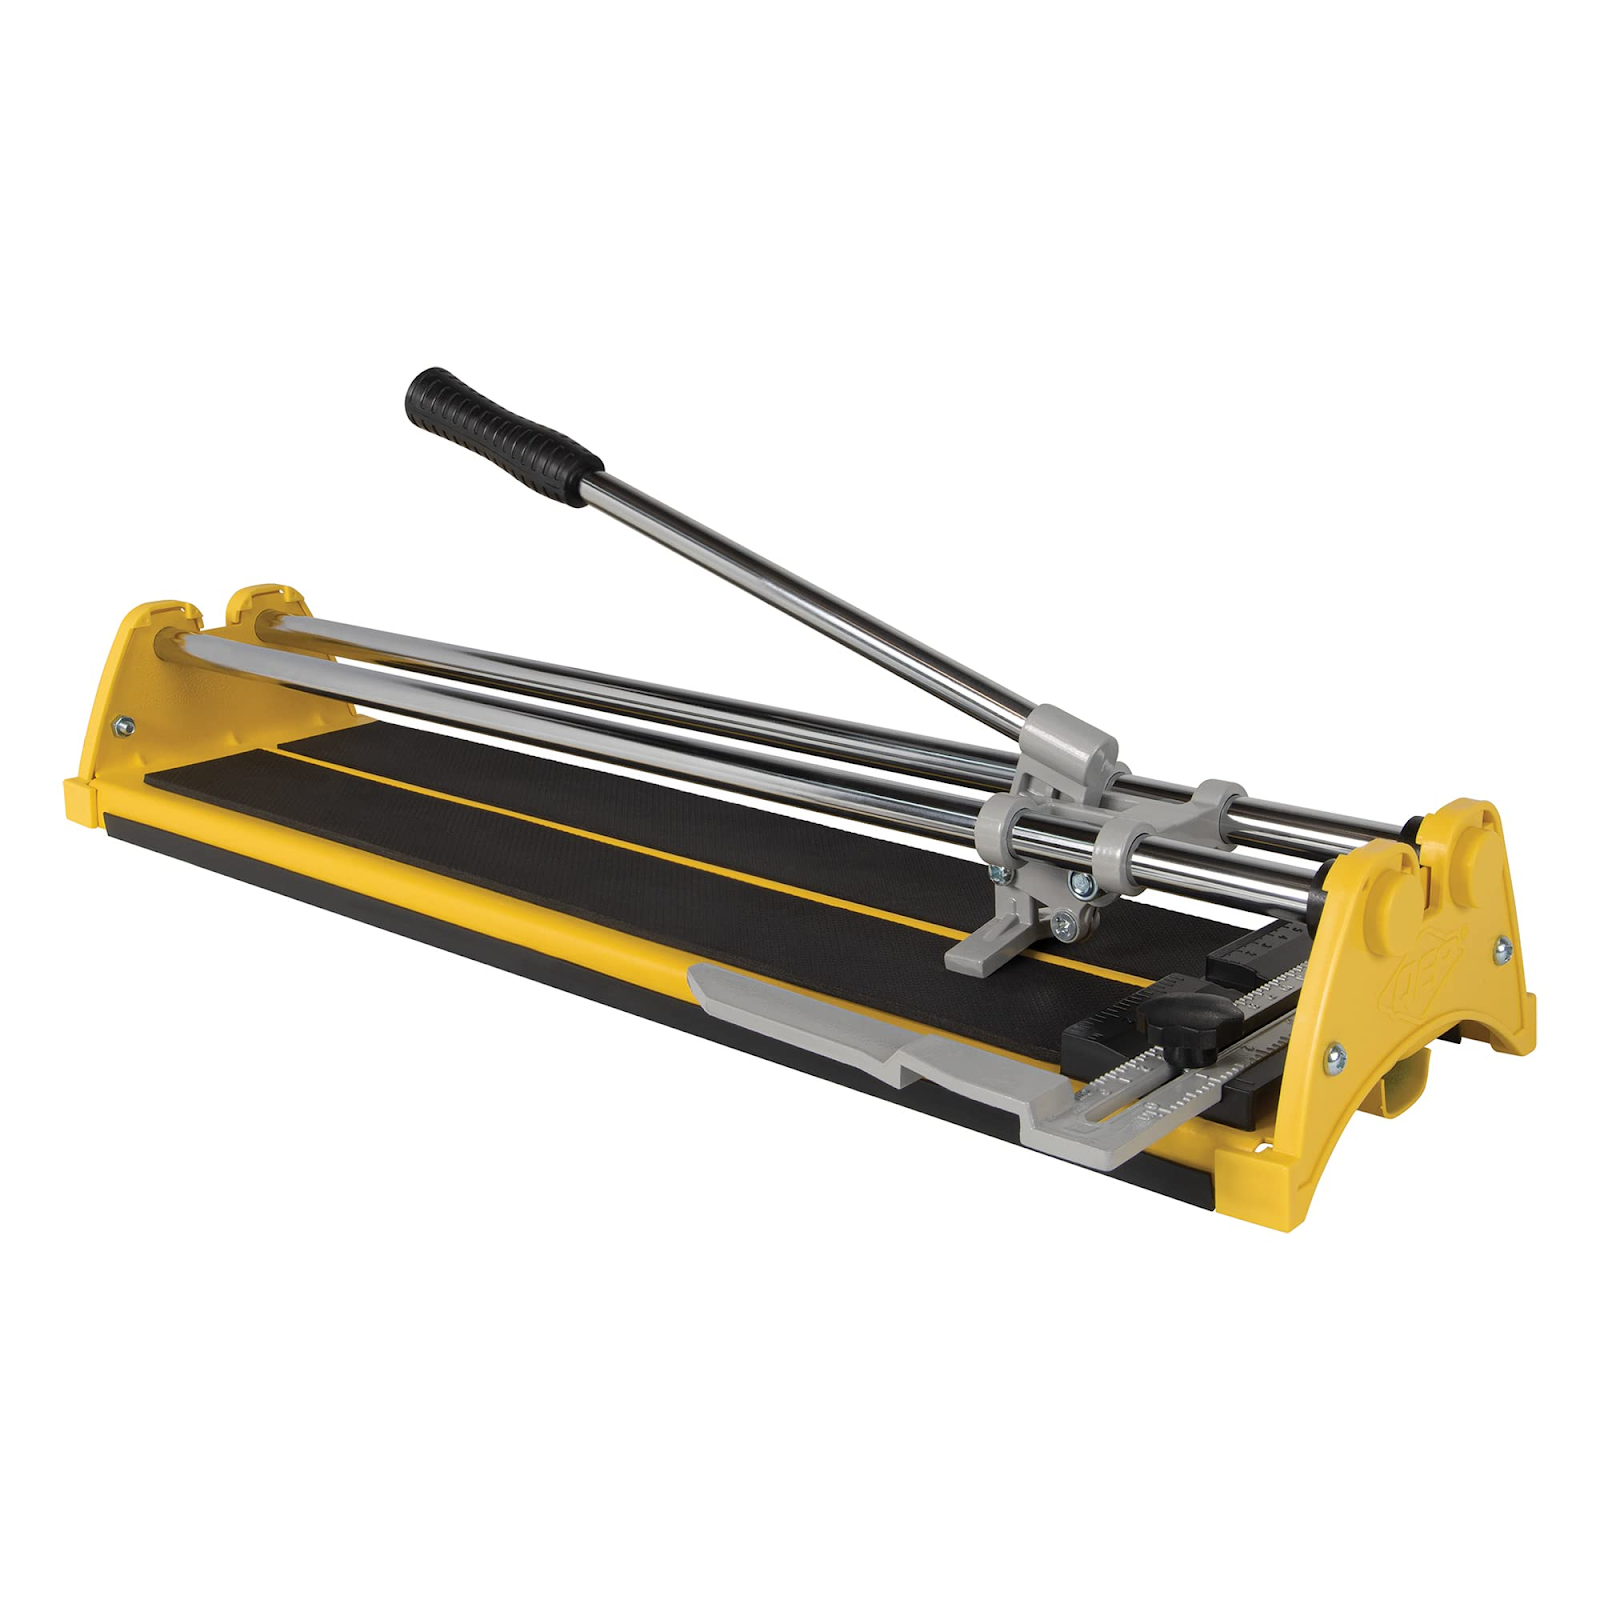
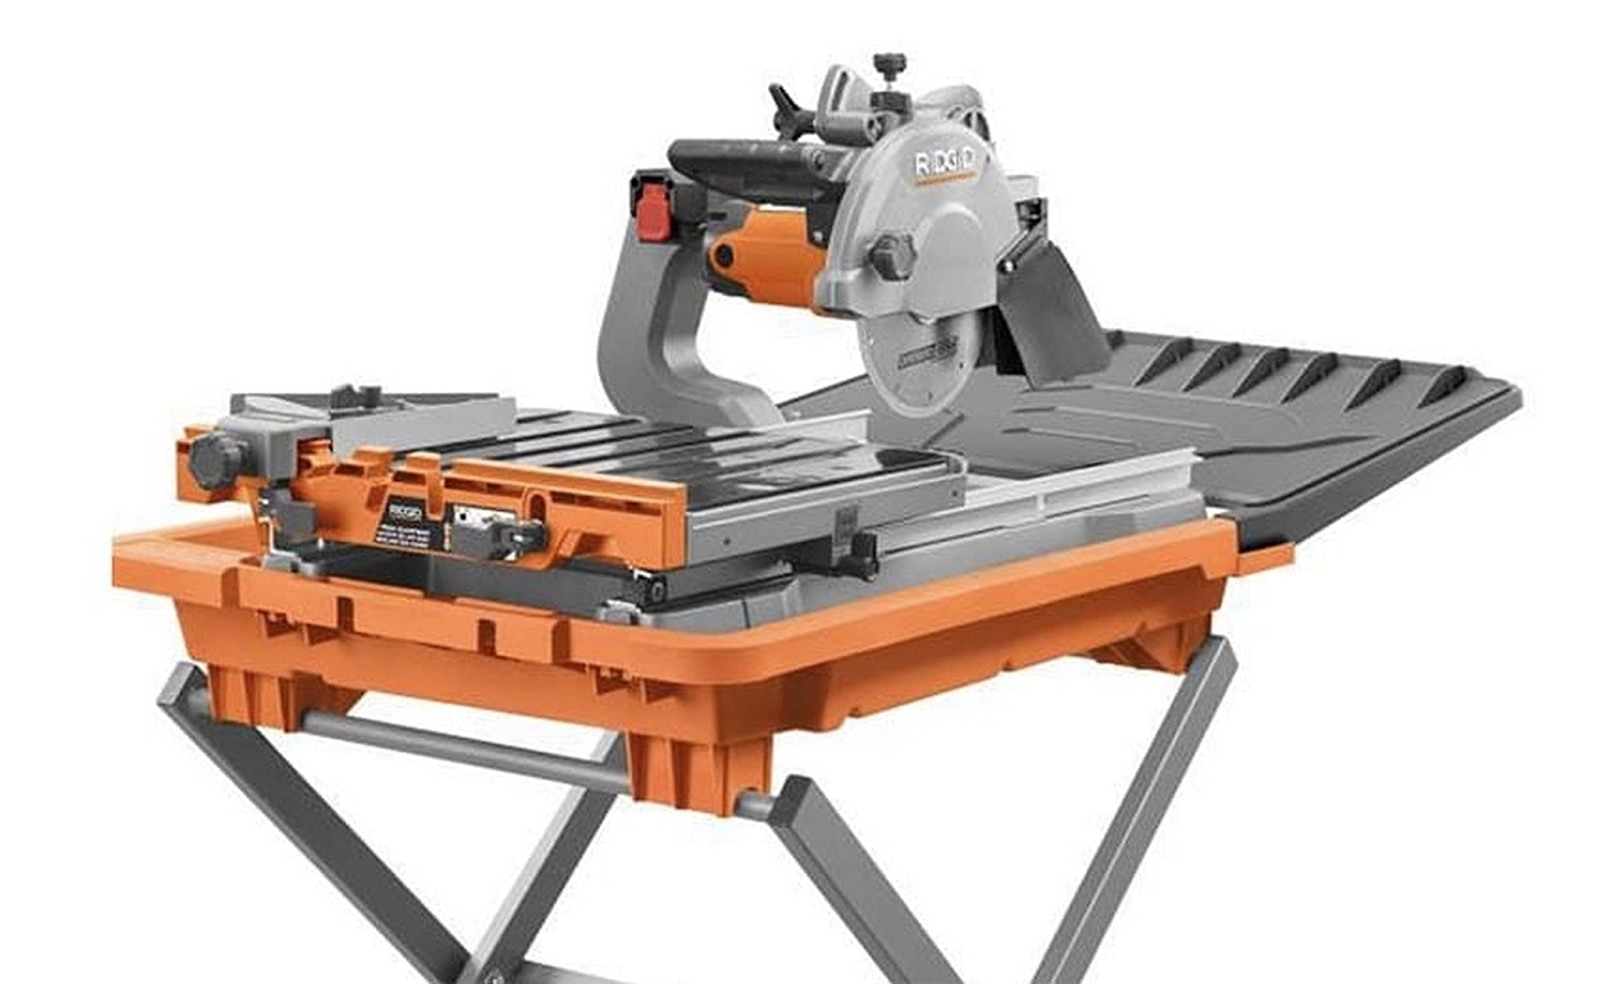

Figure 6: From left to right: Tile cutter, Wet saw, Tile nipper
In this article and for our example, we used Martinque Azul Porcelain Mosaic, a 10 x 12 inch tile for the backsplash. The two most common ways to cut porcelain tiles are a wet saw and a tile cutter. Porcelain is a very hard and dense material and it can be difficult to make clean cuts with a tile cutter, especially for small tiles. Therefore, a wet saw is generally the best tool for cutting porcelain tile.
Please note, if you have a large number of small porcelain tiles to cut or need to make precise cuts, using a wet saw is the recommended choice. Our example was a small-scale project with simple cuts therefore a tile cutter worked for us (see Figure 7).
If you are wondering how to choose the right tile cutting tool for your project, look for our other article that will explain each tool in depth.

Figure 7
Note: Before cutting any tile, read the cutting tool’s manufacturer’s instructions and follow all safety precautions. It is important to wear protective gear, such as safety glasses, to protect yourself from dust and debris.
4. Install EdgeTrim
Edge trim is a type of trim piece used to finish the edges of a kitchen backsplash. It is typically used around openings, such as windows, or at the end of a backsplash run, to provide a neat and finished look (see Figure 8).

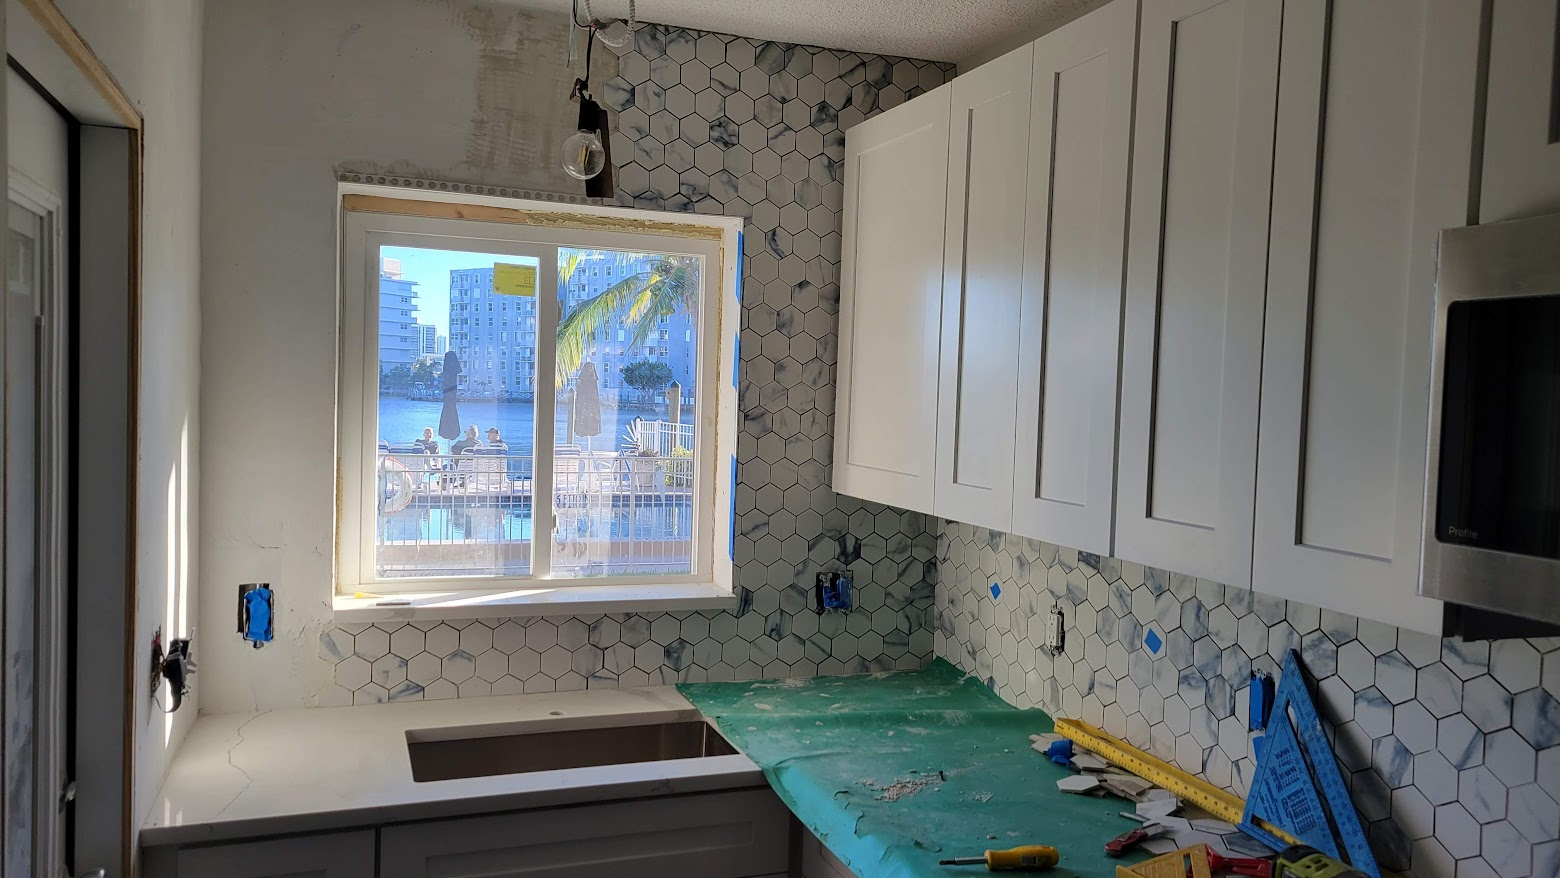
Figure 8
Edge trim is available in a variety of materials, such as metal, plastic, or decorative molding. The type of trim you choose will depend on the design of your kitchen and the type of tile you are using for the backsplash. <Read about different Edge Trims here>
In this article, our example shows the use of a Straight Edge Trim Profile. (see Figure 9)
To install edge trim measure the length of the opening or backsplash end run where it will be installed. Cut it to size then apply a small amount of tile adhesive to the back of the edge trim. Be sure to follow the manufacturer’s instructions for the edge trim you are installing. Carefully place the edge trim, making sure it is straight and level. Use a small sponge to clean any excess adhesive that may have squeezed out from the edges. Allow the adhesive to dry completely, according to the manufacturer’s instructions.

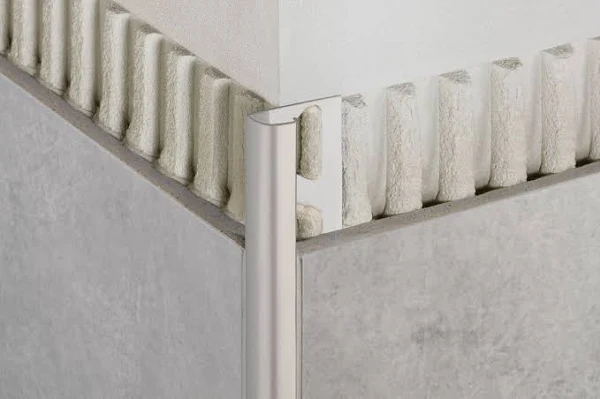
Figure 9
Note, the exact installation process may vary depending on the material and type of edge trim you choose. The trim may be installed using glue, screws, or another type of fastener (see Figure 10). It is important to follow the manufacturer’s instructions for the specific product you are using.
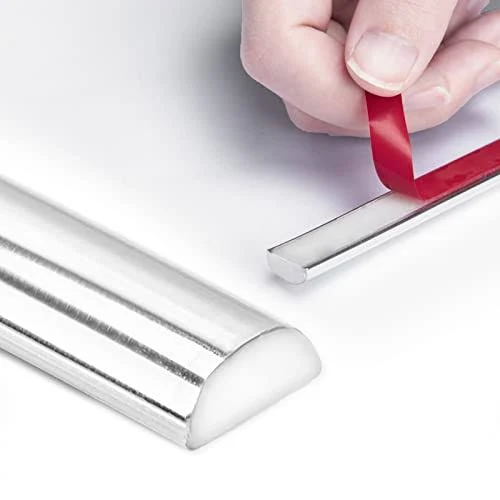

Figure 9
5. Clean Mortar from the Gaps
Clean the gaps between the tiles using a utility knife and cloth of any thinset mortar before it cures to allow space for grouting.
6. Apply the Grout
We recommend using poly-blend sanded grout for ⅛ inch or greater joints and poly-blend unsanded grout for joints smaller than ⅛ inch.
Wait 12 to 24 hours for the mortar to dry before removing all the spacers and then clean the tile with a damp cloth. Mix the grout according to the manufacturer’s instructions and spread it diagonally over the tiles with a grout float. Make sure to completely fill the spaces between the tiles. Wait 10 minutes and wipe away any excess grout with a damp sponge. Don’t forget to remove any excess grout in the space between the countertop and tile and the tile and upper cabinets. Once the grout has completely dried, clean the tiles with a dry cloth.
7. Seal the Grout
Wait at least 24 hours for the grout to dry. Then apply grout sealer to the grout lines to protect them from moisture and staining.
8. Apply the Caulk
If you missed any excess grout in the space between the top or bottom of the backsplash along the walls, remove it now. It is more difficult to remove grout at this step since it has completely dried. To remove missed grout, you can try using a Grout Haze Remover or a solution of vinegar and water. You will need a scrub brush or grout removal tool for this.
It is important to note that Vinegar should not be used on any grout that has already been sealed. Vinegar is acidic and can damage the grout sealer leading to water penetration at the grout line.
Once the area is clear of any excess grout, fill the gap with caulk or silicone sealant.
9. Re-install the Electrical Covers
As the last step, consider installing electrical extenders. (see Figure 11) It may be necessary to install an outlet extender when tiling a kitchen backsplash because the tile, when installed, will sit higher on the wall than the original electrical outlet, making it difficult or impossible to access the outlet. By using an outlet extender, the electrical outlet is moved forward, making it easily accessible even with the tile installed. It also ensures that the outlet can be used safely and effectively.
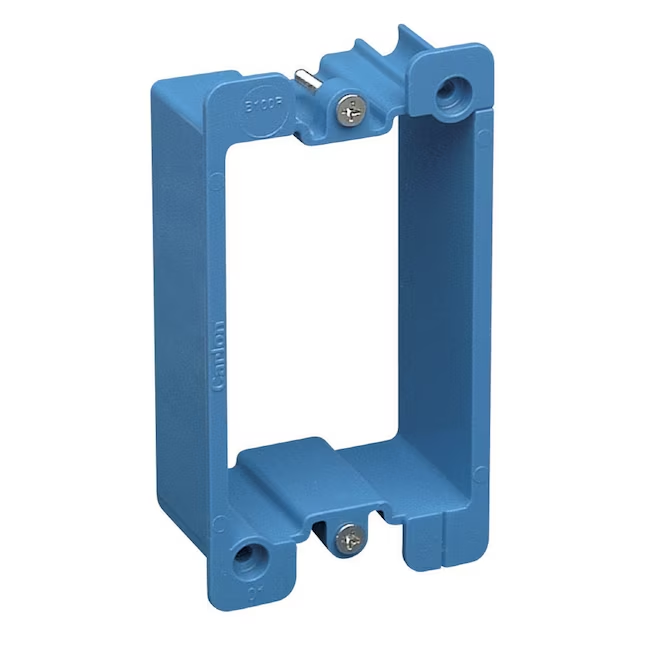

Figure 11
Finally, replace the outlet and switch plate covers and enjoy your beautiful backsplash.
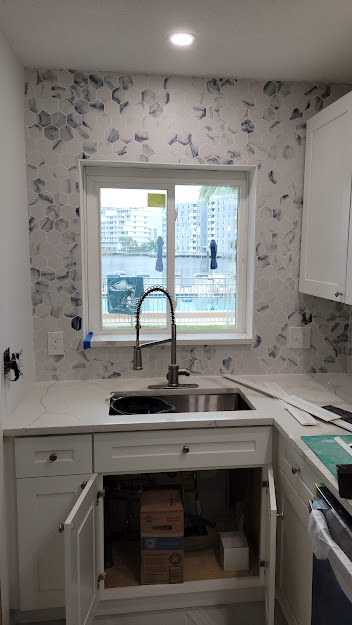
Figure 12
Care and Maintenance after Installation
Tiling a kitchen backsplash is a great way to add style and character to your kitchen. But after installation, proper care and maintenance must be taken to ensure that your backsplash looks its best for years to come. Although there is no strict rule for maintaining tile, the following tips will help you keep your kitchen backsplash looking as good as it did the day it was installed.
- Use a gentle, non-abrasive cleaner to wipe down the tile regularly. Avoid using harsh chemicals or abrasive scrubbers, as these can damage the grout or tile.
- Sealing the grout will help protect it from moisture and staining. Reapply the sealer every few years, or as needed, to maintain its effectiveness.
- Spills, particularly those containing acidic substances, can stain or damage the tile or grout. Wipe up spills immediately to prevent them from setting in.
- Tile can crack or chip if hit with a heavy object or if subjected to a sharp impact. Be careful when moving objects near the backsplash.
- Regularly inspect the tile and grout for any signs of damage and address any issues promptly to prevent them from becoming larger problems.
Conclusion
So, there you have it; a perfect backsplash step by step installation guide to help you make your kitchen upgrade seamless. Of course, many things should be considered when taking on this project, but by following the steps above you will be able to install a gorgeous new backsplash with ease and in no time.
All in all, tiling a kitchen backsplash can be a quick and easy addition to your home. There are challenges throughout the installation process as well as the need for some specialized tools and some knowledge of the materials you are using. Therefore if you are not comfortable doing the work yourself, we highly recommend hiring a professional contractor; by doing so you will have a great looking backsplash that you will be proud to show off for years to come.
Matrix Company Solutions Corp. is the ultimate choice, if you live in the Philadelphia area, and need any renovation service including tile installation. We have many years of experience and we would love to help you make your home a better place to live. Contact us today via our FREE Consultation Service!


0 Comments