Natural gas is one of the most affordable and effective fuels for household heating and cooking. In Philadelphia, most houses use gas for their furnace and hot water heater. However, we all know how dangerous natural gas can be. Therefore, it is crucial to identify problems that might compromise the safety of home occupants before hooking up a gas line.
When doing a renovation project, checking and hooking up the gas line is much more involved then installing a new line from scratch. First you must trace the gas line from the meter into the building, determine the condition of the pipes, and conduct a test for any leaks. If leaks are detected, you must address them. In this article, we will go through the process of hooking up a gas line, including tracing the line and testing for leaks, in a two story Philadelphia home.
Let’s Learn About the Gas Line
The gas line is made up of a network of pipes that carry compressed natural gas from the utility company to your home. The gas line runs underground or along the side of the building.
These pipes might be made of different materials, including metal, PVC, or fiberglass.
Every property using gas has at least one meter outside that measures the amount of gas delivered to the consumer. The gas company is responsible for the gas pipes’ maintenance from the main source to the meter and the homeowner is responsible from the meter into the building.
During a renovation project, all gas pipes on the property should be tested for leaks. If no leaks are detected you are ready to use natural gas, but if leaks are found they must be fixed.
Remember gas is hazardous! Therefore, in every renovation project involving gas, the following process should be done by professionals.
Gas Line System Components
A gas line consists of different components. Knowing each component and its function while inspecting or hooking up a gas line is necessary.
Generally, a gas line system includes pipelines for transferring gas, pipe fittings for connecting pipes, valves for controlling gas flow, regulators for controlling gas pressure, and meters for measuring the amount of gas being delivered to a property. Each item could consist of various types, and based on the situation will use the one that best satisfies the needs of the project.
Now that you have an understanding of a gas line system, let’s jump into how to inspect it. We will use an example from one of our home renovation projects in Philadelphia.
Tracing the Gas Line
In a home renovation project, the first thing you should do is trace the existing gas line from the meter through the building to see the condition of the lines.
In our example, you can see that this property had two meters previously; possibly separate meters for each floor. One meter has been removed.
In Figure 1, the red arrows show the gas line coming from below the ground, into and through the meter, and into the building.

Figure 1
Every gas line has a lock valve before the meter. If the valve is perpendicular to the gas pipe, it is locked and if it is parallel to the gas pipe, it is unlocked. As shown in Figure 2, the valve is in the locked position, this was where the second meter was installed.
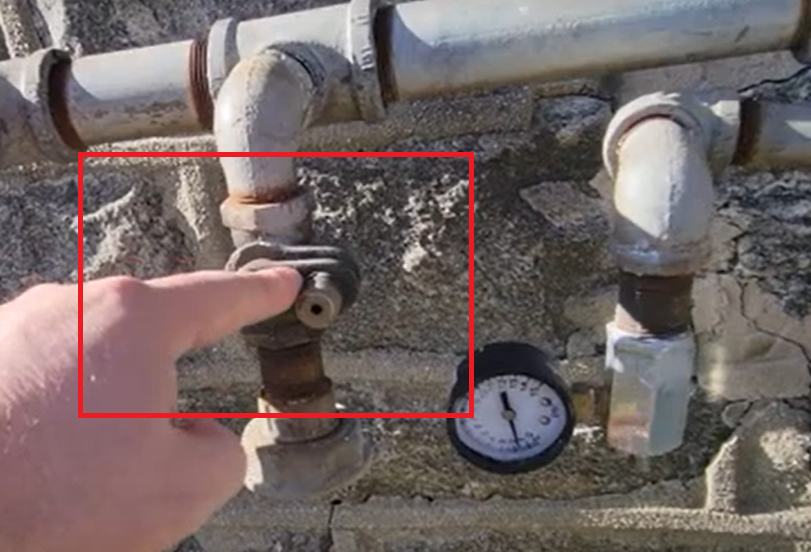
Figure 2
For this property, there are three lock valves, the main lock, a lock for the first meter, and another for the second.
If you follow the gas line into the property, you will be able to see where the line goes and the different components of the gas line. In our example property, the gas line goes to the basement. We were able to easily follow both lines from the two different meters into the basement. Since we are not going to use the second meter, we did not have to follow that line. We will just cap it. But we are going to trace the gas line attached to the first meter because we want to use that line for the heater and hot water tank.
In what follows, we will talk about components that are worth mentioning that we came across while tracing the gas line.
The Union
The first thing we want to mention is the Union. This is a type of pipe fitting that allows you to bring two pipes together. (see Figure 3). A Union works by allowing you to turn one side right and the other side left thus merging two pipes together.
A Union makes it easy to separate and reassemble at the joint whenever needed. For instance, if you need to find a gas leak, you can disconnect at the Union to run the leak detection test.
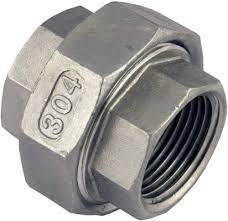
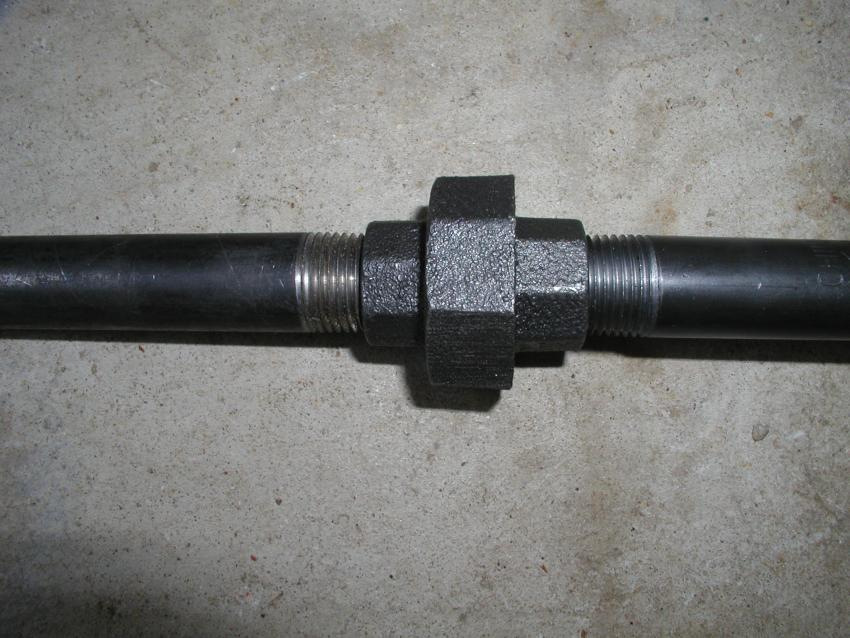
Figure 3
Figure 4 shows a Union on the pipe in our property. We could have disconnected the line here to run a pressure test.
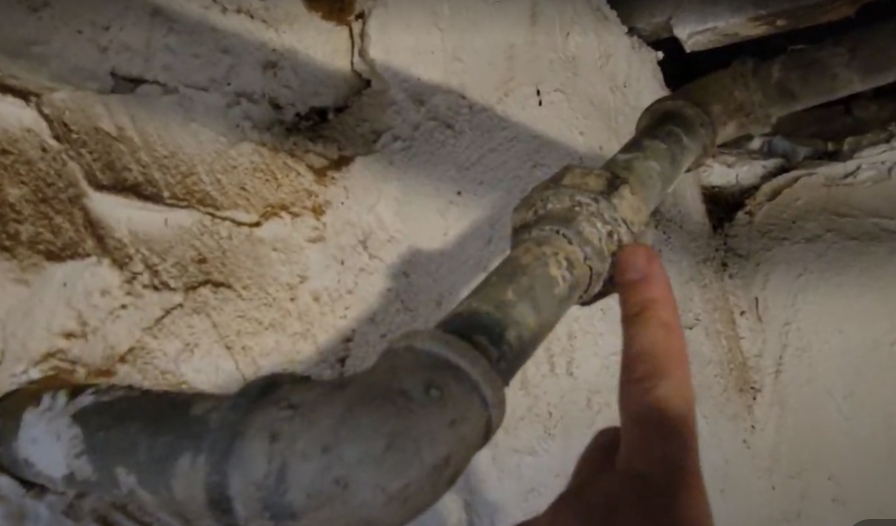
Figure 4
Pipe Dope
Pipe dope, also known as pipe joint compound, is a thread sealant that is used to help secure a seal between threaded connectors ensuring an air and water-tight seal (see Figure 5).

Figure 5
As we traced the pipe in our example, we found pipe dope that was on the outside of the connection (See figure 6). If you come across this, you would have to unthread the connection, apply pipe dope to the threads, and then thread the pipes back together. In Figure 6, the right side photo, you can see pipe dope that was used correctly.
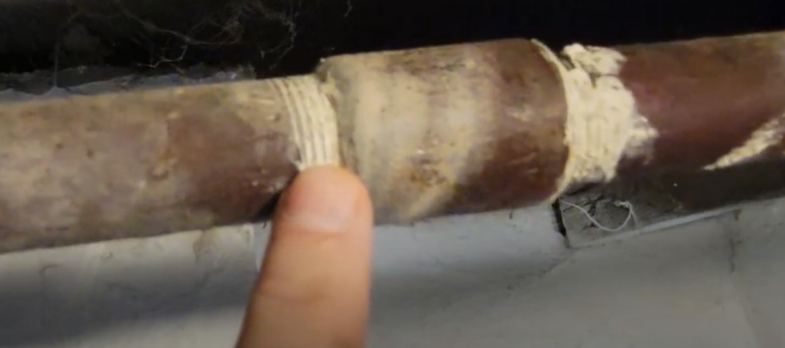
Figure 6

The Tee
The next component we found in our example is a Tee connector (see Figure 7).

Figure 7

In this project, there was actually more than one Tee in the line. First, the main line was divided into two lines. One line goes to the hot water tank and the other line goes to another Tee. From the second Tee, one line goes to the heater and the other line is for the drip. The drip catches and removes condensation and moisture in the gas line. Moisture causes the burners to corrode and become less efficient. Also, in cold weather, the condensation might freeze and block the flow of gas. (see Figure 8)

Figure 8
In our example, the gas line for the meter we are going to use includes a tee and branch that is not in use anymore. We found a branch line to the old kitchen; this branch line will be capped.
Testing for Gas Leaks
So we inspected the gas line and did not see any major issues with the line. In the next step, we conducted a gas leak test.
To test for a gas leak, we installed a pressure tester to the first supply line as seen in Figure 9. We then plugged a compressor into the pressure tester and got it to three pounds of pressure. The compressor was then removed.
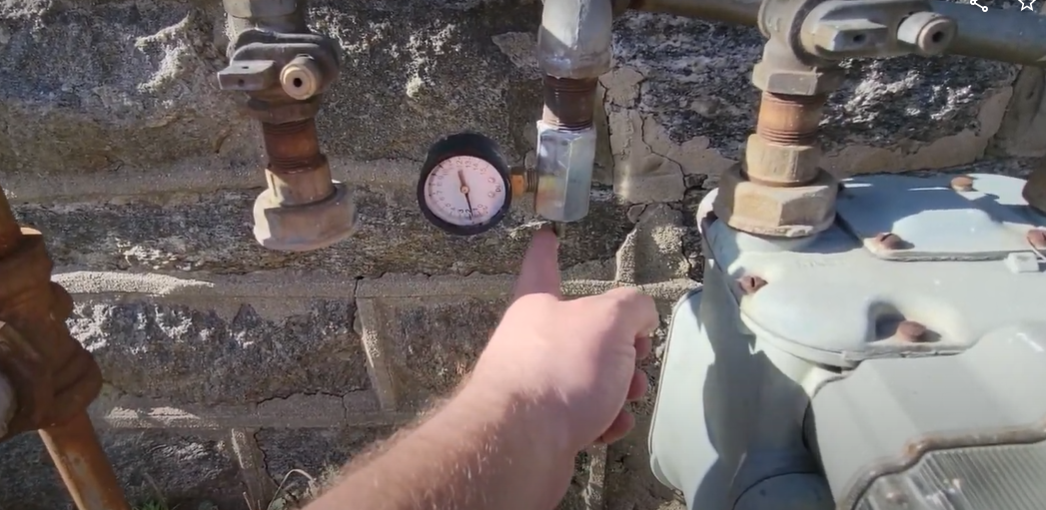
Figure 9
The pressure tester is supposed to maintain three pounds of pressure for 10 minutes. This duration is required by the gas company. After 10 minutes, the pressure tester showed two pounds of pressure; we then realized that there was a leak in the gas line. In the next step, we will try to find the leak.
How to Find the Gas Leak
The process of finding a gas leak should be done step by step. First, disconnect the pipe at the first union cap and run the gas leak test that we explained in the previous section. If it maintains three pounds of pressure for 10 minutes, this part of the line does not have a leak. If no leak is detected, you should find the next union, cap it and run the test again. You should continue this process until you find which part of the pipe has a leak. It seems like a daunting process, and it actually is.
Therefore, we suggest skipping this process and installing a new pipeline using a flex pipe from the first union all the way to where the gas is needed.
In our example, we decided to run a new line using a yellow flex pipe instead of finding the leak. Considering that the furnace and hot water tank are the only two things that have gas in this building, the required material cost for installing this new line should be around $350, and the labor cost should be $200. At this point, we believe it is worth spending the money for a new line, thus saving the time and effort it would take to find and fix the leak.
The Next Step
To sum up, in this article, we learned how to trace a gas line in a building to see the condition of the pipes and check for leaks. In the articles that will be published in the future, we will explain how to install a flex pipe to avoid the difficulties of finding the leak and fixing it.
The primary goal of tracing and checking the gas line is to ensure the safety of the home’s occupants long after you have completed the gas line hook-up. Also, do not consider hooking up a gas line yourself as a DIY project. It is important to find an experienced contractor and have the job done right.
Matrix Company Solutions Corp., a licensed 203(k) contractor in the Philadelphia area, is ready to help with all your home renovation projects. Leave your home renovations to us and enjoy living in a safe and beautiful house. Contact us today via our FREE Consultation Service Link.


0 Comments
Trackbacks/Pingbacks