Tyvek HomeWrap is a well-known protective material for buildings. It prevents water from seeping into the structure. It also acts as an air barrier in gusty winds. Many people in the United States are choosing Tyvek HomeWrap to make their buildings more moisture-resistant.
This article will explain the Tyvek installation process in easy-to-understand terms. Whether you are a DIY enthusiast or a professional in the industry, you will find valuable information in this article. Let’s get started!
Definitions
1.Sill Plate:
The sill plate is a horizontal wooden member at the base of a wall that provides support and helps distribute the weight of the building to the foundation.
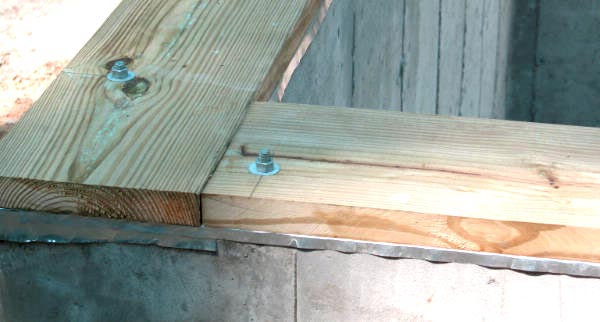
Figure 1
2. Slab-on-Grade Foundation:
A slab-on-grade foundation, also called a floating slab foundation, is a construction method where a concrete slab for a building is made by pouring concrete into a mold set in the ground, with no gap between the ground and the structure.
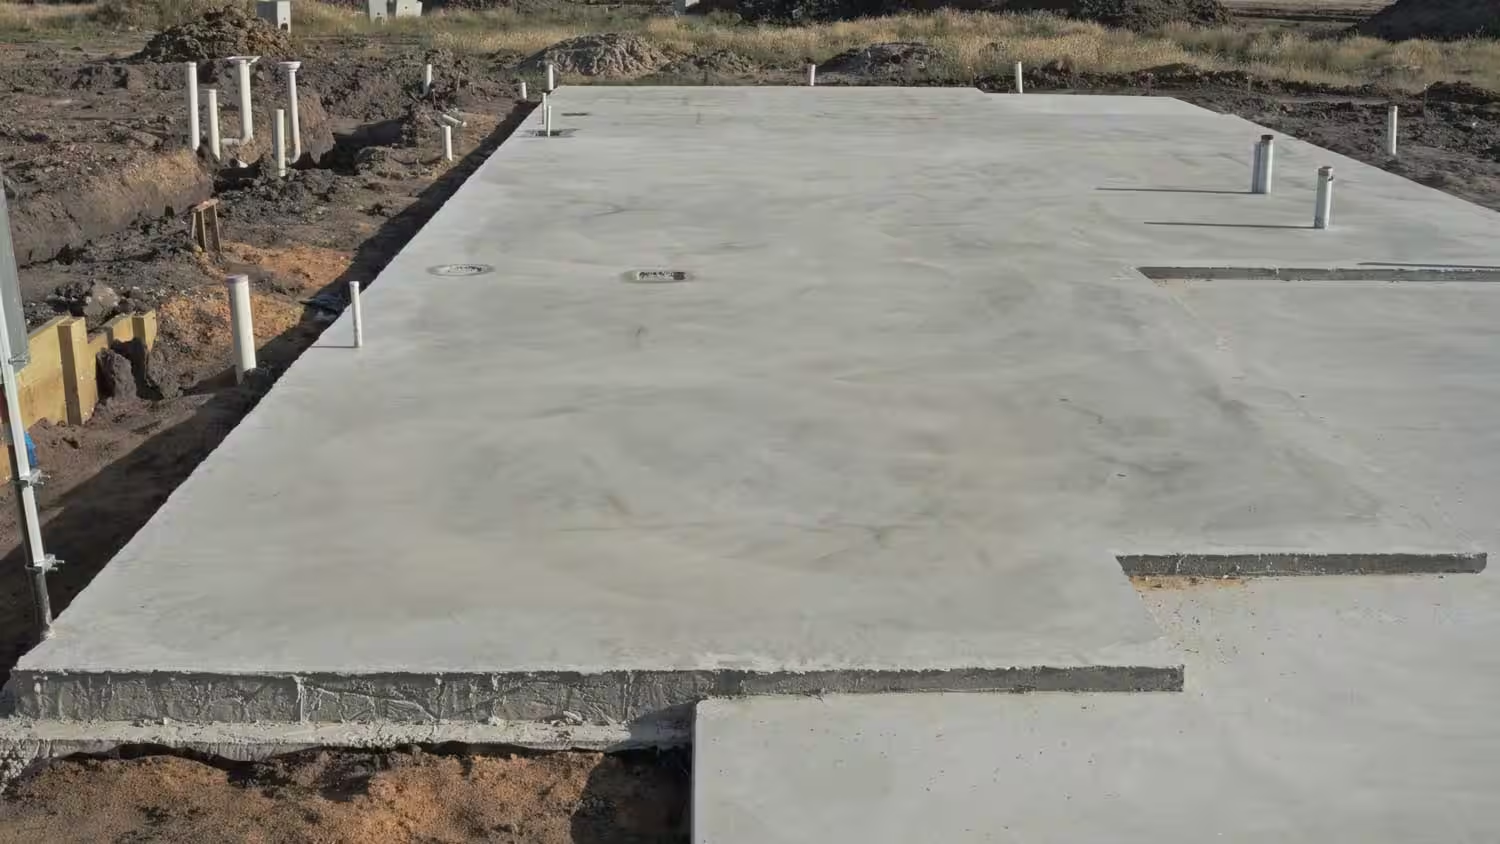
Figure 2
3. Kick-Out or Diverter Flashing:
Kick-out flashing is a slope or ramp that helps to move rainwater into the rain gutters.
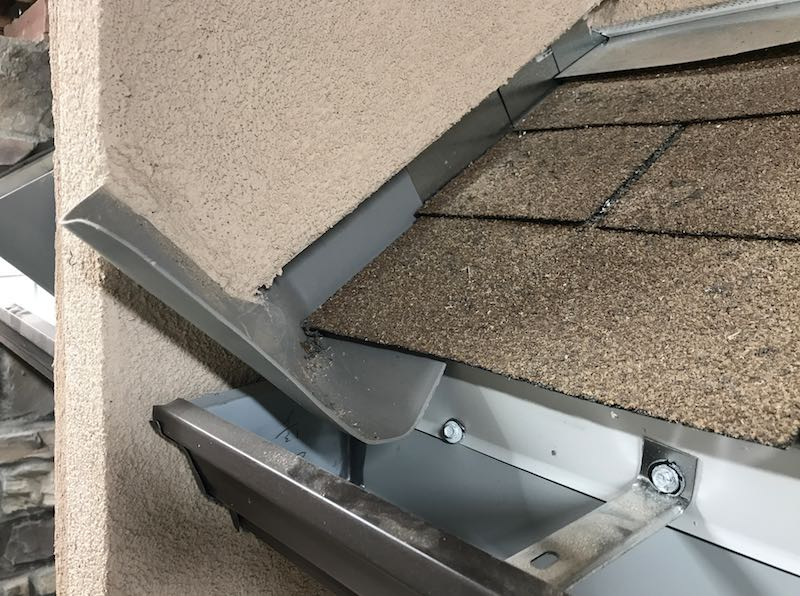
Figure 3
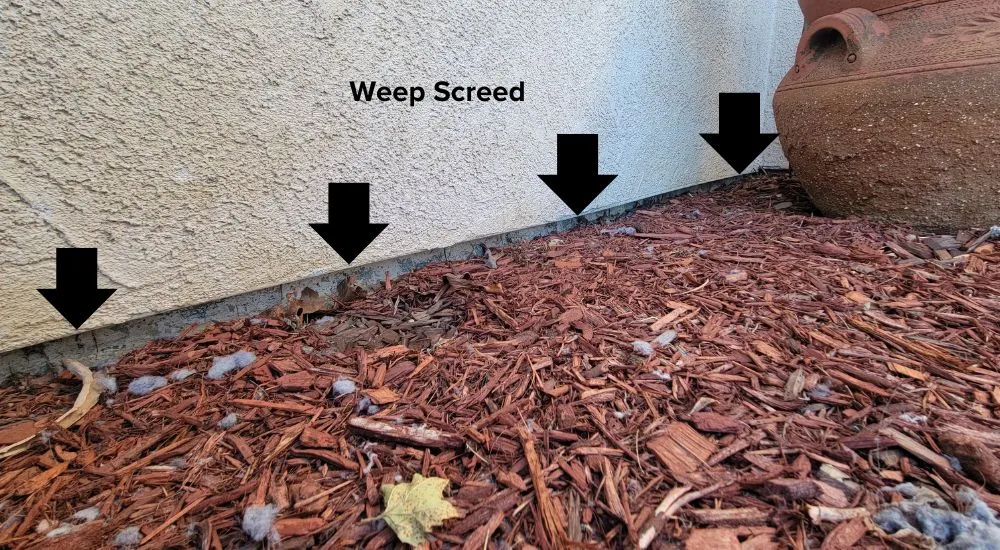
4. Weep Screed:
A weep screed is a perforated metal strip installed at the base of a stucco wall to allow moisture to escape, preventing water accumulation and promoting ventilation in the wall assembly.
Tools and Materials
- DuPont™ Tyvek® Wrap Cap Nails
- Tape measure
- Utility knife
- Pencil
- Hammer
- J roller
- Level
Step 1: Align the First Roll
To begin the Tyvek installation, measure and mark the wall to indicate the desired top position for installing the wrap. Then, transfer this mark down the length of the wall (see Figure 5).

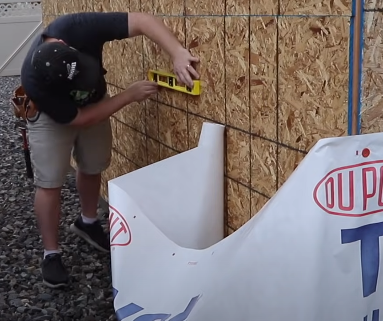
Figure 5
Position the roll at the lower corner to match the vertical alignment. The lower end of the roll should meet one of the following conditions:
- Extend at least 1 inch over the junction with the sill plate (2 inches or more is ideal).
- Reach the bottom of the sill plate if the foundation is a slab-on-grade type.
- Integrate effectively with water management features like kick-out or diverter flashing or a weep screed for stucco exteriors, which redirects rainwater away from the building’s exterior and into the gutter.
Following this criteria ensures that any water that enters the wrap material flows down below the wooden structure and along the foundation.
Step 2: Unroll and Secure the Roll
Start unrolling the material at the corner. Then, use nails to secure it in place. Make sure to hammer the nails into the wooden wall studs for a strong hold. As you continue unrolling, align the material with your markings and nail it in place (see Figure 6).
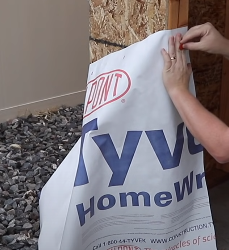
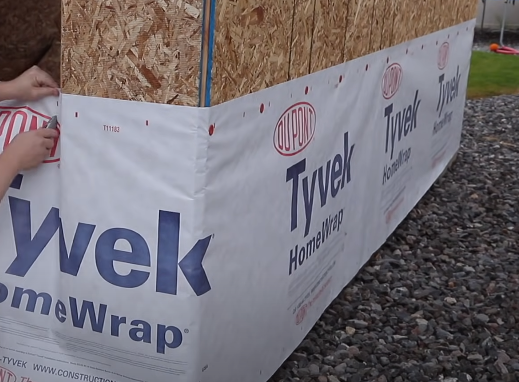
Figure 6
When you have overlapping sections of the material, be sure to overlap them by 6 to 12 inches. This ensures a good seal.
Remember to attach the wrap to the wooden studs. Space your fasteners (nails, screws, or staples) every 6 to 18 inches along the vertical lines of the studs.

Figure 7
However, avoid placing fasteners within 6 inches of the window sill and jambs, and keep them at least 9 inches away from the window head.
Figure 8
It is recommended to use one of the fasteners listed below:
- DuPont™ Tyvek® Wrap Cap Nails
- DuPont™ Tyvek® Wrap Cap Screws
- DuPont™ Tyvek® Wrap Cap Staples
- Equivalent fasteners from other manufacturers
This ensures that the wrap is securely attached to the wall and provides effective protection.
Step 3: Align and Secure the Next Rolls
The number of rolls needed for your building depends on how tall the building is and the size of the rolls. When installing these rolls, ensure the upper layer covers the lower one by at least 6 inches. Start by finishing the installation at the lower level, and then repeat the same steps for the layers above. It is essential to have some assistance during the installation so that one person can hold the roll in place and stretch it out, and another person can attach it securely with nails.
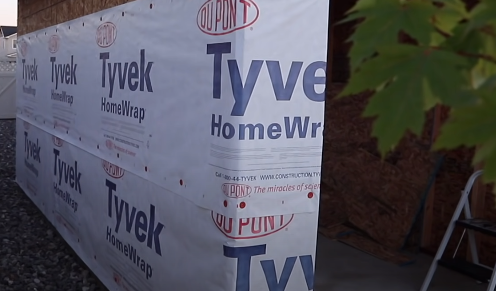
Figure 9
When you reach windows and doors, unroll the material right over them, ensuring that the upper layer of the wrap overlaps the bottom layer by a minimum of 6 inches. We will take care of the openings later.
Step 4: Tape All Seams
To create a solid and continuous barrier that keeps air and water from entering the building, use Tyvek Tape to seal all the seams where the Tyvek material meets. Tape both vertical and horizontal seams (see Figure 10). Additionally, tape any places where the Tyvek ends, like where it meets the roof or the bottom of the wall. Taping enhances the protection provided by Tyvek during construction and beyond.
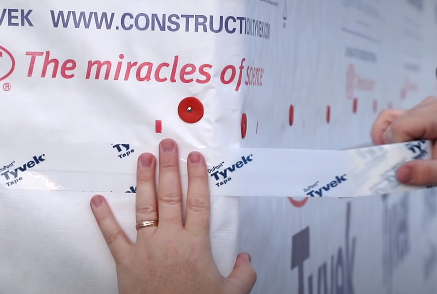
Figure 10
Step 5: Prepare Openings to Install Flashings
Per the Tyvek installation instructions, installing your doors and windows after putting up the Tyvek HomeWrap on your building is recommended. Here is a simple guide on properly sealing the openings for doors and windows using Tyvek Flex Wrap, which is a good choice for this purpose.
Remember you can follow the below steps for sealing all other openings as well. This process will keep your building well-protected from the elements.
- First, cut the Tyvek where your window or door will be. Start at the top and cut below the head of the window. Then, find the middle of the opening and cut straight down. Finally, cut straight across at the bottom of the opening (see Figure 11). This cut exposes the window sill so the Flex Wrap can adhere well to the wood.
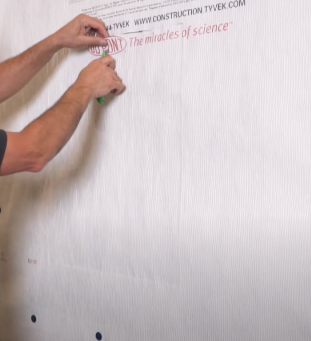
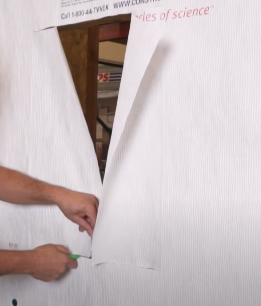
Figure 11
2. Attach the wrap to the inside of the opening on the sides using Tyvek tape.
3. Cut the Tyvek HomeWrap above the window, as shown in Figure 12.

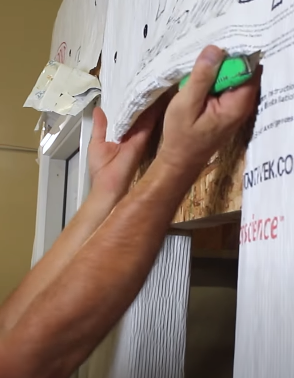
Figure 12
4. Now, you can start installing the flashing. Make sure to check with the manufacturer to determine the correct size of Flex Wrap for your opening. For instance, a 6-inch Flex Wrap is suitable for a 2 x 4 sill.
Step 6: Install Flashings
- The Flex Wrap has two release papers. The wider portion goes on the sill, and the narrower portion goes on the face of the wall (see Figure 13).
Figure 13
2. Start by removing the wider portion. Stick the center of the Flex Wrap to the center of the sill, aligned with the front edge of the wall (see Figure 14). Slowly work the edges down and stick the wrap toward the corners.
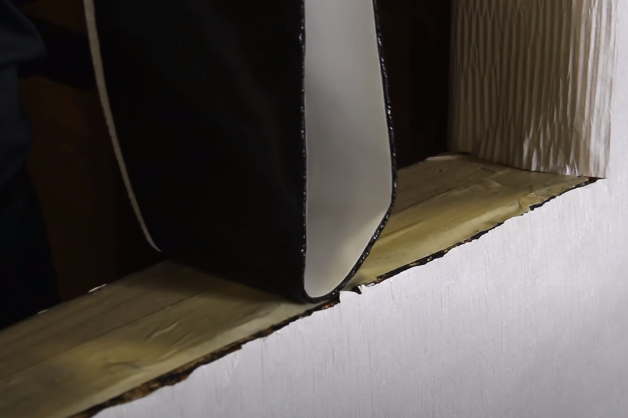
Figure 14
3. The Flex Wrap should be one foot longer than the sill’s opening, as we want 6 inches of wrap on each side of the opening for water drainage (see Figure 15).
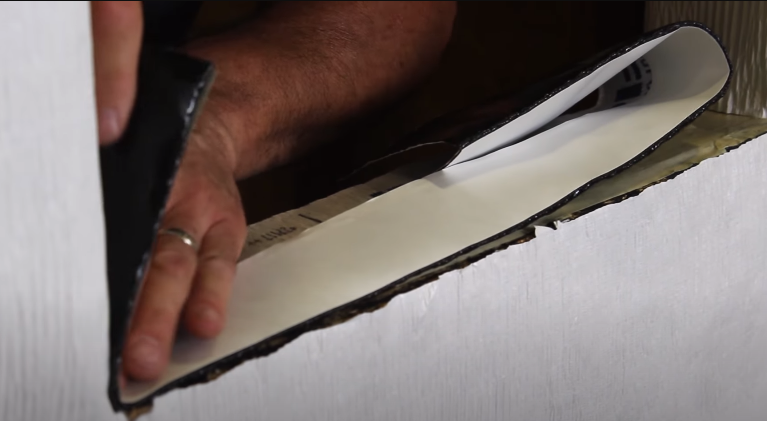
Figure 15
4. Remove the other portion of the release paper and start sticking the Flex Wrap from one corner, ensuring you can easily install the flashing at the corners without making any cuts. Repeat the same for the other corners.
5. Roll a J roller over the flashing for full adhesion (see Figure 16).
Figure 16
6. Now, it is time to install the window. Place the window in position. For proper drainage, ensure that the Tyvek paper at the top is not under the window (see Figure 17).
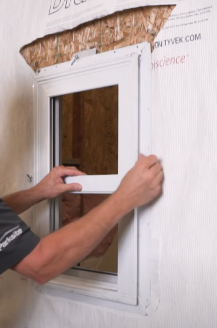
Figure 17
7. Secure the window according to the manufacturer’s instructions.
8. Use the correct size flashing tape. Partially peel off the backing paper and install it on one side of the window, starting from the top, about one inch above the window frame (see Figure 18). Do the same for the other side.
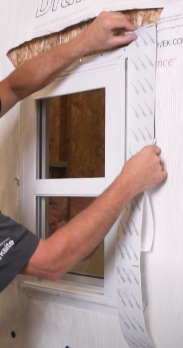
Figure 18
9. For the head flashing, make it longer to go past the side flashings (see Figure 19). Use the J roller again.
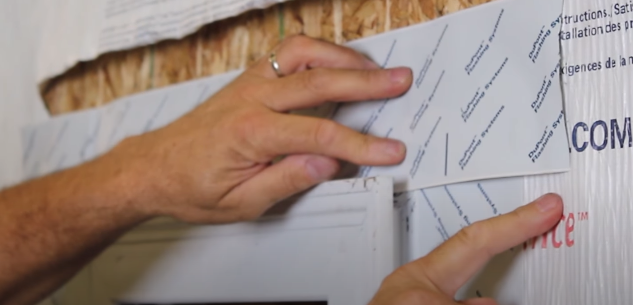
Figure 19
10. Finally, pull the Tyvek paper above the top flashing and secure it with Tyvek tape over the seams.
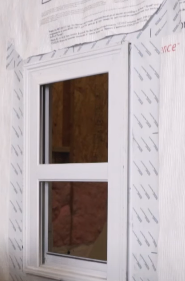
Figure 20
Conclusion
We hope you have found this article valuable for your Tyvek installation project. Nevertheless, each project can have unique aspects that might require additional guidance. These specific challenges could be installing Tyvek HomeWrap on cantilever floors or dealing with flashing for penetration. Please comment below if you want us to share more details regarding Tyvek installation.
Furthermore, we offer FREE Consultations and Estimates if you need renovation services in the Philadelphia and South Jersey areas. Don’t hesitate to contact us for assistance with your home improvement needs.
If you have any questions or comments, please feel free to leave them below. We would love to hear from you and learn from your experience with Tyvek installation Thank you for reading!


Greetings from Florida! I’m bored to death at work
so I decided to check out your blog on my iphone during lunch break.
I really like the knowledge you provide here and can’t
wait to take a look when I get home. I’m shocked at how
fast your blog loaded on my cell phone .. I’m not even using WIFI, just 3G
.. Anyhow, wonderful site!
Really appreciate the support! Hope the posts give you something more fun to do than being bored at work. Can’t wait to hear what you think once you dive in more!