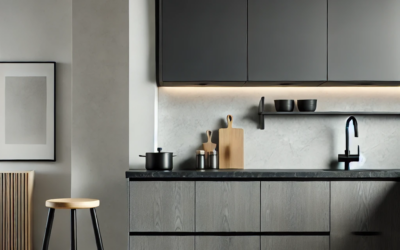
Installing floating shelves in your kitchen is one of the best ways to add style and storage to your space. Floating shelves open up your kitchen design, create easy access to essentials, and give you a versatile, modern look without taking up too much room. If you’re considering this as a DIY project, this guide will walk you through each step to help you mount floating shelves like a pro.
As a contractor in Philadelphia, we’ve handled many projects with similar setups and will break down the process into manageable steps to get those shelves upright and safe. So, let’s get started!
Why Choose Floating Shelves for Your Kitchen?
Before diving into the installation steps, consider why floating shelves are popular. Kitchens in city homes often require flexible storage, and floating shelves do a great job providing it. Unlike bulky cabinets, floating shelves give a more open feel, allowing you to keep frequently used items within reach. They’re also an excellent solution if you’re looking for a mix of functionality and style, making the kitchen feel less cramped. Additionally, floating shelves can be customized to match any decor, from rustic wood finishes to sleek modern metal.
Tools and Materials
To install floating shelves in your kitchen successfully, you’ll need the right tools and materials.
Here’s a list to get started:
Materials
- Wooden Shelves or Butcher Block
- Wall Mounted Shelving Brackets
- Screws
- Masking Tape or Painters Tape
Tools
- Stud Finder
- Bubble Level
- Laser Level
- Drill and Drill Bits
- Screwdriver
- Socket Wrench
- Circular Saw
- Tape Measure
- Pencil
Having all these tools and materials on hand before you start will make the process smoother and faster.
Preparation
Proper planning is key when installing floating shelves in the kitchen. Here are some tips on getting the measurements and layout right:
- Determine Vertical Placement: Measure from the top of the countertop or cabinets to set consistent shelf heights. Common measurements place the first shelf around 20 inches from the countertop, with the second at around 35 inches above the countertop.
- Set Distance from Windows and Walls: Keep a 2-inch gap between the shelf and any adjacent windows or walls to create a visually balanced look and allow for easier tile installation if applicable.
- Locate the Studs: Floating shelves should be anchored into wall studs to bear weight, especially for kitchen use where items can be heavy. Use the stud finder to mark stud locations and plan your shelf placements around them.
- Mark Your Lines: Once you’ve decided on the exact location, use the level to mark straight lines where each shelf will go. Having a visual guide will help keep the installation aligned.
- Check with a Laser Level: After marking your lines, use the laser level to double-check alignment across all marked points on both sides of the wall. This step helps avoid a slanted or crooked appearance once the shelves are up.
- Mark Drill Points: If working on a plywood wall, you can drill directly; for drywall, locate studs and use them as anchors for extra security.
The Distance between Drill Points
The distance between drill points for floating shelves, particularly for heavy-duty shelving like butcher blocks in a kitchen, typically ranges between 16 to 24 inches. Two main factors determine this spacing:
- Wall Stud Spacing: In most standard walls, studs are spaced 16 inches apart, so aligning your drill points with the wall studs provides a secure anchor point. Drilling into studs is highly recommended for floating shelves carrying heavy items, as it significantly increases stability.
- Shelf Length and Support Requirements: For longer shelves (over 30 inches), placing drill points every 16 inches is ideal. If you’re using shorter shelves, placing supports closer (around 12-16 inches) provides more even support and prevents sagging.
For instance, if you’re installing a 38-inch butcher block shelf, placing drill points 16 inches apart allows you to anchor into two studs, giving it enough support for most kitchen items.
Installation
Mounting Brackets or Anchors
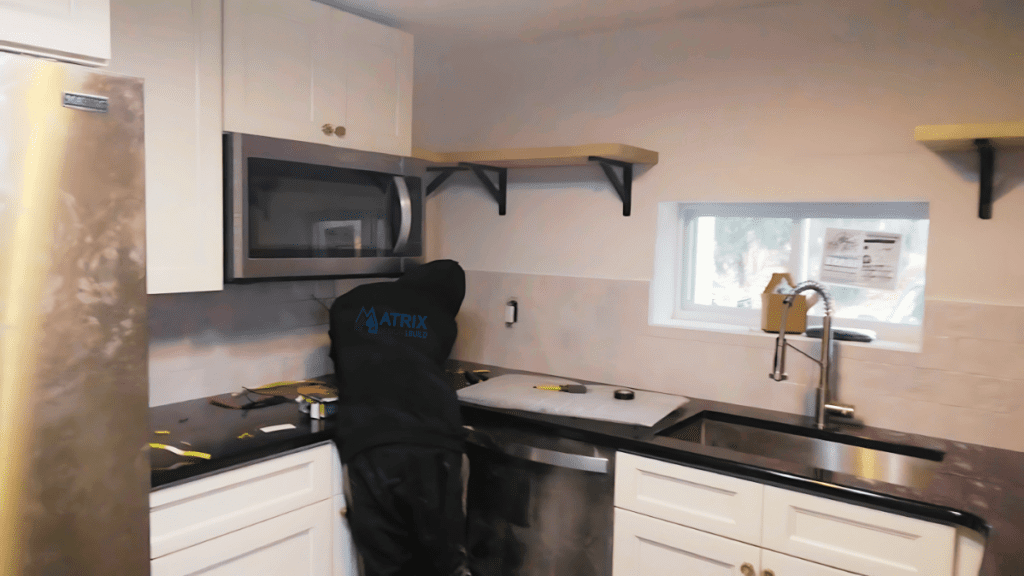
Securing brackets or anchors is a big part of the installation, as this step provides the stability needed for the shelves to hold weight. There are different types of brackets to choose from. We decided that 8-inch malleable iron wall-mounted shelving brackets penetrate the butcher block and provide perfect stability. Here’s how to get it done right:
- Install Round Threaded Supports: Place each round threaded support exactly on the marked points and mark around them.
If you plan to tile around the shelves, cut out small recesses in the drywall to set each support deeper into the wall. This allows the supports to remain flush against the wall, ensuring a smooth surface for your tile installation without obstruction.
- Attach Brackets or Anchors: Position the brackets in the holes and screw them to the studs.
- Secure and Level Supports: Screw in the pipes tightly, making sure they are level both horizontally and vertically. A bubble level can help verify that each support is stable and balanced.
- Double-Check Stability: Give each bracket a slight tug to check that they’re tightly in place before proceeding to the next step. Loose brackets could cause damage or potential accidents.
Preparing the Butcher Block
Now it’s time to prepare the butcher block shelves for mounting:
- Measure and Cut the Butcher Block Shelving: Measure each shelf to the exact length required for the wall space. The most common depth for floating shelves in kitchens is 10 to 12 inches. Cut the pieces using a circular saw.
- Mark Pipe Positions on Butcher Block: To fit the butcher block onto the round supports, mark where each support will touch the wood. Measure carefully from both ends to find the center and place marks for drilling.
- Drill Holes into the Butcher Block: Using an ⅞ inch spade bit, drill deep enough holes into each marked spot on the butcher block so that it slides entirely over the supports. Use tape to mark the bit depth on your drill, typically around half an inch longer than the pipe length, to avoid drilling through the block.
- Check Alignment: After drilling, check the alignment of the holes to the wall supports by holding the butcher block near the supports and adjusting any misalignments before the final installation.
Mounting the Butcher Block Shelves
After drilling and preparing the butcher block, it’s time to install them onto the supports:
- Slide the Shelves onto Supports: Carefully slide each shelf onto the round threaded supports, applying gentle pressure to push them flush against the wall. Check the holes for proper depth if the block doesn’t slide easily.
- Double-Check Leveling: With the shelves in place, use a bubble level to verify that they are straight. Sometimes, adding a thin shim can correct any tilt or misalignment that may occur during the final tightening.
- Secure Shelves for Additional Stability: Depending on your shelving system, you may be able to add small screws or adhesive around the supports to add extra stability to the shelves. This helps prevent movement if bumped.
Finishing Touches and Style Tips
Now that you have installed floating shelves in your kitchen, it’s time to make them functional and appealing. Here are some ways to make the most out of floating shelves in your kitchen:
- Utilize Vertical Storage: Place items you use daily on lower shelves and reserve higher ones for decorative or less-used items.
- Add a Splash of Color: Use jars, plates, and kitchen decor items to add color to your kitchen. Floating shelves provide a perfect backdrop to add style without the clutter.
- Balance Function and Style: While they’re practical, don’t overfill the shelves. A balanced look creates a more organized, modern feel.
- Sand and Seal: Sand any rough edges and apply a coat of wood sealant to protect the butcher block from kitchen moisture.
Maintenance and Troubleshooting Tips
Floating shelves in your kitchen can encounter issues over time. Here’s how to keep them in top shape and fix any common problems:
- Preventing Sagging: To avoid sagging over time, stick to weight limits. Too many heavy items can weaken the brackets or anchors.
- Regular Cleaning: Kitchens are prone to grease buildup, so wipe down the shelves regularly to keep them clean.
- Tightening Screws: Over time, screws can loosen. Give them a quick check periodically to keep everything sturdy.
If you notice any shifting or hear creaks, it’s worth investigating before adding more weight. It’s better to be safe than sorry when it comes to a kitchen setup!
Conclusion
Installing floating shelves in the kitchen is an accessible DIY project that can significantly improve its look and functionality. As a general contractor, we’ve seen how a well-placed shelf can transform a space, creating a modern, clean appearance that cabinets alone often can’t provide. Following these steps will set you up for success, whether refreshing your kitchen or adding style and storage to an existing setup.
With the right tools, planning, and a steady hand, floating shelves in the kitchen can become one of your favorite DIY upgrades. So grab your drill and get started. However, if you envision a complete kitchen transformation, reach out for a FREE Consultation. We specialize in whole-house renovations in Philadelphia and South Jersey. Give us a call at (215) 501- 7566.



![Top 20 Reasons for Failing a Plumbing Inspection in Philadelphia [2025 Guide]](https://matrixgc.com/wp-content/uploads/2025/05/Common-issues-causing-failing-a-plumbing-inspection-in-Philadelphia.png)

0 Comments