Self-leveling floor compound is a game-changer for anyone who wants to achieve a perfectly smooth, level floor without the hassle of traditional methods. Whether you’re preparing a subfloor for new tiles, vinyl, or carpeting, using self-leveling compound can save time and effort while providing a flawless surface for your next flooring project.
In this guide, we’ll walk you through the steps of using self-leveling floor compound, discuss some essential tips, and explore common mistakes to avoid. Let’s get started!
What is Self-Leveling Floor Compound?
Self-leveling floor compound is a specially formulated material designed to be poured onto uneven floors to create a smooth, level surface. It is typically a mixture of cement, sand, and additives that, when mixed with water, form a slurry that spreads evenly across your floor. This compound fills in cracks, dips, and other imperfections, creating a flat surface. Self-leveling compounds are used on concrete, wood, and other common subfloors to ensure that the new flooring you install is secure and aesthetically pleasing.
Why Use Self-Leveling Floor Compound?
The primary benefit of using self-leveling floor compound is its ability to provide a smooth, level surface with minimal effort. Unlike traditional patching methods, which can require trowels and significant skill, self-leveling compounds are designed to spread on their own once poured. This makes them an ideal choice for DIY enthusiasts looking to level floors before installing tile, hardwood, laminate, or carpet.
Key Benefits:
- Saves Time and Effort: Once mixed and poured, the compound levels itself, significantly reducing the time and effort required to smooth the floor.
- Improves Floor Adhesion: A smooth, level surface is essential for ensuring that your new flooring adheres properly.
- Versatility: Suitable for use on concrete, wood, and other subfloors, making it a versatile option for various flooring projects.
Tools and Materials
Before you begin using self-leveling floor compound, gather the following tools and materials to ensure a smooth, successful process:
- Vacuum for thoroughly cleaning the floor surface before preparation.
- Measuring tape to determine the area you need to cover.
- Plastic sheeting or drop cloths to protect surrounding areas.
- Materials for barriers such as old skirting board pieces or expanding foam to contain the flow of the compound.
- Mask to avoid breathing in compound dust during mixing.
- Rubber gloves and safety glasses for personal protection.
- Bucket for mixing the self-leveling compound with water.
- Panel mixer or drill attachment (mixing paddle) for thorough mixing without creating air bubbles.
- Floor primer to help the compound adhere to the subfloor.
- Brush or roller for applying the primer thinly and evenly.
- Trowel, spreader, or float (plastering trowel) for spreading, guiding, working the compound into corners, and smoothing the finish.
- Spiked roller to bring air bubbles to the surface, ensuring a smooth, flat finish and blending sections.
- Speed skin (optional), a larger blade for an even flatter finish.
- Spirit level to check the levelness of the finished floor once dried enough for light foot traffic.
- Self-leveling floor compound, with the amount sufficient for your project.
- Water to mix with the compound.
Preparation
Before applying self-leveling compound, proper preparation of the surface is essential for a successful outcome.
Clean the Subfloor
The first step of surface preparation is to sweep, vacuum, or mop the surface to remove any dirt, debris, or oils. Any contaminants can prevent the compound from adhering properly. Therefore, you need to use a vacuum and clean the whole area to get anything loose and all the dust off.
Ensure the subfloor is dry before application, especially if you’re working with concrete. Excess moisture can affect the setting of the compound.
Priming
Priming the floor is described as an important step in the process. We suggest a two-coat priming process:
- First Coat: Prepare the first coat by mixing primer and water in equal parts (1:1). You only need a small amount since it spreads more than you might expect. Apply a very thin layer over the surface using a brush or roller, taking care not to let it pool or build up in thick spots. This coat should dry in about 30 minutes, depending on the surface.
- Second Coat: After the first coat feels mostly dry, apply a neat (undiluted) acrylic primer. Again, apply it evenly without letting it pool or become too thick, as thicker areas will take longer to dry. The key is to keep this coat thin and smooth for the best results.
Creating Barriers
Before pouring the self-leveling compound, identify areas where you don’t want it to flow, such as doorways, transitions, or boundaries where the compound should stop. To keep it contained, you need to install barriers. Without these, the compound will continue flowing freely, possibly creating low spots or spilling into unwanted areas.
You can use small pieces of old skirting board or architrave as effective barriers. Another good option is applying expanding foam along the edges where you want to block the flow. Once the compound has hardened, the foam can be easily peeled away.

Applying Self Leveling Floor Compound Step-by-Step
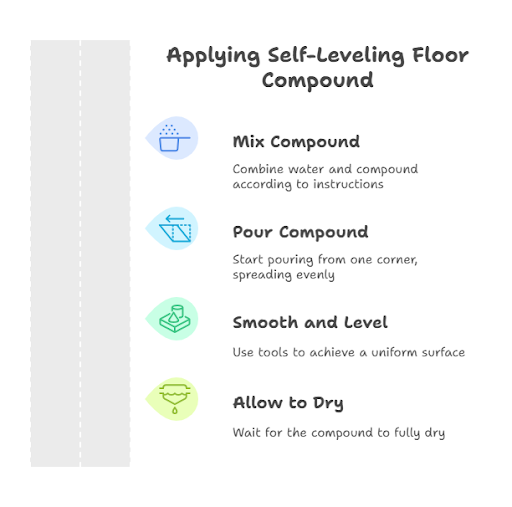
1. Mix the Self-Leveling Compound
- Follow Manufacturer Instructions: The ratio of water to compound varies, so always read the instructions on the packaging. Use a bucket large enough to handle the amount of compound you’ll need. Remember to wear a mask as the material is not very friendly, and you shouldn’t breathe it in.
- Mix Thoroughly: Add the required amount of water to the bucket first, then slowly add the self-leveling compound. Mix with a mixing paddle or a drill attachment to avoid clumps. Ensure a smooth, consistent texture. Be careful not to mix too quickly, as this will add air bubbles and make it harder to work with.
- Work Quickly: Self-leveling compounds typically have a working time of 15 to 20 minutes. Make sure you mix only as much as you can use within this time frame.
2. Pour the Compound
- Start in One Corner: Begin pouring the compound at one corner of the room, working your way towards the exit to avoid stepping on the wet surface. Limit the amount of airflow coming through the room as you lay the compound by shutting the door. Too much airflow to start with can make the chemical reaction go off quicker.
- Spread Evenly: Use a trowel or spreader to help the compound flow into cracks or low spots. The compound will naturally spread out and level itself, but you may need to assist it along the edges or in tighter areas.
3. Smooth and Level the Compound
- Use a Smoother Tool: To help achieve an even surface, you can use a smoother tool or a flat edge to guide the compound as it spreads. You will likely need to work it into corners, as it often doesn’t go in corners very well. This will ensure a uniform thickness and smoothness across the entire floor.
- Maintaining Depth and Smoothing: When working alone and mixing batch by batch, the mixture can thin slightly between buckets. To maintain consistent thickness, pour each new batch along the seam of the previous one. Use your trowel to gently blend the edges and push some compound back to keep the depth even. As you move through the room, regularly check your levels. Working the compound with a float not only helps maintain the desired thickness but also brings air to the surface, smoothing out the entire floor.
- Using the Spiked Roller: After smoothing with the float or trowel, roll a spiked roller over the compound a couple of times. This tool helps release trapped air bubbles, producing a stronger, smoother, and flatter finish. Make sure to overlap the roller strokes onto the previous bucket’s area to blend the sections seamlessly.
- Finishing Touches: Work your way toward the exit, using your trowel to level out any high spots and fill in low spots. This step ensures smooth transitions, especially where height differences exist. For an even flatter finish, you can use a speed skin (a larger trowel blade), though it’s optional depending on your project. Aim to perfect the surface the first time, but if ridges appear after about an hour, try smoothing them out gently with a wet trowel.
- Work Fast: As the compound begins to set, you won’t be able to adjust it, so be quick and efficient in this step.
4. Allow the Compound to Dry
- Wait for Drying: Depending on the brand, the compound can take anywhere from a few hours to a day to fully dry. Check the manufacturer’s instructions for drying times. Light foot traffic is usually possible in about 2 to 4 hours.
- Check for Uneven Spots: Once dry, inspect the floor for any uneven spots. If needed, apply a second coat of compound to fill in any low areas. If good materials and techniques are used, the result can be a perfectly level finish, successfully matching height differences.
Tips for Applying Self Leveling Floor Compound Successfully
- Ensure Room Temperature: Self-leveling compound works best at room temperatures between 50°F and 85°F. Avoid applying it in extreme heat or cold.
- Work in Sections: If you’re covering a large area, consider working in smaller sections. This will give you more control over the compound’s application.
- Product Selection: Look at the bags of different self-leveling compounds for information on their minimum and maximum depths they can be applied at, and what they can be used for (e.g., overboard, underfloor heating).
- Coverage: It is vital to make sure you have enough material. Read the coverage information on the back of the bag to calculate the required amount for your job. You don’t want to run out halfway through.
- Working Speed: SLC starts to set, and you need to work fairly quickly. Having a friend who can mix the compound while you do the laying is really handy because it speeds things up and makes it a lot easier. If working alone, you need to manage both tasks efficiently.
- Environmental Conditions: The chemical reaction of the compound going off happens quicker on hotter days and slower on colder days. Try to pick a nice in-between day. Limiting airflow while laying also helps control the speed of the chemical reaction.
- Not Truly “Self-Leveling”: Contrary to what some people believe, you don’t just put self-leveling compound down and leave it. It won’t flow exactly where you want it to go; you do need to give it a helping hand with tools like a float and spiked roller to ensure it goes where needed and to achieve a better finish.
- Addressing Mistakes: While it’s best to get it perfect the first time, if you get any big ridges about an hour after application, you can try to flatten them out with a wet trowel.
Common Mistakes to Avoid
- Incorrect Mixing Ratios: Always follow the manufacturer’s instructions for mixing the compound. Using too much water or not enough will affect the compound’s performance.
- Not Priming the Floor: Skipping the primer can cause poor adhesion, leading to cracks and uneven surfaces.
- Overworking the Compound: After pouring, resist the urge to keep spreading or smoothing. Overworking the compound can cause bubbles and imperfections.
- Waiting Too Long to Finish: Make sure to finish applying the compound before it sets. Once it starts to harden, it’s very difficult to adjust.
Conclusion
Using self-leveling floor compound is a fantastic way to prepare your floors for new installation, offering a smooth and even surface with minimal effort. By following the correct steps and tips, you can ensure a successful DIY flooring project that looks professional. Remember to take your time with preparation, mixing, and pouring to get the best results. With the right tools and a little patience, you can achieve flawless flooring that will last for years to come.
If you want expert help or a reliable contractor for your flooring or renovation projects, trust MatrixGC-Philadelphia’s trusted choice for quality craftsmanship and dependable service. Contact us today for a FREE Consultation and let’s bring your vision to life!
FAQs
What is self-leveling floor compound used for?
Self-leveling floor compound is used to smooth out uneven subfloors, filling in cracks, dips, or low spots to create a level surface for installing new flooring.
How long does it take for self-leveling compound to dry?
Drying time varies, but most compounds will be dry to the touch in 3-4 hours and fully set in 24 hours. Always follow the manufacturer’s instructions.
Can self-leveling compound be used on wood floors?
Yes, self-leveling compounds can be used on wood floors, but a primer may be necessary to ensure proper adhesion.
Do I need to prime the floor before using self-leveling compound?
Yes, priming the floor is essential to ensure the compound adheres properly. Always follow the manufacturer’s recommendations.
How thick can I apply self-leveling compound?
Most self-leveling compounds are designed to be applied in layers no thicker than ¼ inch to ½ inch. If you need more coverage, additional layers can be applied once the first coat has dried.
Can I install flooring over self-leveling compound immediately?
You can install flooring once the compound is fully dry and cured. Always check the manufacturer’s instructions for specific timing recommendations.


0 Comments