Rubber roofs are a popular choice on flat or low-sloped roofs for many commercial and residential buildings due to their durability, flexibility, and low maintenance requirements. A rubber roof is made from synthetic rubber or a combination of synthetic rubber and other materials. Rubber roofing can be installed using various methods and can also be painted to match the color scheme of a building or to provide added UV protection.
However, there may come a time when a rubber roof must be removed, either due to wear and tear, damage, or the need for a new roofing system. Removing a rubber roof can be a challenging and labor-intensive process, but with the right tools and techniques, it can be done effectively and efficiently. In this article, we will explore the process of removing a rubber roof, including the tools and equipment needed and step-by-step instructions for successful removal.
So, whether you are a roofing professional or a DIY enthusiast, this article will provide you with the knowledge and guidance you need to remove a rubber roof safely and effectively. Let’s begin!
Tools and Materials
The first step is to gather the required tools and materials. Here is a list of tools you will need to remove a rubber roof:
- Roofers Tear Off Spade
- 12 in. Wrecking Bar /Flat pry bar
- 20 oz. Steel Rip Hammer and 15 in. Wrecking Bar
- Rooftop Safe-Tie Bucket Kit
- Ladders
- Dumpster
- Garbage bags
- Roof cover sheets
- Wood sheets/panels
- Roof nails
- Utility knife
- Gloves
- Safety glasses
- Hard hat
Preparation
Before going through the removal process, you must prepare to make sure you can safely and easily remove the rubber roof. Proper preparation saves you time and effort, making the entire process go smoothly.
In order to be prepared for the removal process follow the steps below:
- Plan your work ahead of time by identifying the size of the roof and what equipment you will need. You should also have a plan to safely dispose of the roofing material and debris.
- Plan out the access path to the site and the construction garbage depot (see Figure 1).
Figure 1
- Move cars away from the building when the roof demolition begins.
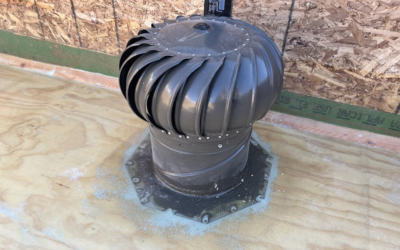
- Observe where the vent stack and chimney are located (see Figure 2), and be aware of the location of any overhead electrical wires.
Figure 2
- Before starting, create a garbage depot by placing large sheets of plastic on the ground near the work site. This is a place to gather debris until it is transferred to the dumpster.
- Clear off any surface debris such as leaves, branches, and dirt before starting to remove the rubber roof. This will make it easier to remove the rubber roofing material.
- Check the weather forecast to determine the best time to begin the project. If possible, wait for warm, dry weather to remove the membrane. Keep in mind that the removal may take more than one day depending on the size of the roof.
- Make sure you have the proper safety equipment, including hard hats, gloves, and goggles.
By following these steps, you will be well-prepared to start removing the rubber roof. So, get ready for a successful and safe removal process.
Removal Process
Removing a rubber roof involves different steps that you should follow carefully to make sure you do not damage the wood roof under the rubber or injure yourself. Once you have all the necessary tools and are prepared you can proceed with the following steps to remove the rubber roof safely.
- Use a sharp utility knife or roofing knife to cut the existing rubber roofing material into manageable sections. Start at the edge of the roof and work your way toward the center. This will make it easier to remove the plies, (the multiple layers of roofing material that are fused together) of the roof without causing damage.
- Insert a Roofers Tear Off Spade under the edge of the rubber roof membrane and pry up to loosen the membrane from the substrate (see Figure 3). Repeat this process along the entire length of the section. Once the membrane is loosened, remove the membrane from the substrate using the spade. Be careful not to damage the underlying roof structure.
Note: The level of difficulty in removing a rubber roof largely depends on the stiffness of the existing material. In some cases, certain sections of the roof can be removed easily with your bare hands. However, for other parts, a combination of tools such as a utility knife, spade, and pry bar may be necessary to remove the membrane effectively. Be prepared to work diligently and use a combination of tools to ensure the successful removal of the rubber roof.

Figure 3
- Use a utility knife to cut the rubber around routing features such as vents and drains. This will make it easier to remove the rubber around these features without causing damage.
- Continue to cut the roof into sections and use the spade and pry bar to loosen and remove the membrane until the entire roof is stripped.


Figure 4
- Use a wrecking bar and hammer to pull the nails from the flashing (which can be found where the roof meets a vertical surface such as a wall or chimney) and remove it from the roof.
- If there are holes in the roof, check for any corrosion or damage caused by rain and moisture. If there is damage, temporarily cover the hole with a small wood sheet and secure with nails before starting the new roof. If the wood sheet (wood roof panels) are damaged, they should be replaced (see Figure 5).


Figure 5
- The drip edge is located around the perimeter of the roof. Use a pry bar or similar tool to remove the caulk, unscrew, and peel away the drip edge for replacement.
- As you remove the rubber and other materials from the roof, move it to the ground garbage depot you created by either throwing it over the side of the building or using a trash chute. Be very careful if you are throwing debris over the side so as not to cause any damage or injuries. Next, move the debris to the dumpster either by wheelbarrow or by hand. Be careful of sharp edges and nails, and cover any debris not moved to the dumpster at the end of the day to prevent it from scattering.
- Once the debris is removed, clean the roof and surrounding area to ensure it is free of debris and ready for the installation of the new roof system (see Figure 6).

Figure 6
- Use a cover sheet to protect the roof from snow and rain if you are unable to install the new rubber roof quickly. It is recommended that you install the new roof as soon as possible to prevent damage to the exposed wood roof.
Final Words
Well, unless you have already done a rubber roof removal yourself, you may think it is not an easy job. Removing a rubber roof can be a challenging task, but with the right tools and techniques, it can be done safely and efficiently.
If you are considering removing a rubber roof, it is important to take all necessary safety precautions and carefully follow each step to avoid any potential damage to yourself or the roof. However, if you feel uncertain about tackling this job yourself, it is always best to enlist the help of a professional. We recommend hiring a professional roofing contractor with experience doing this type of work to ensure the job is done safely and effectively.
Matrix Company Solutions Corp. is a trusted 203(k) and HomeStyle loan contractor in the Philadelphia and New Jersey area, with over 25 years of experience. Our team of experts can assist you with any home renovation project, including removing a rubber roof while ensuring that your project is completed properly and meets the highest standards of quality and safety. Contact us today to discuss your renovation needs!


![The Most Common Types of Roofing Material [2024]](https://matrixgc.com/wp-content/uploads/2024/01/The-Most-Common-Types-of-Roofing-Material-400x250.png)
0 Comments