A valuable part of a row house renovation job is to upgrade the siding. Siding renovation will give your home a fresh, charming look and also increase your home’s value. However, when installing new siding in an older row house you could face many challenges.
This article will focus on installing the siding on a Second Floor Bay Front of a two story Philadelphia row house. This process can be used not only for Philadelphia row houses but similar houses built around the same time in New York City, Baltimore, and Boston.
In the first part of this article, we discussed Preparing for the Siding Renovation. Now we are going to move on with the siding installation. Let’s dive in!
Install the Starter Strip
The first step when installing the siding is to install a starter strip. You should install the starter strip at the bottom of the walls where the siding starts to lock the first row of siding in place.


Figure 1
Choose the starting point for your starter strip, keep in mind that you can start anywhere as long as it is at the bottom of the wall where the siding will be installed.
Once you have chosen your starting point, hammer a nail into the wall where the bottom of your starter strip will be placed. Using this nail as a guide, use a chalk line to make a straight line across the entire wall.
Next, install the starter strip, so the bottom of the strip is at the chalk line, this will keep your starter strip straight. Be careful not to nail it in so firmly that it prevents the siding panels from moving. Also, make sure the starter strip is level before continuing and provide a ¼ inch of space between each strip to allow for expansion.
Install the Corner Posts and J-Channels
The next step is to install the corner posts and J Channels.


Corner Post J Channel
First, install the corner posts in all corners, make sure they are straight, and secure them with nails working from top to bottom.
Next, you should install J-channels around the windows. Repeat the same process you did for corner posts: put the J-channels in place, make sure they are straight, and then secure them to the wall with nails (see Figure 2).

Figure 2
A word of caution: To allow for movement and avoid waves from forming in the panels, you should leave approximately 1/16 inch space between the nail head and the siding. Also, make sure to drive the nails into the center of the provided vinyl siding slots (see Figure 3).

Figure 3
Install the Siding Panels
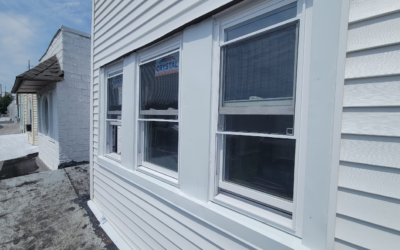
After installing the corner posts and J-channels around the windows, you can start installing the siding panels. First, start by measuring the areas where the siding will be installed. To determine how many siding pieces each wall will need, measure the length of the walls from the bottom edge of the roof to the bottom of the wall. Then divide the number by the width of each panel. If you receive a whole number, installing the siding will not require cutting the panels to size. But if not, the last piece of siding should be cut to size.
Also, measure the width of each wall and cut the panels to fit the wall width. While cutting, remember to leave a ¼ inch gap on each end where the panels meet the corner post or J channel; this allows for expansion (⅜ inch in cold areas). Then start installing siding panels from the bottom and go all the way to the top. Make sure each panel is level, and then install the next piece. Remember to secure the panels with nails every 16 inches. Also, overlap the panels at the seams when there is more than one panel per row, approximately one inch unless otherwise specified by the manufacturer. When you reach the cornice, install a horizontal J-channel where the wall meets the cornice, and go to the next step.

Figure 4
Install the Siding Panels on the Top Part of the Bay (Cornice)
You will probably have some challenges at the top of the bay. This part needs careful consideration. The difference in this area is that the siding, which we usually install horizontally, will be installed vertically.
When installing vertical siding, note that:
- You require solid nailable sheathing or level furring strips horizontally attached every 12 inches.
- Leave more room for expansion at the bottom of the panels.
- You should have a symmetrical appearance. Meaning if you draw a line in the center of the wall, you would have an equal number of panels on the right and left.
In Figure 5,you can see a symmetrical cornice siding that we are still working on. Our team continues to look for the solution to finish this siding job the best way possible and to the customer’s satisfaction.
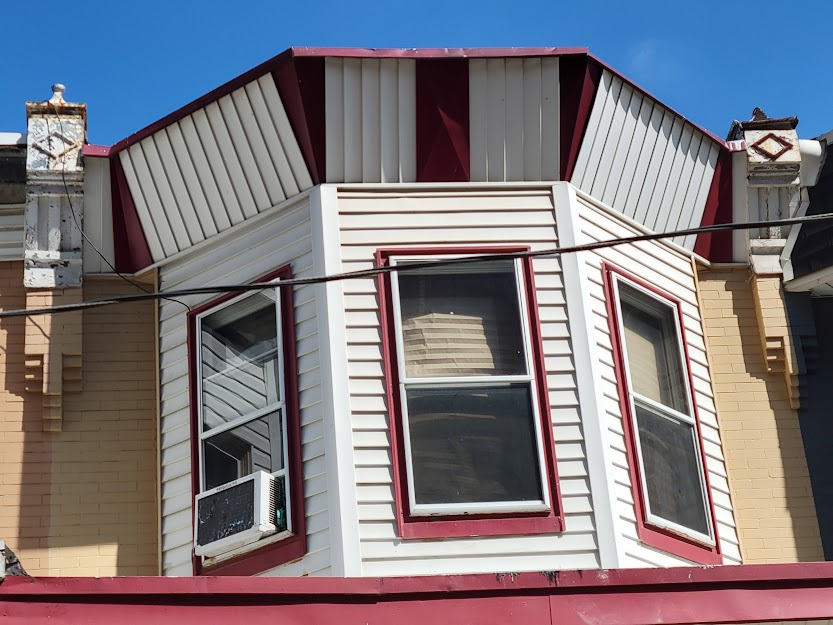
Figure 5
Finish the Siding Job
When you finish installing the siding, as the final step, you will muck and fab the top edge of the roof where it meets the new siding to ensure it is water tight. Replacing the capping along the top edge is the finishing touch and adds an additional water tight layer.
Final Thoughts
This concludes the siding installation of a Philadelphia Row House Second Floor Bay Front. This was a two part process, the first part focused on preparing for the siding installation and the second part focused on the installation of the siding.
With the help of this step by step guide, you should be better equipped to do a siding project on your own. It might sound easy, but installing siding on a Second Floor Bay Front can be quite challenging. If you are in the Philadelphia area and need help with your row house siding installation, give Matrix Company Solutions Corp. a call. Our team of experts can assist with any renovation project you are planning including replacing your home’s siding. Contact us via our FREE Consultation Service link.


Great step-by-step guide on installing siding on a rowhouse with a second-floor bay front! The detailed instructions, combined with the images, make this project much more approachable, even for those with limited experience. I especially appreciate the tips on ensuring proper alignment and sealing around the bay window area, which seems like a critical part of preventing leaks and improving insulation.
One thing I was wondering about is how this process might differ when installing a roof over a bay front like this. Are there any additional considerations or techniques for ensuring both the siding and roofing integrate well, especially around the corners and transitions? I’d love to hear your thoughts!