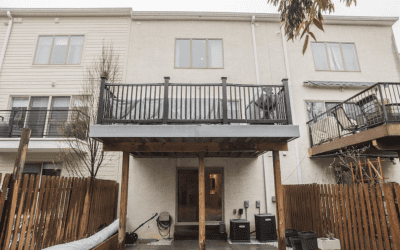
Most Philadelphia row houses have small yards surrounded by other houses and buildings. An elevated deck is one of the simplest and most cost effective ways to upgrade your home. A deck offers a great outdoor extension to your indoor living space where you can enjoy the fresh air. It is also an excellent place for entertaining. However, building one of these decks is not something everyone can easily do. In this article, we will go through the step by step process of creating an elevated deck behind your Philadelphia row house.
Get the Permits
Constructing a deck in Philadelphia requires getting a permit. This is the first step in constructing a deck for your Philadelphia row house. The city offers a Philadelphia EZ deck permit which does not require submitting plans, making it easier to get than a typical permit. Always remember to follow the conditions and requirements in the construction process. For more information regarding an EZ deck permit, refer to the article: How to Get a Philadelphia EZ Deck Permit.
Call the Utility Companies Before Starting Your Deck Construction
Before starting your job, call the utility companies in your area to ensure there are no buried telephone, gas, cable, or electric lines in the area your deck will be located. Each utility company will let you know if and where their lines are located. Take this step seriously, as damaging these lines could be dangerous and costly.
Design the Deck
The deck’s design depends on your personal preferences and the layout of your home and yard. This is a very important step as a bad design may result in a weak structure, damage to the building, and a deck you may not like. Consider consulting a specialist to design a deck that meets your expectations and complies with all permit requirements. With over 25 years of experience, Matrix Company Solutions Corp. is here to help design your ideal deck. (click here for a FREE Consultation)
Determining Tools and Material
Once you have your design, permit and know where the utility lines are located, prepare the tools and material required for the job. Below is a list of what you will need.
Tools:
Tape measure
Post hole digger / Gas engine auger
Mixer
Miter saw
Hammer
Pencil
Drill
Circular saw
Chisel
Block plane
Materials:
Flags
concrete
post anchor bolts
Standoff post base
Hex nut
Landscape fabric
Penny galvanized nail
Hurricane brackets
Chalk line
Carriage bolt
Gravel
Lumber
Concrete form tube
Deck screws
Wood railing
Railing post
Lay out the Deck on the Ground
The most important part of your deck build is laying it out properly. You can prepare the layout using stakes and string and use them as a guide while constructing the deck.
Dig the Elevated Deck Footings
First, you should mark the placement of the post holes using a tape measure and some flags.
Then dig holes at the predetermined places for the posts to the depth specified by codes. You can do the digging using a post hole digger or gas engine auger.
Remember to arrange an inspection for the city inspector to check the size and location of the holes.
Prepare the Forms
Place the forms into the holes and cut them a couple of inches above the ground to allow the water to run off.
Then backfill dirt in between the holes’ walls and forms.
Mix and Pour the Concrete
Mix concrete based on the instructions on the packaging using the mixer. Next pour the concrete into the forms. You need to tamp the concrete periodically to remove air bubbles.. After that, smooth the concrete’s top to give it a tiny convex top that helps with water runoff.
Insert Post Anchor Bolts
Insert post anchor bolts about one inch above the concrete in line with layout lines while the cement is still wet.
Lay some landscape fabric and cover with rocks to help with water runoff and prevent weed growth. Wait for the concrete to set, which usually takes 24 to 48 hours depending on the temperature.
Install Posts and Beams
First, attach post anchors that will be used to install the post.
Next determine the post height. To determine the post height subtract deck board thickness, beam thickness and joist thickness from the total height of the deck. Cut the posts to this height and secure them to the anchors.
Next install the beams on top of the post and secure the beams to the post using brackets and nails.
Lay Out Joists
Lay out the joists every 16 inches and nail them to the beams.
Install Rim Joists
First, nail a support block to the joist’s underside to support the rim joist. Then attach the rim joist perpendicular to all the other joists. After installation, remove the support block.
Add Elevated Deck Boards
Add deck boards and screw them every 16 inches to the joists. If you use dry boards, add a 1/8 inch gap between boards while installing. If you use wet boards, this gap is not necessary because when the boards shrink, the gap forms naturally.
Add Skirting
Put a board around the deck (skirting) to hide the beams.
Install Railings
For the railings, start with adding the posts. Ensure the railing’s height and the distance between the balusters is up to code before securing it to the deck. Cut the railing posts and attach them to the skirting board using two carriage bolts.
Next, you should measure between the railing posts and install supports on the top and bottom for the balusters.
For calculating the spaces between balusters or spindles, measure the inside width between the railing posts (x), the thickness of one of the balusters (y), and the minimum requirement for baluster spacing (z). Then divide the sum of x and y by z ((x+y)/z). Round the number upward and divide the original space between the railings by this number. This will give you the baluster spacing. Do this for each span between railings, as they will all be different measurements.
Then screw the balusters to the top and bottom.
Prepare the Stair Foundation
Dig a spot for the stair’s foundation, put the forming in the hole, put soil and gravel around it, make sure it is level, then pour concrete into the forms to make the support for the stair stringer.
Install the Stairs
Cut stair stringers and attach them with nails and brackets to the skirting boards. Next install kickboards, deck boards, and railings to complete the stairs.
Install Railing Caps
The final step is to cut the railing caps and install them to the top support of the balusters using screws.
The Bottom Line
Building an Elevated Deck can be an exciting process. However, there are many things to consider to ensure a successful end product. For example you must account for drainage and proper installation of footings to avoid future problems such as sinkholes. You must also make sure your Elevated Deck is structurally sound by ensuring it is securely attached to the house and is evaluated high enough off the ground. An experienced contractor can help you avoid all of these issues. Matrix Company Solutions will create an elevated deck your family can enjoy for many years.


![Top 20 Reasons for Failing a Plumbing Inspection in Philadelphia [2025 Guide]](https://matrixgc.com/wp-content/uploads/2025/05/Common-issues-causing-failing-a-plumbing-inspection-in-Philadelphia.png)


0 Comments
Trackbacks/Pingbacks